Uncategorized
Nailing It: The Best Brad Nailers for Your Woodworking Projects
Brad nailers are essential tools for fine trim and carpentry work, offering precision and a clean finish without the need for extensive surface repair after nailing. They use smaller gauge nails, typically 18-gauge, which are thin enough to reduce the risk of splitting the workpiece but still provide adequate holding power for light to medium-duty tasks. Brad nailers can be pneumatic (air-compressed) or electric (battery-powered), each with its own set of advantages and disadvantages.
Leading Brands and Models:
- Bostitch BTFP12233 Smart Point Brad Nailer Kit
Best for: Precision Work
A precise and user-friendly nailer known for its Smart Point technology, allowing for easy nail placement. - Milwaukee M18 Fuel Cordless Brad Nailer
Best for: Heavy-Duty Projects
Offers cordless convenience without sacrificing power, ideal for professional, high-volume work. - Ridgid R213BNF 18-Gauge 2⅛-Inch Brad Nailer
Best for: Reliable Pneumatic Performance
Features Clean Drive Technology for fewer jams, making it a solid choice for precision nailing tasks. - PORTER-CABLE PCC790LA Battery-Powered Brad Nailer
Best for: Versatility
A battery-powered model that stands out for its adaptability and ease of use, equipped with LED lights for precision. - NEU MASTER NTC0040 Electric Brad Nailer and Staple Gun
Best for: Light to Medium-Duty Applications
An electric brad nailer and staple gun in one, offering great versatility without the need for a compressor. - DeWalt 16-Gauge Angled Finish Nailer
Best for: Tight Spaces
Lightweight and designed for precision, perfect for installing trim or baseboards in challenging spaces. - Porter-Cable Max Cordless Brad Nailer Kit
Best for: DIY Projects
Offers great sight lines and ergonomic balance, making it a solid choice for DIY enthusiasts. - Metabo HPT NT50AE2M 18-Gauge Brad Nailer
Best for: Precision Work and Comfort
Known for its finesse and reliability in precision tasks, this tool is lightweight and easy to use. - Wen 61721 18-Gauge Pneumatic Brad Nailer
Best for: Budget-Conscious Woodworkers
A standout for its affordability and performance, making it especially suited for hobbyists or those just starting out. - Craftsman CMCN618C1 V20 Cordless Brad Nailer Kit
Best for: Cordless Convenience
Shines for its portability and power, ensuring crafting is unhindered by cords or the need for a pneumatic setup. - Makita AF506 2″ Pneumatic Brad Nailer
Best for: Beginners and Durability
Offers a robust construction and user-friendly features, making it a fantastic starting point for novices.
Several brands are well-regarded in both pneumatic and electric brad nailer categories, including DeWalt, Makita, Bostitch, and Milwaukee. Each brand offers models that vary in features, performance, and price, catering to different needs and preferences.
When choosing a brad nailer, consider the specific requirements of your projects, such as the duration of use, the materials you’ll be working with, and whether portability or power is your priority. Reviews and direct comparisons of the latest models can provide valuable insights into performance and reliability, helping you make an informed decision.
In Depth Analysis:
Top Overall Brad Nailer
Bostitch BTFP12233 Smart Point Brad Nailer Kit:
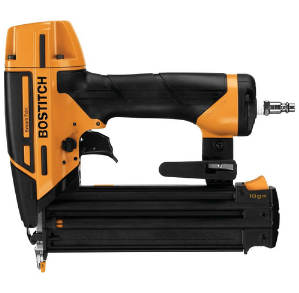
Praised for its precision and ease of use, it’s great for those who need a reliable tool for detailed work.
Pros:
- Smart Point Technology: Provides easy nail placement thanks to a smaller nose for improved visibility and accuracy without needing to compress the contact tip.
- Dial-A-Depth Control: Allows for precise depth of nail driving, ensuring a perfect finish every time.
- Tool-Free Jam Release: Makes it easy to clear jams without having to take the tool apart, minimizing downtime.
Cons:
- Size and Weight: While compact, it might feel a bit bulky to some users, especially during extended periods of use.
- Air Compressor Dependency: Being pneumatic, it requires an air compressor, which could be a limitation for users who prefer cordless tools.
Why We Like It: The Bostitch BTFP12233 is celebrated for its precision and user-friendly features, making it an excellent choice for detailed and finish work. Its Smart Point technology allows for precise nail placement, which is particularly beneficial when working in tight spaces or where accuracy is important. The Dial-A-Depth control ensures that nails are driven consistently at the desired depth, enhancing the quality of the finish. Its tool-free jam release mechanism is a standout feature that saves time and hassle. This nailer strikes the perfect balance between performance and convenience, making it the top overall choice for professionals and enthusiasts alike who demand reliability and precision in their nailing tasks.
Professional’s Choice for Heavy-Duty Projects
Milwaukee M18 Fuel Cordless Brad Nailer
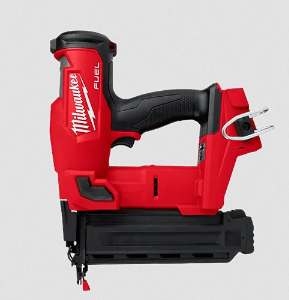
For professionals seeking the robustness of a pneumatic nailer without the constraints, this battery-powered tool stands out. Its rapid firing capacity and precision make it a mainstay on job sites, offering the reliability demanded by high-volume, high-quality work.
Pros:
- Cordless Operation: Provides the freedom to use the tool without the hassle of cords or the need for an air compressor, enhancing mobility and convenience on the job site.
- PowerState Brushless Motor: Offers increased efficiency, power, and longevity, driving nails consistently in various materials.
- RedLink Plus Intelligence: Ensures optimal performance and provides overload protection to the tool and battery during heavy applications, preventing damage.
- Zero Ramp-Up Time: Ready to fire as soon as the trigger is pulled, which increases productivity and reduces downtime between nail drives.
Cons:
- Weight: Although cordless, the inclusion of a battery pack makes it heavier than some pneumatic models, which could lead to user fatigue over extended use periods.
- Price: As a high-end tool with advanced features, it’s more expensive than many other models, potentially putting it out of reach for hobbyists or occasional users.
Why We Like It: The Milwaukee M18 Fuel Cordless Brad Nailer is the go-to choice for professionals who require the reliability and power of a pneumatic nailer with the versatility and convenience of a cordless tool. Its advanced PowerState brushless motor and RedLink Plus intelligence not only provide exceptional power and performance but also ensure the tool’s longevity by protecting it from overload and overheating. This nailer’s ability to fire nails instantly, without any ramp-up time, significantly enhances efficiency, making it an invaluable tool for high-volume, demanding projects. Its robust construction and reliable performance solidify its status as a must-have for professionals tackling heavy-duty tasks.
Best Pneumatic
Rigid R213BNF 18-Gauge 2⅛-Inch Brad Nailer
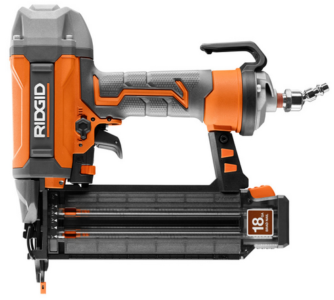
Utilizes Clean Drive Technology for fewer jams and a swivel air-hose nipple for ease of movement.
Pros:
- Clean Drive Technology: Reduces nail jams significantly, leading to smoother operation and less downtime for maintenance.
- Swivel Air-Hose Nipple: Enhances maneuverability and ease of use, allowing the user to move more freely without the hose getting in the way.
- Tool-Free Depth Adjustment: Offers quick and precise control over nail depth, ensuring each nail is set consistently for a flawless finish.
- Powerful Performance: Capable of driving nails up to 2⅛ inches, making it suitable for a wide range of applications, from delicate trim work to more robust projects.
Cons:
- Requires Air Compressor: As a pneumatic tool, it needs an air compressor to operate, which may add to the initial investment and limit portability.
- Noise Level: Pneumatic tools, in general, can be louder than their battery-operated counterparts, which might be a consideration for noise-sensitive environments.
Why We Like It: The Ridgid R213BNF is a standout pneumatic brad nailer, celebrated for its reliability and performance. Its Clean Drive Technology is a game-changer, drastically reducing nail jams and increasing the tool’s efficiency. The swivel air-hose nipple is a thoughtful addition that addresses the common frustration of managing the air hose, making the tool more user-friendly. With tool-free depth adjustment, users have precise control over nail depth, which is critical for achieving professional-quality finishes. This brad nailer’s combination of power, precision, and ease of use makes it the best pneumatic option on the market, suitable for both seasoned professionals and DIY enthusiasts looking for a high-quality tool for their projects.
Innovator’s Pick for Versatility
PORTER-CABLE PCC790LA Battery-Powered Brad Nailer
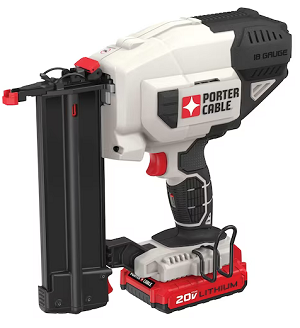
A leader in the battery-powered category, this tool is celebrated for its adaptability and ease of use across a broad range of nailing tasks. It’s particularly noted for its built-in LED lights, enhancing vision in tight spaces.
Pros:
- Cordless Freedom: Allows you to work anywhere without the need for an air compressor or power outlet.
- LED Lighting: Integrated LED lights illuminate the work surface for better visibility and precision.
- Consistent Performance: Delivers consistent driving depth with a variety of materials and nail lengths.
Cons:
- Battery Life: While convenient, the reliance on battery power means you need to manage charging times and possibly have spare batteries for larger projects.
- Weight: The inclusion of the battery makes it heavier than pneumatic counterparts, which could lead to fatigue during extended use.
Why We Like It: The PORTER-CABLE PCC790LA is a standout in the battery-powered category for its exceptional versatility and user-friendly design. The inclusion of LED lighting is a thoughtful touch that enhances visibility in dimly lit areas, ensuring each nail is placed accurately. Its cordless operation frees you from the confines of cables and hoses, offering the flexibility to work in any environment. This tool is a fantastic option for a wide range of nailing tasks, from delicate trim work to more robust projects, making it a valuable addition to any toolkit.
Handyman’s Favorite for All-Around Use
NEU MASTER NTC0040 Electric Brad Nailer and Staple Gun
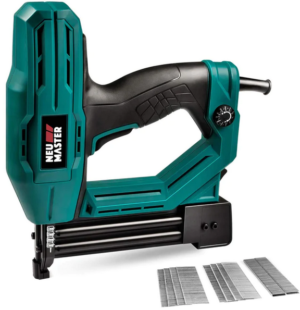
This electric model is a dual-threat, functioning as both a brad nailer and a staple gun. It’s recognized for its exceptional adaptability, catering to both light and heavy-duty applications without the need for a compressor.
Pros:
- Electric Operation: Eliminates the need for a compressor, gas, or batteries, making it highly convenient and ready to use anytime.
- Dual Function: Works as both a brad nailer and a staple gun, providing versatility for a wide range of projects from upholstery to light trim work.
- User-Friendly: Designed with simplicity in mind, it’s an excellent tool for beginners and those not wanting to fuss with pneumatic or fuel-powered options.
- Adjustable Power: Offers settings to adjust driving force, accommodating both soft and hard materials.
Cons:
- Limited by Cord: While electric means less hassle with batteries or air compressors, being corded limits mobility compared to cordless models.
- Not for Heavy-Duty Use: While versatile, it might not have the power for more demanding tasks that a pneumatic or more robust electric model would handle.
Why We Like It: The NEU MASTER NTC0040 shines due to its dual functionality and ease of use, making it an ideal tool for hobbyists and DIYers. Its electric operation removes the barriers of using pneumatic tools, providing a plug-and-play experience that’s hard to beat. The ability to switch between nailing and stapling adds immense value, offering flexibility for various home projects without the need for multiple tools. This model is particularly appealing for those looking for a hassle-free, versatile tool for light to medium-duty tasks around the house.
Best Cordless for Tight Spaces
DeWalt 16-Gauge Angled Finish Nailer:

Lightweight and designed for precision in hard-to-reach areas, perfect for installing thick trim or baseboards in challenging spaces.
Pros:
- Angled Design: Allows for easier access in tight corners and spaces, making it ideal for trim and molding work.
- Cordless Freedom: Powered by a rechargeable battery, offering convenience and portability without the need for gas cartridges or air hoses.
- Tool-Free Depth Adjustment: Enables quick and precise setting of nail depths for a seamless finish.
- Integrated LED Lights: Illuminate the work area, improving visibility and accuracy during use.
Cons:
- 16-Gauge Limitation: While versatile, the 16-gauge size may not be suitable for all types of projects, especially those requiring finer brads.
- Weight and Balance: The battery can add weight to the tool, which might affect maneuverability and ease of use during long projects.
Why We Like It: The DeWalt 16-Gauge Angled Finish Nailer is a standout tool for its ability to effortlessly navigate tight spaces, a common challenge in finishing work. Its angled design and cordless operation free users from the constraints of pneumatic hoses and electrical cords, enhancing flexibility and range of movement. The addition of tool-free depth adjustment and integrated LED lights further contribute to its precision and ease of use, making it a preferred choice for professionals and DIY enthusiasts alike. Whether you’re working on intricate trim, cabinetry, or molding, this nailer provides the performance and accessibility needed to achieve high-quality results with less effort.
Best DIY Cordless
Porter-Cable Max Cordless Brad Nailer Kit:

Offers great sight lines and ergonomic balance, making it a solid choice for DIY projects where precision and comfort are key.
Pros:
- Complete Kit: Comes with everything needed to start working right out of the box, including a battery and charger.
- Cordless Convenience: Offers the freedom to work without the hassle of cords or air compressors, enhancing portability and ease of setup.
- Depth Adjustment Dial: Allows for precise control over nail depth, ensuring a perfect finish for various materials and projects.
- Lightweight Design: Despite being battery-operated, it’s designed to minimize fatigue during extended use, making it ideal for DIY projects.
Cons:
- Battery Life: While convenient, the dependency on battery power means work duration may be limited without access to spare batteries.
- Nail Capacity: Some users might find the magazine capacity insufficient for longer projects, requiring frequent reloads.
Why We Like It: The Porter-Cable Max Cordless Brad Nailer Kit is a dream come true for DIY enthusiasts looking for a reliable, easy-to-use nailing solution. Its cordless design liberates you from the constraints of pneumatic systems, allowing for greater flexibility across a wide range of projects. The included depth adjustment dial ensures that every nail is driven with precision, contributing to a professional-quality finish, regardless of the user’s experience level. Lightweight and ergonomically balanced, it reduces strain on the user, making it possible to tackle larger projects with comfort. This kit represents a perfect blend of performance, convenience, and value, making it an excellent choice for anyone passionate about their craft.
Top Performer for Precision Work
Metabo HPT NT50AE2M 18-Gauge Brad Nailer
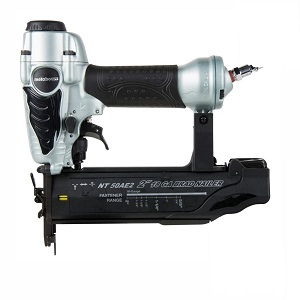
This tool stands out for its finesse and reliability in precision tasks. Notable for its straightforward functionality, it excels in projects requiring meticulous detail, from cabinetry to trim work, offering both single and bump firing modes for versatility.
Pros:
- Lightweight and Well-Balanced: Enhances ease of use and reduces fatigue, making it comfortable for extended periods of use.
- Selective Actuation: Allows the user to easily switch between bump fire for speed and sequential fire for precision, accommodating various project needs.
- Tool-Free Depth Adjustment: Offers quick and easy control over nail depth, ensuring a professional finish across different materials.
- Tool-Free Jam Release: Simplifies the process of clearing jams, reducing downtime and maintaining workflow efficiency.
Cons:
- No Dry-Fire Lockout: Lacks a feature to prevent firing when out of nails, which could potentially damage the work surface.
- Air Compressor Required: As a pneumatic tool, it depends on an external air compressor, which may limit portability and add to the overall investment for those who don’t already own one.
Why We Like It: The Metabo HPT NT50AE2M is a standout brad nailer for its exceptional balance of precision, flexibility, and user-friendly features. It’s particularly noted for its lightweight design, which makes it a favorite among professionals and hobbyists for all-day use without excessive fatigue. The selective actuation switch is a highly appreciated feature, providing versatility for a wide range of applications, from delicate trim work to more rapid project completions. Its ease of use, combined with tool-free adjustments, makes it an excellent choice for users of all skill levels seeking reliability and high-quality performance in their nailing tasks.
Best Value for Craftsmen
Wen 61721 18-Gauge Pneumatic Brad Nailer
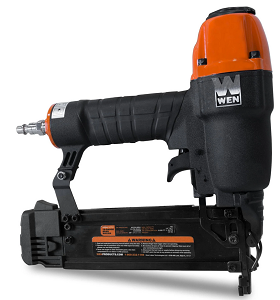
A standout for budget-conscious woodworkers, this model marries affordability with performance. It’s especially suited for hobbyists or those embarking on their DIY journey, providing uncompromised quality and ease of use for various projects.
Pros:
- Affordable Price Point: Offers great value for money, making it accessible to hobbyists and professionals alike without compromising on quality.
- Lightweight Design: Enhances maneuverability and comfort during use, reducing user fatigue even during long projects.
- Adjustable Depth Control: Allows for precise setting of nail depths, ensuring a clean and professional finish across various materials.
- Quick Jam Release: Features an easy-to-use mechanism for clearing nail jams, keeping projects moving smoothly without significant delays.
Cons:
- Air Compressor Needed: Like most pneumatic tools, it requires an air compressor, which may not be ideal for those preferring cordless convenience.
- No Dry-Fire Lockout: Lacks a mechanism to prevent firing when the magazine is empty, which could lead to unnecessary wear or damage to the tool and work surface.
Why We Like It: The Wen 61721 brad nailer is a standout choice for those seeking a balance between affordability and performance. It embodies the essential features needed for a wide range of nailing tasks without overwhelming users with unnecessary complexities. Its lightweight and ergonomic design ensures it’s easy to handle, making it a suitable tool for both beginners and seasoned professionals. The adjustable depth control and quick jam release mechanisms are thoughtful inclusions that underscore the tool’s commitment to user satisfaction and efficiency. For crafters and DIY enthusiasts looking for a reliable, cost-effective solution for their nailing needs, the Wen 61721 offers a compelling option that delivers quality results without breaking the bank.
Top Choice for Cordless Convenience
Craftsman CMCN618C1 V20 Cordless Brad Nailer Kit
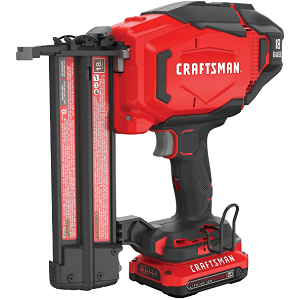
In the realm of cordless options, this model shines for its portability and power. Ideal for those working in locations without easy access to power outlets, it ensures that your crafting is not hindered by cords or the need for a pneumatic setup.
Pros:
- Cordless Design: Utilizes a V20 lithium-ion battery for cord-free operation, eliminating the need for air compressors or hoses and enhancing portability.
- Consistent Firing Power: Engineered to deliver consistent firing power into various materials and climate conditions, ensuring reliable performance.
- Tool-Free Depth Settings: Allows for quick adjustment of nail depth to suit the task at hand, ensuring a professional finish.
- Minimal Maintenance: Operates without the need for gas cartridges, providing clean operation with less maintenance.
Cons:
- Weight: The inclusion of the battery adds weight compared to pneumatic models, which could lead to user fatigue during extended use.
- Battery Dependency: While offering freedom from cords, the reliance on battery power requires management of charging times and potentially having spare batteries for longer projects.
Why We Like It: The Craftsman CMCN618C1 V20 Cordless Brad Nailer Kit strikes a perfect balance between the convenience of cordless operation and the performance demands of serious woodworking and crafting projects. Its robust design ensures that it stands up to a variety of materials and conditions, offering consistent results time and again. The tool-free adjustments for nail depth add to its user-friendly appeal, making it accessible for both novices and professionals. The move towards minimal maintenance, thanks to its gas-free operation, means less downtime and more focus on the task at hand. This nailer represents a smart choice for those seeking the flexibility of a cordless tool without compromising on the quality and reliability needed for high-caliber work.
Craft Enthusiast’s Selection for Beginners
Makita AF506 2″ Pneumatic Brad Nailer
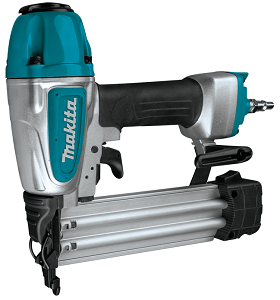
With its robust construction and user-friendly features, this pneumatic model is ideal for those new to woodworking or brad nailing. It offers the perfect combination of durability and accessibility, making it a fantastic starting point for novices.
Pros:
- Durable Construction: Engineered with a robust aluminum body and magazine for long-term reliability and performance.
- Narrow Nose Design: Enhances visibility and accuracy for precise nail placement, especially in tight spaces or near edges.
- Tool-less Depth Adjustment: Allows for easy dialing in of nail depth for a seamless finish, accommodating various types of projects.
- Air Duster Feature: Integrated air duster can be used to clear away debris from the work surface, ensuring a clean nailing area.
Cons:
- Requires an Air Compressor: As with most pneumatic tools, the need for an air compressor may add extra cost and reduce portability.
- Noise Level: Pneumatic tools are generally louder than their electric or battery-powered counterparts, which might be a consideration for some users.
Why We Like It: The Makita AF506 is a highly recommended tool for those new to woodworking or brad nailing, thanks to its user-friendly features and durable construction. It stands out for its precision, facilitated by the narrow nose design, and the convenience of tool-less depth adjustment. The addition of an air duster feature is a thoughtful touch, underscoring Makita’s commitment to functionality and efficiency. This nailer is built to offer reliable performance, making it an excellent starting point for novices while still meeting the demands of more experienced users looking for a quality pneumatic tool. Its balance of features and build quality positions it as an ideal tool for a wide range of nailing tasks, from simple home projects to more complex woodworking endeavors.
| Cordless Design | Tool-Free Depth Adjustment | Lightweight Design | LED Lights | Pneumatic | Battery Included | |
|---|---|---|---|---|---|---|
| Bostitch BTFP12233 | ✓ | ✓ | ||||
| Milwaukee M18 Fuel | ✓ | ✓ | ✓ | ✓ | ||
| Ridgid R213BNF | ✓ | ✓ | ||||
| PORTER-CABLE PCC790LA | ✓ | ✓ | ✓ | ✓ | ||
| NEU MASTER NTC0040 | ✓ | |||||
| DeWalt Angled Finish | ✓ | ✓ | ✓ | ✓ | ||
| Porter-Cable Max | ✓ | ✓ | ✓ | ✓ | ||
| Metabo HPT NT50AE2M | ✓ | ✓ | ✓ | |||
| Wen 61721 | ✓ | ✓ | ✓ | |||
| Craftsman CMCN618C1 | ✓ | ✓ | ✓ | ✓ | ||
| Makita AF506 | ✓ | ✓ | ✓ |
Conclusion
Choosing the right brad nailer can make all the difference in achieving clean, professional finishes on your projects. From the lightweight and versatile Bostitch BTFP12233, celebrated for its precision and ease of use, to the robust, job site-ready Milwaukee M18 Fuel Cordless Brad Nailer, designed for heavy-duty tasks without the constraints of cords or hoses, the options are tailored to meet a wide array of needs and preferences.
The Ridgid R213BNF stands out for its pneumatic power and innovative Clean Drive Technology, offering reliability and freedom of movement. For those seeking the ultimate in versatility and ease, the PORTER-CABLE PCC790LA and NEU MASTER NTC0040 offer cordless and electric options, respectively, each with unique features that cater to both novices and seasoned professionals. Meanwhile, the DeWalt 16-Gauge Angled Finish Nailer and Craftsman CMCN618C1 V20 showcase the importance of ergonomic design and user-friendly features in modern woodworking tools.
As we’ve explored the top brad nailers on the market, it’s clear that whether you’re a professional contractor requiring unmatched durability and performance or a DIY enthusiast in need of a reliable tool for home projects, there’s a brad nailer designed to meet your specific needs. Each model we’ve discussed brings something unique to the table, from the Metabo HPT NT50AE2M‘s finesse in precision work to the Wen 61721‘s exceptional value and the Makita AF506‘s beginner-friendly design.
Ultimately, the best brad nailer for you depends on your specific project requirements, budget, and personal preferences. By considering the features, advantages, and potential limitations of each model, you can choose a tool that not only enhances your craftsmanship but also brings efficiency and joy to your woodworking journey.
What are the Best 3HP Routers?
A 3 horsepower (HP) router is a powerful woodworking tool built for heavy duty use. They are often used in router tables, given their strength and durability. In this overview, we will describe several popular models along with their pros and cons. Further down the page we will go in-depth about these larger models, giving you information and tips on what to look for when making a purchase.
Here are the Top 5 Heavy Duty 3HP Routers:
- Bosch 1617EVSPK Wood Router Combo Kit: This versatile kit includes both a plunge router and a fixed base. With a 12-amp motor, variable speed control, and compatibility with various router bits, it’s a favorite among professional woodworkers. Priced at $249.
- Milwaukee 5625-20 Fixed Base Variable Speed Router: Offering 15 amps of power, this router features T-handle height adjustment, a 3.5-horsepower motor, and a 1/2-inch collet. It’s a reliable choice for precision work, priced at $428.
- Makita RP2301FC Plunge Router: With a 3.25-horsepower motor, ergonomic handles, LED lights, and variable speed settings, the Makita RP2301FC delivers consistent performance. It’s priced at $389.
- Bosch MRF23EVS Electronic VS Fixed-Base Router: This router combines power (2.3 HP) with precise control. It features trigger control, variable speed, and smooth operation. Priced at $223.
- The DeWalt DW625 is a powerful and versatile plunge router at 3.25 horsepower, designed for heavy-duty woodworking tasks. Priced at $349.
Bosch 1617EVSPK
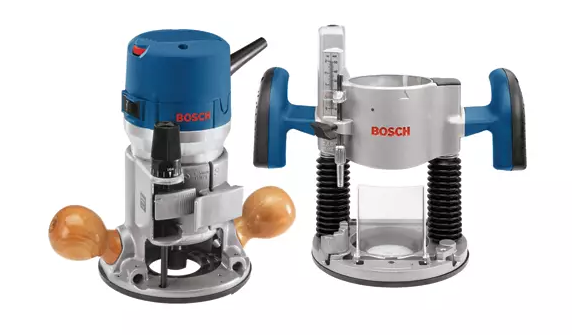
The Bosch 1617EVSPK is a versatile and reliable wood router combo kit that includes both a fixed base and a plunge base.
Specifications:
- Motor Power: It features a 12-amp motor, providing ample power for various woodworking tasks.
- Variable Speed Control: The router allows you to adjust the speed according to your needs.
- Compatibility: The kit includes both a fixed base and a plunge base, offering flexibility for different routing techniques.
Features:
- Proven History: The Bosch 1617EVSPK has been in production since 2006, which speaks to its reliability and durability.
- Wide Variety of Compatible Accessories: Whether you’re using it for edge routing, mortising, or other applications, this router can accommodate various accessories.
- Soft Start: The soft-start feature ensures a smooth and gradual ramp-up in motor speed, reducing strain on the motor and enhancing control.
- Aluminum Housing: The router’s aluminum housing provides stability and helps dissipate heat during extended use.
Pros:
- Versatility: With both fixed and plunge bases, it’s suitable for a wide range of tasks.
- Ease of Use: The ergonomic design and smooth operation make it user-friendly.
- Above-Table Adjustment: When mounted in a router table, you can adjust it from above, simplifying bit changes and adjustments.
- Compatibility with Accessories: It works seamlessly with Bosch’s edge guide and guide bushings.
Cons:
- Plunge Base Adjustment: Some users find the plunge base adjustment a bit stiff initially.
- Weight: It’s not the lightest router, so prolonged handheld use may be tiring.
User Reviews:
- Users appreciate its power, versatility, and compatibility with accessories.
The Bosch 1617EVSPK is considered an excellent all-around woodworking router.
Milwaukee 5625-20

The Milwaukee 5625-20 is a powerful fixed-base router designed for heavy-duty woodworking tasks.
Specifications:
- Motor Power: It boasts a robust 15-amp motor, providing ample horsepower for demanding routing jobs.
- Variable Speed Control: The router allows you to adjust the speed within a range of 10,000 to 22,000 rpm.
- Collet Size: It features a 1/2-inch collet for securely holding router bits.
Features:
- T-Handle Height Adjustment: The router includes a convenient T-handle height adjustment mechanism. This allows you to fine-tune the bit depth precisely.
- Electronic Variable Speed: The electronic speed control ensures consistent performance across different applications.
- Built-In Router Lift: The 5625-20 has a built-in router lift feature, making it easier to adjust the bit height from above the table.
- Handles: It comes with both U-shaped handles and palm-grip knobs for comfortable operation.
Pros:
- Powerful Performance: With its 3.5-horsepower motor, this router can handle tough tasks effortlessly.
- Stability: The router feels ultra-solid and vibration-free during operation.
- Quiet Operation: Despite its power, it surprisingly operates quietly.
- Easy Bit Changes: The single-button press allows you to drop the router body out for quick bit changes.
Cons:
- Height Adjustment Knob Placement: Some users find the height adjustment knob opposite the speed control a minor inconvenience when using the router from above the table.
- Noise Level: It measures 100 decibels, which is noisier than average.
User Reviews:
- Users appreciate its power, stability, and suitability for router table use.
The Milwaukee 5625-20 is an excellent choice for those who prioritize precision and durability.
Makita RP2301FC

The Makita RP2301FC is a robust and versatile plunge router designed for heavy-duty woodworking tasks.
Specifications:
Motor Power: The RP2301FC boasts a powerful 3.25 horsepower motor, making it suitable for demanding projects.
Variable Speed Control: It offers variable speed settings for precise control over different applications.
Features:
- Smooth Plunge Action: The plunge mechanism operates smoothly, allowing accurate depth adjustments.
- LED Lights: Integrated LED lights enhance visibility, especially when working in dimly lit areas.
- Ergonomic Design: Comfortable handles reduce fatigue during extended use.
- Electronic Speed Control: The router maintains consistent performance even under load.
- Electric Brake: The electric brake ensures quick stops for safety.
Pros:
- Versatility: The RP2301FC can handle a wide range of tasks, from cabinets to doors and windows.
- High-Performance Motor: Its powerful motor tackles tough materials effortlessly.
- Depth Settings: Variable speed and depth adjustments allow for versatility.
- Chip Deflector and Labyrinth Fan: These features enhance performance.
Cons:
- Replacement Parts Availability: Some users find it challenging to obtain replacement parts.
User Reviews:
- Many users appreciate its smooth plunge action, ergonomic design, and overall performance.
Some negative reviews mention difficulties in getting replacement parts.
Bosch MRF23EVS

The Bosch MRF23EVS is a high-quality router known for its precision, power, and user-friendly features.
Specifications:
- Motor Power: It features a robust 2.3 horsepower motor, providing ample strength for various woodworking tasks.
- Variable Speed Control: The electronic variable speed allows you to adjust the router’s speed according to your needs.
Features:
- Trigger-Controlled Power Switch: The MRF23EVS is the only fixed-base router with a trigger-controlled power switch in the base handle. This feature enhances safety and control during operation.
- Built-In Work Lights: Two LED lights illuminate the cutting area, making it easier to see your workpiece.
- Height Adjustment: The router offers both coarse and micro adjustments for precise depth control.
- Aluminum Construction: The build quality is excellent, ensuring durability and stability.
- Soft Start: The soft-start feature reduces torque during startup, enhancing user comfort.
Pros:
- Control and Precision: The trigger switch allows for superior control, especially when using the router freehand.
- Illumination: The built-in lights improve visibility, even in dimly lit workshops.
- Table Mounting: If you decide to use it in a router table, the height adjustment can be done with the included Allen wrench.
- Compatibility: It accepts both 1/2-inch and 1/4-inch collets.
Cons:
- Weight: At 10 pounds, it’s relatively heavy for handheld use.
- Trigger Delay: There might be a slight delay when you press the trigger.
User Reviews:
- Users appreciate the on/off trigger on the handle, which provides superior control and safety.
- The MRF23EVS is favored for freehand routing and precision work.
- Some users find it a great choice for use with jigs and templates.
DeWalt DW625
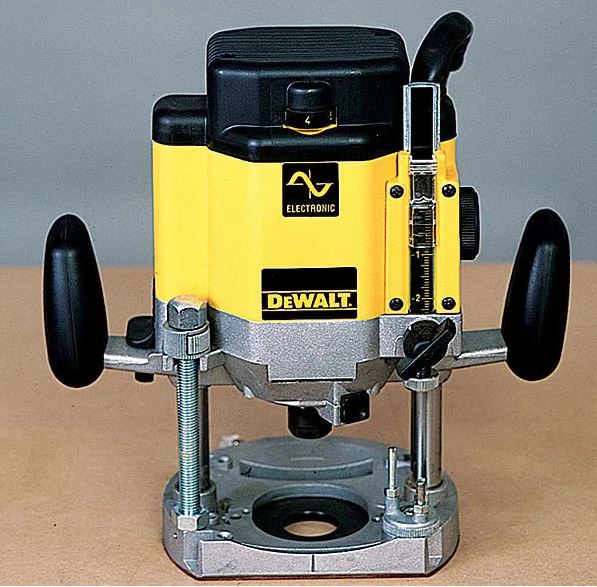
The DeWalt DW625 is a powerful and versatile plunge router designed for heavy-duty woodworking tasks.
Specifications:
- Motor Power: The DW625 boasts a robust 3.25 horsepower motor, making it suitable for demanding projects.
- Variable Speed Control: It offers variable speed settings for precise control over different applications.
Features:
- Smooth Plunge Action: The plunge mechanism operates smoothly, allowing accurate depth adjustments.
- LED Lights: Integrated LED lights enhance visibility, especially when working in dimly lit areas.
- Ergonomic Design: Comfortable handles reduce fatigue during extended use.
- Electronic Speed Control: The router maintains consistent performance even under load.
- Electric Brake: The electric brake ensures quick stops for safety.
Pros:
- Versatility: The DW625 can handle a wide range of tasks, from cabinets to doors and windows.
- High-Performance Motor: Its powerful motor tackles tough materials effortlessly.
- Depth Settings: Variable speed and depth adjustments allow for versatility.
- Chip Deflector and Labyrinth Fan: These features enhance performance.
Cons:
- Handles: Some users find the handles are not ergonomically designed.
- Noise Level: The motor can be loud during operation.
User Reviews:
- Many users appreciate its smooth plunge action and powerful performance.
- The DW625 is favored for its versatility and reliability.
Understanding 3HP Routers
What is horsepower (HP) when talking about routers?
Horsepower (HP) in routers refers to the motor’s power output. In this article, the routers we are discussing produce three horsepower, making them highly capable of handling heavy-duty woodworking tasks. A 3HP motor is quite a bit more powerful than most other types.
Overview of the capabilities of a 3HP router:
3HP routers cut through dense materials easily.
These routers typically come with variable speed controls, depth adjustments, and ergonomic designs for enhanced usability.
They are versatile tools suitable for various woodworking tasks, including shaping, routing, grooving, and edge profiling.
Many 3HP routers also feature advanced dust collection systems to keep the work area neat and clean and improve visibility during operation.
Comparison with other router sizes and types:
Compared to smaller routers with lower horsepower, such as 1HP or 2HP routers, 3HP routers offer increased cutting power and efficiency.
While compact routers are more portable and suitable for light to medium-duty tasks, 3HP routers excel in heavy-duty applications and larger woodworking projects.
In Comparison to fixed-base routers, plunge routers, and trim routers, 3HP routers stand out for their robust performance and ability to handle demanding woodworking tasks with precision and speed.
Key Features of 3HP Routers
Power and Performance Capabilities
At the heart of every 3HP router lies an impressive powerhouse boasting robust motors that deliver unparalleled performance. With a horsepower rating of 3 to 3.25, these routers possess the muscle necessary to tackle many tasks efficiently.
Whether it’s shaping edges, cutting intricate designs, or hollowing out recesses, the sheer power of these machines ensures swift and efficient execution.
Variable Speed Control and Precision
One of the hallmark features of 3HP routers is their variable speed control, which provides unparalleled precision and control over your work. By allowing users to adjust the rotational speed of the router bit from gentle finesse to blazing speed, these routers cater to a diverse range of woodworking needs.
Compatibility with Router Bits and Accessories
Versatility is the cornerstone of 3HP routers, and their compatibility with many router bits and accessories further underscores this trait. From traditional straight bits to specialized profiles and joinery cutters, these routers accommodate an extensive range of attachments, allowing you to unleash creativity without constraints.
Ergonomic Design and User Comfort
These routers feature thoughtfully contoured handles, balanced weight distribution, and intuitive controls, ensuring fatigue-free operation even during extended work sessions.
Furthermore, their compact yet robust construction minimizes strain on the user’s hands and arms, facilitating precise control and maneuverability.
Dust Collection Capabilities
Woodworking can be a messy affair, with sawdust and debris often posing a hindrance to productivity and workspace cleanliness.
Larger 3HP routers usually come with efficient dust collection capabilities. Equipped with strategically placed dust ports and integrated vacuum systems, these routers can effectively capture and contain debris at the source, keeping work areas clean and minimizing airborne particles.
By prioritizing dust extraction, 3HP routers streamline cleanup efforts and promote safety and longevity in woodworking workshops.
Durability and Build Quality
Last but certainly not least, the durability and build quality of 3HP routers stand as a testament to their engineering excellence.
Crafted from premium materials and subjected to rigorous quality control standards, these routers are built to withstand the rigors of professional woodworking environments. From heavy-duty cast iron components to precision-machined steel mechanisms, every aspect of their construction exudes durability and reliability.
Housing and protective coatings resist wear, corrosion, and impact damage, ensuring longevity and performance consistency over countless projects.
Applications and Uses
Overview of joint woodworking and carpentry tasks suitable for 3HP routers
Thanks to their power, precision, and versatility, 3HP routers are versatile tools that excel in a wide range of woodworking and carpentry tasks. Some everyday tasks suitable for 3HP routers include:
Edge Profiling: Whether rounding over sharp edges, creating decorative profiles, or chamfering edges, 3HP routers offer the power and control needed to achieve precise and uniform results.
Joinery: From dovetails and box joints to mortise and tenon joints, 3HP routers are indispensable for creating strong and aesthetically pleasing joinery in various woodworking projects.
Panel Raising: 3HP routers are well-suited for raising panels on cabinet doors, providing a professional finish, and adding dimension to woodworking projects.
Template Routing: With their power and stability, 3HP routers excel at template routing, allowing you to duplicate intricate shapes and patterns accurately.
Flattening Slabs: When equipped with the appropriate router bit and jig, 3HP routers can be used to flatten large slabs of wood, making them suitable for tabletops, countertops, and other furniture pieces.
Dadoes and Grooves: Whether it’s creating dadoes for shelves or grooves for joinery, a 3HP router offers the precision and power needed to achieve clean and accurate cuts.
Decorative Inlays: From inlaying wood veneer to intricate designs with contrasting woods, 3HP routers enables woodworkers to add decorative accents and embellishments to their projects.
Examples of projects that benefit from the power and versatility of 3HP routers
Custom Furniture: Whether crafting tables, chairs, cabinets, or bed frames, 3HP routers offer the versatility to handle various woodworking tasks in custom furniture making, from joinery to edge profiling and decorative detailing.
Architectural Millwork: From crown molding and baseboards to wainscoting and window trim, 3HP routers are indispensable for producing the intricate profiles and moldings commonly found in architectural millwork projects.
Sign Making: Whether it’s carving letters and logos or creating intricate designs, 3HP routers provide the power and precision needed to produce professional-quality signs from different materials, including wood, plastic, and acrylic.
Cabinet Making: From constructing cabinet doors and drawers to shaping door panels and adding decorative details, 3HP routers are essential in cabinetmaking, enabling precise and high-quality results.
Staircase Construction: Whether shaping balusters and handrails or creating custom stair treads and risers, 3HP routers offer the versatility and power needed to tackle the complex joinery and profiling in staircase construction.
Comparison with other router sizes for specific applications
While 3HP routers offer superior power and versatility compared to smaller routers, they may only sometimes be the most suitable choice for some applications.
Smaller routers, such as those with 1HP or 2HP motors, excel in tasks that require more maneuverability and precision, such as delicate inlay work or small-scale routing in tight spaces.
Smaller routers are often preferred for handheld routing tasks because they are lighter and compact.
Factors to Consider When Choosing a 3HP Router
Budget considerations
When selecting a 3HP router, it’s essential to consider your budgetary constraints. Prices for 3HP routers can vary significantly depending on brand, features, and included accessories.
Determine your budget and explore options within that range, ensuring you balance cost and desired features. Remember to consider long-term value and durability, as a higher initial investment may translate to lower maintenance costs and better performance over time.
Brand reputation and customer reviews
Before purchasing, research the reputation of various brands offering 3HP routers. Established brands with a record of producing high-quality tools will likely provide reliable products with excellent performance and durability.
Knowing and reading customer reviews and testimonials can provide valuable insights into users’ real-world experiences with different models. Look for routers with consistently positive reviews and ratings, which indicate customer satisfaction and product reliability.
Compatibility with existing equipment and accessories
If you own woodworking equipment and accessories, ensure that the 3HP router you choose is compatible with your existing setup.
Consider factors such as collet sizes, router table compatibility, and compatibility with router bits and accessories.
Choosing a router that seamlessly integrates with your existing equipment can streamline your workflow and maximize the utility of your tools. Verify compatibility with dust collection systems, jigs, and other accessories you may use regularly to ensure a seamless woodworking experience.
Warranty and customer support
When investing in a 3HP router, prioritize models with a comprehensive warranty and reliable information from customer support. A warranty provides peace of mind against manufacturing defects and ensures that you receive prompt assistance in case of any issues or malfunctions.
Consider the reputation of the manufacturer for customer service responsiveness and reliability. Opting for a reputable brand known for standing behind its products can save you time and frustration if you encounter any issues with your Router.
Best Practices for Using a 3HP Router
Safety precautions and guidelines
Wear Personal Protective Equipment (PPE): Always wear appropriate PPE, including safety glasses, hearing protection, and dust masks, to protect yourself from flying debris, loud noise, and airborne particles generated during routing.
Secure Workpieces Properly: Ensure workpieces are securely clamped or held in place using appropriate usage or jigs to prevent movement or kickback during operation.
Use Sharp Router Bits: Use sharp, high-quality router bits appropriate for the task. Dull bits can cause tear-out and increase the risk of accidents. Regularly inspect and replace worn or damaged bits to maintain optimal performance.
Follow Manufacturer’s Instructions: Familiarize yourself with the manufacturer’s instructions and safety guidelines provided with your 3HP router. Adhere to recommended operating procedures and safety precautions at all times.
Avoid Climb Cutting: Avoid climb cutting, as it can cause the Router to grab the workpiece and lose control. Always feed the workpiece against the direction of the cutter rotation for safer and more controlled cuts.
Maintain a Clean Workspace: Keep your work area clean and clutter-free to minimize tripping hazards and ensure better visibility and maneuverability during operation.
Proper maintenance and care of 3HP routers
Regular Cleaning: Routinely clean your 3HP router after each use to remove dust, debris, and buildup from the motor housing, base, and other components. Use compressed air or a vacuum with a brush attachment to remove and clean dust from hard-to-reach areas.
Lubrication: Periodically lubricate moving parts, like the plunge mechanism and depth adjustment components, to ensure smooth operation and prevent premature wear.
Check for Wear and Damage: Routinely inspect your Router for signs of wear, damage, or loose components. Replace worn or damaged parts promptly to maintain optimal performance and safety.
Adjust and Calibrate: Regularly check and adjust the Router’s depth settings, fence alignment, and other adjustments to ensure accuracy and precision in your woodworking projects.
Store Properly: Store your 3HP router in a clean, dry, and well-ventilated environment when not in use. Avoid storing and exposing it near sources of heat or moisture, which can damage electrical components and degrade performance over time.
Tips for achieving optimal results in woodworking and carpentry projects
Start with Test Cuts: Before committing to a final cut, make test cuts on scrap material to verify settings and achieve the desired results. This allows you to make fine-tune adjustments and avoid costly mistakes on your actual workpiece.
Control Feed Rate: Maintain a consistent and controlled feed rate when routing to achieve smooth and even cuts. Avoid pushing the Router too quickly, as this can cause burning or tear-out, especially in hardwoods.
Use Featherboards and Guides: Incorporate feather boards, guides, and other accessories to maintain consistent pressure and alignment during routing. This helps prevent wandering and ensures straight, accurate cuts.
Consider Grain Direction: Pay attention to the direction of the wood grain when routing, especially when edge profiling or making cuts across the grain. Routing against the grain can result in damage, while routing with the grain produces cleaner cuts.
Experiment with Router Speed: Adjust the router speed based on the material being routed and the type of cut being made. Lower speeds are recommended for larger-diameter bits and harder woods, while higher speeds may suit smaller-diameter bits and softer materials.
Conclusion
3HP routers are essential tools in woodworking. They’re strong, precise, and can do lots of different tasks. These routers can handle it all, whether you’re shaping edges, making joints, or adding fancy designs.
If you’re a professional or hobbyist, choose a 3HP router that fits your needs. Pros might want one that’s tough, powerful, and can handle lots of work. It’s also good to pick a brand known for making reliable tools with good customer service.
Hobbyists might want one that’s easy to use and not too expensive. Whatever your level, make sure you get a router that’s right for what you want to do.
As you start using your 3HP router, explore what it can do! Whether making furniture, fancy joints, or adding designs, these routers can help you create beautiful work. Try different bits, techniques, and materials to see what works best. Feel free to try new things or take on big projects.
How to Make a DIY Router Sled
What is a Router Sled?
A router sled is a tool used in woodworking to smooth the surface of large materials, especially pieces that are too large to fit through a thickness planer. A sled will guide the router over the wood from above, making sure that the height of the router is consistent throughout each pass. The sled can be adjusted to fit different sized pieces of wood.
Different Types of DIY Router Sled Designs
Basic Sled Design:
The primary router sled design comprises a simple frame or base that securely holds the wood piece in place.
It typically has rails or guides along which the router moves, ensuring straight and even cuts across the surface of the wood.
This type of sled is very straightforward to build.
Advanced Sled Designs with Adjustable Features:
Advanced router sled designs offer more flexibility and control over the cutting process.
These sleds often feature adjustable components such as height and cutting angle, allowing customization to fit different woodworking needs.
Advanced sleds may include additional features like dust collection systems or built-in measuring guides for increased precision.
While more complex to build, an advanced router sleds is a versatile tool suitable for experienced woodworkers tackling more intricate projects or requiring exact results.
Materials and Tools Needed
Plywood or Medium Density Fiberboard for the base/frame
Rails or guides (such as hardwood strips or aluminum extrusions)
Screws or bolts for assembly
Nuts and washers (if using bolts)
Wood glue or adhesive
Optional: Adjustable components (e.g., threaded rods, knobs, wing nuts)
Optional: Sandpaper or router bit for smoothing edges
Overview of the Tools Needed for Assembly
Circular saw, table saw, or jigsaw for cutting plywood or MDF
Drill and drill bits for making holes for screws or bolts
Screwdriver or screw gun for driving screws
Clamps for securing pieces together during assembly
Measuring tape or ruler for taking accurate measurements
Pencil or marker for marking cut lines and hole locations
Optional: Router and router bits for adding grooves or channels to the base/frame
Optional: Sandpaper or sanding block for smoothing rough edges
These materials and tools are commonly used in constructing a DIY router sled. Depending on the design and features of the sled, additional materials or tools may be required.
Gathering all necessary materials and tools before starting the assembly process ensures a smooth and efficient build.
Building Your DIY Router Sled
Constructing a DIY router sled can be rewarding and enhance your woodworking capabilities. Below are step-by-step instructions for building a basic router sled and optional features for more advanced designs:
Step-by-Step Instructions for Constructing a Basic Router Sled:
Prepare Your Materials: Gather plywood or MDF for the base/frame and rails or guides. Cut these materials to size according to your desired dimensions using a circular saw, table saw, or jigsaw.
Assemble the Base: Lay the plywood or MDF flat and arrange the rails or guides along the edges to create a frame. Secure the rails in place using bolts and screws, ensuring they are straight and parallel to each other.
Attach the Rails: Position the wood piece to be flattened or leveled onto the base/frame, ensuring it sits securely within the rails. Use clamps to hold the wood piece firmly in place.
Mount the Router: Install the handheld router onto the sled, ensuring it is securely attached and aligned with the rails. The router’s base should be able to slide smoothly along the rails without wobbling.
Adjust Depth and Height: Adjust the depth of cut on the router to achieve the desired thickness of material to be removed. Additionally, adjust the router’s height to control the cut’s depth.
Begin Routing: With the router turned on, move it steadily across the surface of the wood piece, following a back-and-forth motion to ensure even cutting. Take light passes with each movement to avoid overloading the router.
Optional Features and Enhancements for Advanced Router Sled Designs:
Adjustable Components: Incorporate flexible components such as threaded rods, knobs, or wing nuts to allow for precise adjustments in depth, height, or angle.
Dust Collection System: Add a dust collection system to the router sled to minimize sawdust and debris buildup, keeping the work area clean and improving visibility.
Measuring Guides: Integrate measuring guides or rulers along the rails to facilitate accurate positioning and measurement of the wood piece.
Stabilization Features: Include stabilizing features such as additional supports or braces to minimize vibration and ensure smooth routing.
Enhanced Base Design: Experiment with different base designs, such as a sled with multiple cutting depths or a curved base for shaping irregular surfaces.
Operating a DIY Router Sled
Explanation of How to Use the Router Sled for Woodworking Projects
Using a router sled for woodworking projects involves a few key steps to achieve flat and even surfaces:
Preparation: Start by securing the wood piece to be flattened or leveled onto the base/frame of the router sled. Use clamps to hold the wood piece firmly in place, ensuring it does not move during operation.
Adjustments: Set the desired depth of cut on the router to determine how much material will be removed with each pass. Additionally, adjust the router’s height to control the cut’s depth.
Routing Process: With the router turned on, move it steadily across the surface of the wood piece in a back-and-forth motion. Take light passes with each movement to avoid overloading the router and ensure even cutting.
Repeat Passes: After completing one pass, inspect the surface of the wood piece to assess the level of flattening achieved. If necessary, make additional passes with the router sled until the desired level of flatness is attained.
Final Inspection: Once the routing process is complete, inspect the surface of the wood piece for any imperfections or uneven areas. Use sandpaper or a hand plane to smooth out any rough spots.
Safety Precautions to Consider While Operating the Router Sled
Eye Protection: Wear safety goggles and glasses to protect your eyes from sawdust, wood chips, or flying debris generated during the routing process.
Ear Protection: Use an ear muffler or earplugs to protect your ears from the loud noise the router produces during operation.
Dust Mask: Wear a dust mask to prevent inhalation of sawdust and debris, especially if working in a confined or poorly ventilated area.
Secure Workpiece: Ensure the wood piece is securely clamped to the router sled to prevent it from shifting or moving during operation, which could lead to accidents or injuries.
Router Safety: Familiarize yourself with the operation of the handheld router and follow all manufacturer’s instructions for safe use. Keep hands away from the cutting area and maintain a firm grip on the router during operation.
Applications and Projects
A router is a versatile tool that opens up various woodworking possibilities. Here’s an overview of the tasks it can accomplish, and examples of projects suited for a DIY router sled:
A router sled is primarily used for:
Flattening Rough-Sawn Lumber: Transforming uneven and rough surfaces into smooth and even ones is essential for various woodworking projects.
Levelling Tabletops: Ensuring tabletops are flat and stable, ideal for dining tables, desks, or countertops.
Thickness Planing: Achieving consistent thicknesses across large workpieces is crucial for uniformity in furniture making and other woodworking tasks.
Examples of Projects Suited for a DIY Router Sled
Making a Wooden Cutting Board: Using the router sled to flatten the cutting board’s surface, ensuring a smooth and even surface for food preparation.
Building a Live-Edge Table: Flattening the uneven surface of live-edge slabs while preserving the natural edge, creating unique and visually striking tabletops or benches.
Crafting Custom Furniture: Creating flat and uniform surfaces for constructing custom furniture pieces like desks, cabinets, or shelves, ensuring professional-quality results.
They are restoring Antique Furniture: Leveling and smoothing out uneven or damaged surfaces of antique furniture, restoring them to their former glory while preserving their character.
DIY Woodworking Projects: Utilizing the router sled for various DIY woodworking projects such as bookshelves, picture frames, or decorative items, achieving precise and polished outcomes.
These examples illustrate the effectiveness and versatility of a DIY router sled in woodworking, empowering enthusiasts and professionals alike to tackle diverse projects with accuracy and efficiency.
Troubleshooting and Maintenance
DIY router sleds can be incredibly useful for woodworkers and DIY enthusiasts, allowing for precise flattening of large workpieces. However, like any tool, they can face possible issues and require maintenance to ensure optimal performance. Here are some common problems encountered with DIY router sleds, along with tips for troubleshooting and maintenance:
Common Issues:
Uneven Surfacing:
Symptom: The sled leaves uneven surfaces, resulting in dips or ridges.
Cause: Uneven pressure distribution or instability of the sled.
Solution: Check for the level of the sled and workpiece. Ensure even pressure distribution across the entire surface by adjusting supports or using shims.
Router Bit Dullness:
Symptoms: Poor cutting performance, burning wood, or tear-out.
Cause: Dull router bit due to prolonged use.
Solution: Replace the router bit with a sharp one. Sharpen or replace router bits regularly for clean cuts.
Slippage or Movement:
Symptom: The sled moves or slips during operation, leading to inaccuracies.
Cause: Insufficient stability between the sled and workpiece.
Solution: Improve traction by using anti-slip materials on the sled base or clamping the workpiece securely. Ensure the sled’s base is flat and smooth to minimize friction.
Maintenance Tips:
Regular Cleaning:
Clean the sled’s surface and tracks after each use to remove sawdust and debris that could affect its performance.
Lubricate moving parts, such as rails or sled runners, to prevent friction and ensure smooth operation.
Inspect and Adjust:
Regularly inspect the sled for signs of wear or damage. Replace worn components promptly to maintain accuracy and safety.
Check alignment and squareness regularly to ensure precise cuts. Adjust as needed.
Tighten Fasteners:
Check and tighten all screws, nuts, and bolts regularly to prevent loosening during use, which could compromise stability and accuracy.
Storage and Protection:
Store the router sled in a dry, clean environment to prevent rust or corrosion.
Cover or protect the sled when not in use to minimize exposure to dust and moisture.
Router Maintenance:
Keep the router clean and well-maintained according to the manufacturer’s instructions.
Replace worn or damaged router parts, such as bearings or collets, to ensure smooth operation.
Conclusion
A router sled is a fantastic tool that helps flatten large slabs. Purchasing one or making your own, you will find a router sled to be an invaluable tool.
Nail Gun Basics: How to Load a Brad Nailer
In construction and woodworking, a nail gun, also known as a nailer, is a powerful and efficient tool used to drive nails into various materials such as wood, metal, and even concrete. It operates by utilizing compressed air (in pneumatic models), battery power (in cordless models), or electricity (in electric models) to propel nails into the work surface quickly and accurately.
Loading a nail gun correctly is of paramount importance for several reasons. First, proper loading ensures that the nail gun operates smoothly and efficiently, minimizing the risk of jams, misfires, and other malfunctions that can disrupt workflow and compromise safety.
Additionally, correctly loaded nails are securely seated in the magazine or chamber, reducing the likelihood of nails becoming dislodged during operation, which could pose a safety hazard.
Accurate loading ensures that the nail gun delivers consistent and precise nail placement, resulting in professional-quality results in construction and woodworking projects. Therefore, understanding how to load a nail gun correctly is essential for safety and performance in various applications.
Types of Nail Guns
Pneumatic Nail Guns:
Pneumatic nail guns, also called air nailers, are indispensable tools in construction and carpentry due to their power and reliability. These nailers harness compressed air stored in an attached air compressor to drive nails into various materials.
Renowned for their high efficiency, pneumatic nail guns excel in heavy-duty tasks like framing, sheathing, and roofing. They are available in diverse styles and sizes, including framing, finish, and brad nailers, each of which is tailored to specific applications.
The versatility and robustness of pneumatic nail guns make them the preferred choices for professionals seeking precision and productivity in demanding projects.
Cordless Nail Guns:
Cordless nail guns offer unparalleled portability and freedom from restrictive power cords. Powered by rechargeable lithium-ion batteries, these nailers provide flexibility for use in remote locations or areas lacking electrical outlets.
They are favored for trim work, molding installation, and minor repairs, offering convenience and efficiency. Cordless nail guns are available in various sizes and styles, such as brad nailers, finish nailers, and staplers, catering to different project requirements.
Electric Nail Guns:
Electric nail guns operate using electricity and are distinguished by their lightweight and quiet operation. These nailers are suitable for light-duty applications and indoor projects where noise and portability are considerations.
Popular among DIY enthusiasts and homeowners, electric nail guns are commonly used for furniture assembly, crafting, and small woodworking projects.
They typically feature compact designs and ease of maneuverability, making them ideal for precise tasks. Despite their lighter duty, electric nail guns offer convenience and effectiveness for various household and hobbyist projects.
Preparing for Loading
Understanding the Nail Gun’s Capacity and Nail Type Compatibility:
Each nail gun model has specific nail length, gauge, and angle requirements, which users must understand before loading. Consulting the manufacturer’s instructions or the nail gun’s user manual is essential to determine the appropriate nail specifications.
Using nails that exceed the recommended size or type can lead to jamming, misfires, or damage to the nail gun. Selecting nails compatible with the nail gun’s capacity ensures optimal performance and safety during operation.
Gathering Necessary Supplies:
Before loading the nail gun, gather all necessary supplies to streamline the process and avoid interruptions during the project. This includes the appropriate nails for the specific project, safety gear such as gloves and safety glasses, and the nail gun’s user manual.
Having everything on hand ensures a smooth loading process. It allows users to refer to the manual for specific instructions or precautions for loading nails into the nail gun.
Ensuring the Nail Gun is Disconnected and Deactivated:
Before loading nails into the nail gun, it is crucial to ensure the tool is disconnected from any power sources and deactivated to prevent accidental firing. This involves disconnecting the air hose from the compressor for pneumatic nail guns.
Users should remove the battery or unplug the power cord for cordless or electric nail guns. Even when deactivated, handling the nail gun with caution and following safety protocols to avoid accidents is essential. Always treating the nail gun as loaded and ready to fire helps maintain a safe work environment.
Loading Process
Steps for Loading Nails into a Pneumatic Nail Gun:
- Disconnect the nail gun from the air compressor by removing the air hose.
- Open the magazine or nail strip compartment of the nail gun.
- Insert the nails into the magazine in the direction the manufacturer indicates, ensuring they are correctly aligned.
- Close the magazine securely, ensuring it latches into place.
- Reconnect the nail gun to the air compressor.
- Test fire the nail gun to ensure proper loading and feeding of nails.
Steps for Loading Nails into a Cordless Nail Gun:
- Remove the battery from the cordless nail gun if it is installed.
- Open the nail magazine or nail strip compartment.
- Insert the nails into the magazine, following the orientation indicated by the manufacturer.
- Close the magazine securely, ensuring it locks into place.
- Reinstall the battery into the cordless nail gun.
- Test fire the nail gun to confirm proper loading and feeding of nails.
Steps for Loading Nails into an Electric Nail Gun:
- Ensure the electric nail gun is disconnected from the power source.
- Open the magazine or nail strip compartment.
- Insert the nails into the magazine, following the proper orientation.
- Close the magazine securely, ensuring it is properly seated.
- Reconnect the electric nail gun to the power source.
- Test fire the nail gun to verify the correct loading and feeding of nails.
Common Mistakes to Avoid During the Loading Process:
- Overloading the magazine with too many nails.
- Incorrectly orienting the nails in the magazine.
- You need to close and latch the magazine securely.
- Refrain from reconnecting the nail gun to the power source or air compressor after loading.
Safety Considerations
Importance of Wearing Appropriate Safety Gear:
Wearing the proper safety gear, like gloves and eye protection, is paramount when working with nail guns. Gloves shield hands from potential injuries caused by sharp nails or mishandling of the nail gun, while eye protection guards against flying debris or accidental nail discharge.
By wearing safety gear, workers minimize the risk of accidents and ensure their safety during nail gun operations. Additionally, safety gear provides protection against dust, debris, and other hazards in the work environment, promoting overall health and well-being.
Ensuring the Nail Gun is Pointed Away from Oneself and Others During Loading:
Always point the nail gun away from yourself and others during the loading process. This simple precautionary measure prevents accidental firing and reduces the likelihood of injuries to oneself or nearby individuals.
By keeping the nail gun pointed in a safe direction, any misfires or accidental discharges are directed away from others and helps to minimizing the possibility of accidents and injuries on the job site.
Being Mindful of Potential Hazards While Handling Nails and Loading the Gun:
When handling nails and loading them into the nail gun, it is essential to exercise caution. Avoid touching the nail points to prevent accidental punctures or injuries.
Additionally, be wary of potential hazards like sharp edges or misaligned nails, which can lead to jamming or malfunctioning of the nail gun.
By staying vigilant and attentive to these potential hazards, workers can mitigate risks and ensure a smooth and safe loading process. Regular inspection of nails and the nail gun can also help identify and address any issues before they escalate into safety hazards.
Troubleshooting the More Common Loading Issues:
How to troubleshoot common loading issues like jams or misfeeds for smooth operation:
- Clear any obstructions or debris from the nail magazine or feeding mechanism.
- Check for misaligned nails and realign them within the magazine.
- Ensure that you are using nails of the correct size and gauge for the nail gun.
- Verify proper air pressure for pneumatic nail guns and ensure the compressor functions correctly.
- Refer to the nail gun’s user manual for specific troubleshooting guidance.
Tips for Maintaining Proper Nail Gun Performance After Loading:
- Regularly inspect the nail gun for wear or damage, addressing issues promptly.
- Keep the nail gun clean by removing debris and dust buildup from the magazine and feeding mechanism.
- Take note of lubricating moving parts as the manufacturer recommends for smooth operation.
- Store the nail gun in a dry, clean environment to prevent rust or corrosion.
- Remember to follow the maintenance procedures outlined in the user manual for reliable performance.
Best Practices for Safe and Efficient Nail Gun Operation
Ensure safe and efficient nail gun operation with these best practices:
- Keep your finger off the trigger when not using the nail gun to prevent accidental firing.
- Maintain a firm grip on the nail gun and keep it pointed away from yourself and others.
- Use the appropriate nail size and type for the intended application to prevent jams.
- Avoid modifying the nail gun’s safety features.
- Wear gloves and eye protection to mitigate potential hazards.
- Follow and take note of the manufacturer’s instructions for safe and proper operation.
Things to Consider in Loading Nail Gun
Loading a nail gun properly is essential for safe and effective operation. Several factors should be considered to ensure that the nail gun is loaded correctly:
Nail Type and Size: Selecting the appropriate nails for the specific project is crucial. Different nail guns are designed to accommodate various nail lengths, gauges, and types. Using nails incompatible with the nail gun can lead to jams, misfires, or damage to the tool itself.
Capacity: Understanding the nail gun’s capacity is essential to avoid overloading it with nails. Exceeding the recommended capacity can affect the tool’s performance and increase the risk of malfunctions.
Loading Mechanism: Familiarize yourself with the nail gun’s loading mechanism, whether a magazine, strip, or coil system. Each type of loading mechanism has its own unique procedure for loading nails, so refer to the manufacturer’s instructions or the tool’s user manual for guidance.
Safety Precautions: Before loading the nail gun, ensure it is disconnected from any power sources and deactivated to prevent accidental firing. In addition, wear appropriate safety gear, like gloves and safety glasses, to protect yourself from existing and potential hazards.
Proper Handling: Handle the nails carefully to avoid bending or damaging them during loading. Ensure they are aligned correctly in the magazine or loading chamber to prevent jams or misfeeds.
By considering and taking note of these factors and following the manufacturer’s instructions, you can load your nail gun safely and effectively for your woodworking or construction project.
Conclusion
Correctly loading a nail gun is crucial for safe and effective operation. In this article, we have discussed several vital points to consider when loading a nail gun, including selecting the appropriate nail type and size, understanding the tool’s capacity, familiarizing yourself with the loading mechanism, and adhering to safety precautions.
It is extremely important to emphasize the significance of adequately loading a nail gun to prevent accidents, such as misfires, jams, or injuries. By following the manufacturer’s instructions and considering the factors discussed, users can ensure that their nail gun is loaded safely and effectively for their woodworking or construction projects.
Encourage all users to take the time to follow proper loading procedures, wear appropriate safety gear, and handle nails with care. By doing so, they can protect themselves and others from potential hazards and optimize the performance and longevity of their nail gun. Let’s prioritize safety and adhere to best practices when loading nail guns for a successful and rewarding woodworking experience.
How to Load a Staple Gun
Properly loading a Stanley staple gun is essential to ensure it works well and keeps you safe. When you load it right, the staples go in smoothly and don’t get stuck, which helps you work faster and more accurately on things like fixing furniture, doing woodwork, or crafting.
Safety is always very important as well. It could be dangerous if you don’t load the staple gun properly. You might have an accident and get hurt. But if you know how to load it correctly, you can lower the chances of accidents and make your work area safer.
The loading process has a few primary steps. You need to pick the suitable staples, put them in the staple gun correctly, and then check if it’s working perfectly. Once you understand these steps, you’ll be ready to follow the detailed instructions and use your staple gun safely and effectively.
So, learning how to load a Stanley staple gun is more than just how the tool works. It’s about being responsible and ensuring you stay safe whenever you use it.
Understanding Your Stanley Staple Gun
Types and Models
Stanley offers various types and models of staple guns designed for different purposes.
These may include manual staple guns, electric staple guns, or pneumatic staple guns.
Each type has features and benefits suited for specific tasks and user preferences.
Components of a Typical Stanley Staple Gun
Handle/Grip
The handle or grip is where you hold the staple gun while using it.
It is typically ergonomically designed for comfort during extended use.
A good handle/grip ensures better control and reduces fatigue.
Magazine
The magazine is the part of the staple gun that holds the staples.
It may vary in size depending on the model and capacity of the staple gun.
The magazine is where you load the staples before use.
Loading Mechanism
The loading mechanism is the system that allows you to insert staples into the staple gun.
It may involve opening a latch or sliding mechanism to access the magazine.
Understanding the loading mechanism is crucial for safely and effectively loading the gun.
Understanding these components will help users identify and operate their Stanley staple gun effectively, ensuring optimal performance for various projects.
Preparing to Load the Staple Gun
Selecting the Appropriate Staples for Your Project
Before loading your staple gun, it’s crucial to carefully consider the type and size of staples required for your specific project. Staples come in various sizes, materials, and types, each suited for different applications.
For instance, upholstery projects may require longer staples with a finer gauge to securely fasten fabric, while carpentry tasks might call for thicker staples to affix wood pieces together.
Additionally, the material of the staples, such as galvanized steel or stainless steel, may be chosen based on environmental factors or the desired longevity of the fastening.
To select the appropriate staples, assess the requirements of your project, considering factors such as the thickness of the materials being fastened and the intended durability of the connection.
Consulting the manufacturer’s guidelines or recommendations can also provide valuable insight into the ideal staple type and size for your staple gun model.
Ensure the Staple Gun is Disconnected from Any Power Source
Safety should always be a top priority when handling power tools like electric or pneumatic staple guns. Before loading your staple gun, it’s essential to disconnect it from any power sources, such as electrical outlets or air compressors.
This precautionary measure helps prevent accidental firing of the staple gun during the loading process, which could lead to injury or damage to your work surface.
Follow the manufacturer’s instructions for adequately disconnecting your specific type of staple gun from its power source.
For electric staple guns, unplug the power cord from the outlet, and for pneumatic staple guns, ensure that the air compressor is turned off and disconnected from the tool. Confirming that the staple gun is wholly disconnected before loading provides a safer working environment for you and those around you.
Clearing Any Existing Staples or Debris from the Magazine
Before inserting new staples into the magazine of your staple gun, it’s essential to inspect the magazine for any leftover staples or debris from previous use.
Accumulated staples or debris can obstruct the feeding mechanism and cause jams or misfires during operation, compromising the effectiveness of the staple gun and potentially damaging your workpiece.
To clear the magazine, carefully examine its interior and remove any visible staples or debris using a tool or your fingers. Pay close attention to areas where staples may have become lodged or tangled, ensuring the magazine is thoroughly cleared of obstructions.
Taking the time to clean the magazine before loading new staples helps ensure the smooth and reliable operation, minimizing the risk of interruptions or malfunctions during use.
Loading Staples into the Magazine
Opening the Magazine
Before loading staples into your staple gun, open the magazine to access the staple chamber.
The method for opening the magazine may vary depending on the model of your staple gun. Commonly, a latch or release mechanism will be located near the rear or side of the staple gun.
Follow the manufacturer’s instructions to safely open the magazine, ensuring you understand how to operate the mechanism without causing damage to the tool.
Inserting the Staples Correctly
Once the magazine is open, carefully insert the staples into the chamber in the orientation specified by the manufacturer. Staple guns require the staples to be placed in a particular direction, with the legs facing downward into the magazine.
Ensure the staples are correctly aligned to prevent jams or feeding issues during operation. Depending on the design of your staple gun, you may need to push the staples firmly into place or slide them along a track until they are fully seated in the magazine.
Closing and Securing the Magazine
After loading the staples, close the magazine securely to prevent them from falling out during use. Ensure the magazine is fully latched according to the manufacturer’s instructions.
This step is crucial for maintaining the integrity of the staple chamber and preventing accidental discharge of staples. Double-check that the magazine is securely closed before resuming the operation of the staple gun.
By following these essential steps carefully, you can safely and effectively load staples into your Stanley staple gun, ensuring smooth and reliable performance for your projects. Always consult the manufacturer’s instructions and exercise caution when handling power tools.
Testing the Loaded Staple Gun
Conducting a Test Fire to Ensure Staples Feed Properly
Once you’ve loaded the staple gun, conducting a test fire is essential to ensure that the staples feed smoothly and consistently. Find a scrap piece of material similar to what you’ll be working with and place it securely on a stable surface. Hold the staple gun firmly against the material and squeeze the trigger to fire a staple.
Observe how the staple gun functions during the test fire. Check to see if the staples penetrate the material cleanly and if they are driven to the desired depth.
Listen for unusual sounds or sensations that indicate feeding or mechanical problems. If the staples do not feed properly or there are any issues with the operation of the staple gun, proceed to the next step.
Adjusting the Staple Gun if Necessary
If you encounter any issues during the test fire, you may need to adjust the settings or components of the staple gun to ensure proper operation. Refer to the manufacturer’s instructions for guidance on how to change the settings on your specific staple gun.
Standard adjustments may include:
- Adjusting the depth control to change the depth at which staples are driven into the material.
- Adjust the tension of the spring that feeds staples into the firing mechanism.
- Inspecting and cleaning any components that may obstruct the feeding or firing of staples.
Make minor adjustments as needed and conduct additional test fires until you are satisfied with the performance of the staple gun. It is essential to take the time to ensure that the staple gun is functioning correctly before using it on your actual project to avoid any potential issues or damage to your workpiece.
Safety Precautions
Wearing Appropriate Safety Gear (Gloves, Eye Protection)
When using a staple gun, you must prioritize your safety by wearing protective gear. This includes safety equipment, gloves to protect your hands from accidental injury, and eye protection to shield your eyes, such as earmuffs from flying debris or staples.
Gloves protect potential pinching or cuts from the staple gun’s moving parts, while eye protection helps prevent eye injuries from ricocheting staples or debris.
Handling the Staple Gun with Care to Avoid Accidents
Handle the staple gun with caution and mindfulness to reduce the risk of danger, accidents, or injuries. Always keep your fingers away from the trigger when not in use to prevent accidental firing.
Avoid pointing the staple gun at yourself or others, even when unloaded, to minimize the risk of accidental injury. When operating the staple gun, maintain a firm grip on the tool and ensure that your hands are clear of the staple exit point to prevent accidental contact with the staples.
Storing the Staple Gun Safely When Not in Use
Proper storage is essential to prevent dangerous accidents and keep your staple gun in good working condition. When it is not use, store in a secure location out of reach of children or unauthorized users.
Ideally, store the staple gun in a dedicated toolbox or case to protect it from damage and prevent accidental activation. Additionally, ensure that the staple gun is stored in a dry environment to prevent corrosion or damage to its components.
By following these safety precautions, you can lessen the risk of accidents and injuries while using a staple gun and ensure that it remains in good condition for future use. Always prioritize safety when handling power tools to protect yourself and others from harm.
Troubleshooting Common Issues
Staples Jamming in the Magazine
If you encounter staples jamming in the magazine, follow these steps to troubleshoot the issue:
- Disconnect the staple gun from any power source and ensure it is not loaded.
- Open the magazine and carefully inspect the staple chamber for obstructions or jammed staples.
- Use a pair of pliers or a screwdriver to remove any jammed staples or debris gently from the magazine.
- Check the alignment of the staples in the magazine to ensure they are inserted correctly and not overlapping.
- Close the magazine securely and test-fire the staple gun to ensure the issue has been resolved.
Staples Not Feeding Properly
If staples are not feeding properly, try the following troubleshooting steps:
- Ensure that the staple gun is loaded with the accurate type and size of staples for your project.
- Check the tension of the spring that feeds the staples into the firing mechanism and adjust if necessary.
- Inspect the magazine for any obstructions or debris hindering the feeding mechanism.
- Make sure the staples are inserted into the magazine in the proper orientation and are not misaligned.
- Test fire the staple gun after adjusting to ensure that staples are feeding smoothly.
Addressing Any Other Issues Encountered During Loading or Testing
If you encounter any other issues during the loading or testing of your staple gun, consider the following troubleshooting steps:
- Refer to the manufacturer’s instructions or online resources for troubleshooting tips specific to your model.
- Inspect for any signs of crack damage or wear, and replace any damaged components as needed.
- Clean the staple gun thoroughly to remove any accumulated debris or residue affecting its performance.
If the issue continues, contact the manufacturer’s customer support, or seek professional repair services.
Conclusion
Loading a Stanley staple gun is essential to make sure it works well. First, ensure the staple gun is not connected to any power source, and remove any old staples or dirt from the magazine. After loading, try firing a staple to check if it works smoothly. It is extremely important to wear safety gear like gloves and eye protection and handle the staple gun carefully to avoid accidents.
The more you practice, the better you’ll get at it and know what to do if something goes wrong. Remember always to follow safety rules and handle the staple gun with care. That way, you can use your Stanley staple gun safely and do a great job on your projects.
Mastering the Craft: How to Build a DIY Router Table Fence
In woodworking, a router table fence is a guide that keeps your workpiece steady while you use the router. It helps you make accurate and smooth profiles by guiding the wood at an exact distance from the router bit.
In this article, we will discuss how to make your own DIY router table fence. We will cover everything from picking the suitable materials and tools to putting it all together. With this DIY project, woodworkers can upgrade their workshop.
Definition and function of a router table fence
Router table fences help with complex routing tasks such as joinery and molding.
With a well-designed fence, woodworkers can easily create dadoes, rabbets, and other joinery cuts by using guide blocks or stops to control the depth and position of the cuts.
Moreover, for molding operations, router table fences can be equipped with auxiliary feather boards or hold-down clamps to hold the workpiece securely against the wall, ensuring consistent profiles and preventing stock from slipping.
How router table fences enhance precision and safety in woodworking
Another advantage of router table fences is their versatility in accommodating various router bits and accessories.
Most router table fences feature adjustable openings or T-slots that allow for the attachment of feather boards, sacrificial fences, or dust collection attachments.
This adaptability enables woodworkers to customize their setups based on the specific requirements of each project, whether it involves routing narrow stock or handling curved profiles.
Importance of a router table fence in guiding workpieces and controlling cuts
Beyond their functional benefits, a router table fence contributes to efficiency in woodworking by reducing setup time and minimizing material waste.
Providing a stable reference surface and precise guidance enables woodworkers to achieve desired results with fewer trial-and-error adjustments, ultimately saving time and resources.
Using a router table fence promotes a systematic and organized approach to routing tasks, leading to smoother workflow and improved productivity in the workshop.
Components of a DIY Router Table Fence
Main body or frame of the fence
The main body or frame of the DIY router table fence serves as the structural foundation, providing stability and rigidity to the entire assembly.
It is typically constructed from sturdy wood, aluminum, or composite materials, ensuring durability and longevity. The frame is designed to be securely mounted onto the router table and provide a stable platform for the other components of the fence.
Fence faces or wings for supporting workpieces
The fence faces, or wings, are the horizontal components of the router table fence that support the workpiece during routing operations.
These faces extend perpendicular to the router bit and provide a flat reference surface for guiding the workpiece along the desired path.
Fence faces are usually made from smooth materials such as high-density fiberboard (HDF), laminate, or aluminum, ensuring minimal friction and smooth movement of the workpiece.
T-tracks or other methods for attaching accessories
T-tracks or other attachment methods are integrated into the router table fence to allow for the attachment of accessories such as feather boards, hold-down clamps, or dust collection attachments.
T-tracks provide a convenient and versatile mounting solution, allowing woodworkers to customize their setups according to the specific requirements of each routing task. Additionally, T-tracks facilitate easy adjustment and repositioning of accessories, enhancing flexibility and efficiency in woodworking.
Adjustable features for precise positioning and alignment
Adjustable features are incorporated into the DIY router table fence to enable exact positioning and alignment of the wall relative to the router bit.
These features may include adjustable fence faces, sliding mechanisms, or micro-adjustment knobs that allow for fine-tuning of the fence position. Flexible features ensure accuracy and repeatability in routing operations, enabling woodworkers to achieve consistent and professional-quality project results.
Tools and Materials Needed for Building a DIY Router Table Fence
Essential Tools:
- Table saw or circular saw
- Miter saw or miter box and handsaw
- Drill with drill bits and screwdriver bits
- Tape measure
- Combination square
- Clamps
- Wood glue
- Sandpaper or sanding block
Common Materials:
- Wood (such as plywood, hardwood, or MDF)
- Aluminum extrusions or angle brackets
- T-tracks or T-slot extrusions
- Bolts, nuts, and washers
- Screws
- Wood glue
- Finish (optional)
Optional Accessories or Hardware:
Featherboards
- Dust collection attachment
- Hold-down clamps
- Router lift mechanism
- Micro-adjustment knobs
- T-track hold-downs
- Clear acrylic or Lexan for see-through guard
Step-by-Step Guide to Building a DIY Router Table Fence
Gather Your Materials and Tools:
Collect all the materials mentioned in the other section, including wood or other preferred material, screws, bolts, T-tracks, etc.
Ensure you have the necessary tools, such as saws, drills, measuring tools, clamps, and sandpaper.
Design and Plan:
Decide on the dimensions and design of your router table fence. Consider factors like the size of your router table, your type of router, and any specific features you want to incorporate.
Sketch out a rough design and make precise measurements for each component.
Prepare Materials:
Measure and mark the materials according to your design using a tape measure, square, and pencil.
Use a table or circular saw to cut the fence’s main body; fence faces, and any additional components to the desired dimensions. Sand the edges and surfaces of the cut pieces to smooth out any roughness.
Assemble the Main Body:
Begin by assembling the main body of the fence. This typically involves joining together the main sections of the fence using wood glue and screws or bolts.
Use clamps to hold the pieces together firmly while the glue dries, ensuring the fence remains square and true.
Attach Fence Faces:
Once the main body is assembled, attach the fence faces perpendicular to the router table surface.
Apply wood glue between the edges of the main body where the fence faces will be attached.
Secure the fence faces in place using screws or bolts, ensuring they are correctly aligned and flush with the top of the main body.
Add T-Tracks or Other Attachments:
Install T-tracks or T-slot extrusions along the top of the fence faces, accommodating accessories such as feather boards or hold-down clamps.
Use washer bolts and nuts to secure the tracks, ensuring they are aligned parallel to the router bit path.
Incorporate Adjustable Features:
If desired, incorporate adjustable features such as micro-adjustment knobs or a router lift mechanism.
Ensure these features allow for precise positioning and alignment of the fence and test their functionality thoroughly.
Test and Fine-Tune:
Before using the router table fence for your projects, test its functionality and make any necessary adjustments.
Check for squareness, smooth movement of adjustable features, and proper alignment with the router bit. Fine-tune as needed to ensure the fence operates smoothly and accurately.
Tips and Tricks for Customizing and Improving DIY Router Table Fences
Ideas for Customizing the Design:
Variable Fence Height: Incorporating an adjustable height feature into your router table fence design adds versatility to accommodate different router bit heights and various woodworking tasks.
This allows you to position the fence precisely at the optimal height for each specific application, whether it’s edge profiling, dado cutting, or shaping.
Removable Fence Faces: Creating interchangeable fence faces with different heights or profiles enables you to tailor the fence to specific woodworking tasks.
For example, you might have one face with a tall profile for vertical workpieces or joinery tasks, while another with a shorter profile is better suited for edge routing or detail work. This flexibility allows for quick and easy customization without needing multiple dedicated fences.
Built-in Measurements: Integrating measurement scales or rulers directly onto the fence facilitates precise setups and adjustments, eliminating the need for external measuring tools.
Whether you’re aligning the fence for a specific cut or establishing the distance from the router bit to the workpiece edge, having measurements conveniently displayed on the fence streamlines workflow and enhances accuracy.
Extended Wings: Extending the wings of the router table fence provides additional support for larger workpieces or longer cuts, enhancing stability and control during operation.
This feature is handy when working with oversized materials or performing edge routing on longboards. By increasing the surface area of the fence, you can effectively manage more significant projects with ease and confidence.
Techniques for Enhancing Durability, Accuracy, and Ease of Use:
Sturdy Construction: Utilizing high-quality materials and robust joinery techniques, such as dovetail or box joints, ensures the router table fence’s durability and stability during use.
Investing in solid construction can minimize flexing or vibration, resulting in more precise and consistent cuts.
Precision Alignment: Accurately aligning the fence faces perfectly parallel to the router bit path is crucial for achieving accurate cuts and maintaining consistency across multiple passes.
Use precision measuring tools, such as dial indicators or digital calipers, to verify alignment and make fine adjustments. Additionally, incorporating adjustable features allows precise alignment tuning to accommodate different cutting scenarios.
Smooth Sliding: Incorporating low-friction materials, such as UHMW (Ultra-High Molecular Weight Polyethylene) or nylon, on sliding components ensures smooth adjustment and operation of the fence.
Apply dry lubricants or wax to sliding surfaces to reduce friction and prevent binding, enhancing overall ease of use and user experience.
Secure Locking Mechanism: Implementing a reliable locking mechanism, such as cam locks or toggle clamps, securely holds the fence in place once adjusted, preventing unwanted movement during operation.
Choose locking mechanisms that provide ample clamping force and ergonomic operation for effortless locking and unlocking.
Replaceable Wear Parts: Designing the router table fence with replaceable wear parts, such as sacrificial faces or inserts made from high-density plastic or phenolic resin, prolongs its lifespan and maintains accuracy.
Replace damaged and worn parts as needed to ensure optimal performance and minimize the risk of errors during operation.
Suggestions for Integrating Safety Features and Dust Collection Systems:
Adjustable Guard: Installing a transparent guard or shield over the router bit area provides essential protection against accidental contact while still allowing visibility of the workpiece.
Choose a guard design that can be easily adjusted or removed to accommodate different router bit sizes and cutting depths, ensuring maximum safety without compromising visibility or accessibility.
Featherboards: Incorporating adjustable feather boards along the fence helps hold workpieces securely against the table surface, minimizing the risk of kickback and ensuring consistent feed rates. Position feather boards at appropriate locations relative to the router bit path to provide adequate support and guidance throughout the cutting process.
Dust Collection Port: Including a dust collection port or attachment on the fence helps capture debris and keep the work area clean and safe.
Connect the dust collection port to a vacuum system or dust extractor using a flexible hose or tubing to effectively remove dust and chips generated during routing operations, reducing airborne particles and maintaining a healthier working environment.
Overhead Dust Hood: Consider adding an overhead dust hood or shroud to capture dust and chips directly above the router bit, enhancing dust collection efficiency.
This supplemental dust collection feature helps capture airborne particles that may escape traditional dust collection methods, providing comprehensive dust control and improving overall air quality in the workshop.
Emergency Stop: Installing an emergency stop button or switch within easy reach of the operator allows for quick shutdown of the router in case of an emergency or unexpected situation.
Position the emergency stop control in a prominent location on the router table fence to ensure rapid access and intuitive operation during critical moments, prioritizing operator safety above all else.
Conclusion
Making your router table fence is essential for woodworking. It helps you perform your work more accurately and safely. Plus, it keeps you safe while you work. You can make it just right for you with things like adjustable featherboards.
All woodworkers should try making their own router table fence. It’s pretty easy if you plan it out and take your time. And when you’re done, you’ll have something that fits your needs perfectly and makes your woodworking even more fun.
So, whether you’re working on big or small projects, a good router table fence is like having a reliable helper. It lets you do your work confidently and get great results every time.
How to Cut a Square Hole With a Router
In woodworking, making square holes is essential. Square holes are often used in joinery, like when making mortise and tenon joints. These joints are very strong and durable because square holes give a greater surface area for the wood to be glued together.
Making square holes takes careful planning and measuring, plus requires some special tools. Woodworkers use techniques like chiseling or routing to make these holes just right. They use chisels, mallets, routers, and square guides to finish the job neatly and accurately.
Learning to make square holes is essential to ensure your woodworking projects look good and the joints stay strong. It’s like building a solid foundation for your work so everything turns out just how you want it, whether you’re a beginner or a pro woodworker.
Preparation
Choosing the Right Wood and Measuring Correctly:
Selecting the appropriate wood is the first step in preparing to cut a square hole. Different types of wood have varying strengths, densities, and textures, so it’s crucial to choose one that aligns with the requirements of your project. Consider factors such as safety, durability, and compatibility with other materials.
Once you’ve chosen your wood, carefully measure the dimensions of the hole you want to make. Using a measuring tape or a ruler, mark the hole’s length and width on the wood surface. Take accurate measurements to ensure the square hole fits your project’s specifications perfectly.
Marking the Location:
After determining the size of the square hole:
Mark its location on the wood surface.
- Use a pencil or marker to make clear, precise marks at the desired placement of the hole.
- Double-check your measurements and ensure the marks align correctly with the wood grain and any surrounding features or components.
- Properly marking the location of the square hole is essential for ensuring accuracy and precision during the cutting process. Take your time to measure and observe to avoid any errors or inaccuracies that could affect the final result.
Gathering Tools and Safety Gear:
Before beginning the cutting process, gather all the necessary tools and safety equipment required for the job. Depending on the cutting method, you may need chisels, mallets, routers, saws, and square guides.
Prioritize your safety by wearing appropriate safety gear, including safety glasses to protect your eyes from flying debris and gloves to safeguard your hands from sharp tools and rough surfaces.
Ensure that your tools are in good working condition and adequately sharpened for optimal performance.
By gathering the right tools and safety gear, you will be well-prepared to tackle cutting a square hole in wood efficiently and safely. Preparing appropriately sets the stage for a successful woodworking project with precise and professional results.
Using a Chisel and Mallet
Marking the Outline of the Square Hole:
Before starting to cut, it is crucial to mark the outline of the square hole on the wood surface. Use a marker or pencil to make clear and accurate marks representing the dimensions of the hole you want to create. Take your time to ensure that the marks are straight and aligned correctly.
Making Initial Cuts with a Chisel:
With the outline marked, it’s time to make initial cuts along the perimeter of the square hole using a sharp chisel. Hold the chisel to the wood surface at a safe slight angle and carefully tap it with a mallet. The goal is to create shallow cuts that outline the shape of the hole perfectly, so be sure to cut only a little at this stage.
Removing Material to Create the Hole:
Once the outline is established, use the chisel to gradually remove material from the marked area. Work methodically, making small and controlled cuts along the edges of the square. Apply gentle force with the mallet to chisel away the wood but be careful not to remove too much material at once.
Squaring Off the Corners for Precision:
After removing the bulk of the material, it is essential to square off the corners of the square hole for precision. Use the chisel to carefully trim and refine the edges, ensuring that they are straight and perpendicular to the surface of the wood. Take your time to achieve sharp and well-defined corners, as they contribute to the overall quality and appearance of the square hole.
Using a Router and Square Guide
Securing the Wood and Setting up the Router:
To ensure accurate and safe routing, properly securing the wood to a stable work surface is crucial. Use clamps or a vice to hold the wood firmly in place, preventing movement during the routing process.
This stability not only enhances accuracy but also reduces the risk of accidents.
Once the wood is secured, it’s time to set up the router with a square guide attachment. This attachment helps maintain the router’s alignment with the marked outline of the square hole. Ensure the guide is securely fastened to the router and aligned correctly before routing.
Routing the Outline of the Square Hole:
With the wood securely fastened and the router set up with the square guide attachment, carefully guide the router along the marked outline of the square hole. Apply steady pressure on the router and move it in a smooth, controlled motion to trace the hole’s perimeter. The router bit should cut through the wood gradually, following the outline you’ve marked.
Removing Excess Material with Multiple Passes:
After routing the outline, it’s time to remove the excess material within the marked area. Make multiple passes with the router, gradually lowering the router bit with each pass. Start from the outer edges and work your way toward the center of the square hole. This gradual approach helps achieve a clean and uniform cut, ensuring the hole’s edges are smooth and even.
Squaring Off the Corners for Accuracy:
Once most of the material is removed, focus on squaring off the corners of the square hole for precision. Since a router bit spins in a circular motion, you will need to clean up the corners with a chisel as described above. Take your time to ensure that each corner is evenly squared off, contributing to the overall precision and quality of the hole.
Following these steps meticulously, you can achieve accurate and clean-cut square holes in wood using a router. Remember to prioritize your safety throughout the process and slowly take time to ensure precise results. With practice and attention to detail, you can master this woodworking technique effectively.
Finishing Touches
Smoothing the Edges and Surfaces of the Square Hole:
After cutting the square hole, it’s crucial to ensure the edges and surfaces are smooth and free of roughness or imperfections. This step is essential for achieving a clean and professional finish in your woodworking project.
To smooth out the edges of the hole:
Use sandpaper or a sanding block with fine grit.
- Carefully sand along the edges, maintaining the square shape of the hole while removing any splinters, unevenness, or sharp edges.
- Be gentle and patient during this process to avoid accidentally altering the dimensions or shape of the hole.
Please pay close attention to the corners of the square hole, as they may require extra attention to ensure they are smooth and evenly shaped. Use a finer grit sandpaper or sanding sponge to refine the corners and achieve a uniform appearance.
Checking the Dimensions and Ensuring a Snug Fit:
Once the square hole is cut and smoothed, it is essential to verify that it matches the specifications of your project. Use a measuring tape or gauge to measure the hole’s length, depth, and width, ensuring that they align with your intended dimensions.
Test the fit of any inserts or joinery components placed within the square hole. This could include wood, hardware such as hinges, etc… Ensure these components fit snugly and securely within the hole without any gaps or excessive play.
If necessary, adjust the square hole to ensure everything aligns correctly and functions as intended. This may involve sanding or trimming the edges slightly to achieve a better fit or making minor modifications to the dimensions of the hole.
Applying Finishes or Treatments to the Wood:
Depending on your preferences and the requirements of your project, you may choose to apply finishes or treatments to the wood surrounding the square hole. This can enhance the appearance of the wood and provide additional protection against moisture, damage, and wear.
Standard finishes and treatments include staining, painting, or sealing the wood. Before applying any finish or treatment, ensure the wood is dry, clean, and dust-free. Follow the manufacturer’s instructions for the chosen finish, and allow adequate drying time before proceeding with further assembly or installation.
Applying finishes or treatments to the wood adds the final touch to your woodworking project, enhancing its overall appearance and durability. Apply the finish carefully and evenly, allowing it to dry and clean thoroughly before handling or using the finished piece.
Safety Considerations
Importance of Wearing Safety Goggles and Hearing Protection:
Safety should always be a top priority when using any type of woodworking tools. Wear safety goggles to protect your eyes from chips, flying wood dust, and debris that can cause injury.
Wear hearing protection, like earplugs or ear mufflers, to protect your ears from the loud noise created by power tools. Protecting your eyes and ears ensures your safety and reduces the risk of long-term damage.
Tips for Securing the Wood and Using Tools Safely:
Before cutting or shaping tasks, ensure the wood is securely fastened to a stable work surface using clamps or a vice. This prevents the wood from moving unexpectedly during cutting, reducing the risk of danger and accidents.
When using hand tools such as chisels or mallets, maintain a firm grip on the tool and position your hands away from the cutting edge to prevent injuries. For power tools like routers, familiarize yourself with the operation manual and follow all safety guidelines provided by the manufacturer.
Potential Hazards to Watch Out for During the Cutting Process:
Be aware of potential dangers and hazards during the cutting process and take precautions to avoid accidents. Keep fingers and hands away from cutting blades or router bits to prevent cuts or amputations.
Avoid wearing loose, baggy clothing or jewelry that can get caught in moving parts. Be cautious of wood splinters, sharp edges, and kickbacks from power tools, and take measures to minimize their impact by wearing appropriate protective gear and following safe work practices.
Conclusion
Skill at cutting square holes in wood involves a series of essential steps. First, it is crucial to prepare. This means choosing the right type of wood, measuring and marking the dimensions accurately, and gathering all the necessary tools before cutting.
Next, you must use the proper techniques to cut the square hole. This might involve using a chisel, mallet, or a router and guide. Whatever method you choose, ensure you are precise and careful to get the best results.
Once you’ve finished cutting, remember the final touches. Smooth any rough edges, double-check the dimensions to ensure everything fits perfectly, and apply any finishes or treatments to protect the wood and enhance its appearance.
It’s also important to keep practicing and try new techniques. Every project is an opportunity to learn and improve your skills, so don’t be afraid to experiment and get creative.
Finally, always prioritize safety. Wear the proper safety gear, secure the wood properly, and take your time to avoid accidents. With patience and dedication, you’ll soon become a confident and skilled woodworker, creating beautiful pieces with ease.
Notching Techniques: How to Cut Perfect Notches in Wood
In woodworking, you will often find yourself having to cut some sort of notch in the wood. Whether it’s a lap joint or a dovetail, notches help pieces fit together like puzzle pieces, strengthening joints and supporting structures. Notches can also make things look nicer and more decorative while providing strength.
The process of cutting notches involves careful planning, precise measurements, and the use of appropriate tools and techniques. From marking the location and dimensions of the notch to executing the cuts with precision, every step plays a crucial role in achieving the desired outcome.
By understanding the fundamentals of notch cutting and following a systematic approach, woodworkers can effectively incorporate this essential skill into their repertoire, elevating the quality and craftsmanship of their woodworking projects.
Understanding Notches
Definition:
Notches in woodworking encompass a variety of cuts or grooves made in wood or other materials, to achieve specific shapes, facilitate joinery, or enhance structural integrity.
This usually involved removing material to create a recess or opening that allows for interlocking of components within a construction project.
Different Types of Notches:
Through Notches: These cuts penetrate entirely through the material, resulting in a complete opening or gap. Notches are commonly employed in joinery applications where a tight fit and robust connection between pieces are paramount.
Examples include the creation of mortise and tenon joints or precise interlocking mechanisms in furniture assembly.
Stopped Notches: Stopped notches, in contrast, do not extend through the entire thickness of the material. Instead, they terminate before reaching the opposite surface.
This type of notch is frequently utilized to achieve joints where maintaining a continuous surface on one side of the material is desirable. Stopped notches are also used for decorative purposes, allowing craftsmen to incorporate intricate patterns or embellishments along the edges of woodworking projects without compromising structural integrity.
Applications of Notches in Woodworking Projects:
Joinery: Notches serve as foundational elements in various joinery techniques, enabling woodworkers to connect individual pieces of wood securely. Dovetail joints, mortise and tenon, and lap joints are just a few examples where notches are pivotal in establishing durable and aesthetically pleasing connections between components.
Construction: Notches are indispensable for seamlessly fitting pieces together during framing activities. Whether it involves creating openings for windows and doors or fashioning the distinctive notched corners of log cabins, these cuts ensure structural integrity while facilitating the assembly process.
Decorative Detailing: Beyond their practical functions, notches offer an avenue for creative expression and decorative detailing in woodworking projects. One can use stopped notches to carve intricate patterns, motifs, or ornamental designs along the edges of furniture pieces, cabinetry, or architectural elements, elevating the finished product’s aesthetic appeal.
Functional Design: Notches also serve pragmatic purposes in woodworking, particularly in available design. By incorporating strategically placed notches, artisans can accommodate the passage of cables, pipes, or other utilities within built-in shelving units, cabinetry, or furniture pieces, ensuring both structural stability and practical functionality in the final assembly.
Tools and Materials Needed
Essential Tools:
Saws: Various types of saws are essential for cutting notches, including:
Backsaw: Ideal for precise and controlled cuts, particularly in joinery work.
Coping Saw: Useful for intricate curved cuts or detailed work.
Japanese Pull Saw: Offers clean and efficient cutting action, suitable for both rip and crosscuts.
Chisels: Chisels are indispensable for shaping and refining notches. Both bevel-edge and mortising chisels may be required, depending on the type of notch being created.
Marking Tools: Accurate marking is crucial for achieving precise cuts. Essential marking tools include:
- Carpenter’s Pencil: Used for marking cutting lines and layout.
- Marking Knife: Provides a precise and crisp line for accurate cuts.
- Square: Ensures perpendicular and straight cuts.
- Hammer or Mallet: Used with chisels for driving and controlling cutting force.
- Measuring Tools: Tape, ruler, or combination square for precise measurements and layout.
Safety Equipment:
Safety Glasses: Essential for eye protection against flying wood chips, dust, and debris.
Dust Mask or Respirator: Protects against inhalation of wood dust, which can pose respiratory hazards.
Ear Protection: Earplugs or earmuffs may be necessary, especially when using power tools such as saws or routers.
Work Gloves: Optional but recommended for handling rough or splintered wood and providing additional grip and protection.
Types of Wood Suitable for Cutting Notches:
Softwoods: Softwoods such as pine, cedar, spruce, and fir are commonly used for woodworking projects requiring notches. They are relatively easy to work with and suitable for various applications, including framing, cabinetry, and furniture construction.
Hardwoods: Hardwoods like oak, maple, cherry, and walnut are prized for their durability, strength, and attractive grain patterns. While they may require more effort to cut and shape, hardwoods are often preferred for high-end woodworking projects where aesthetics and longevity are paramount.
Engineered Woods: Wood products such as plywood, MDF (medium-density fiberboard), and particleboard can also be used for cutting notches.
These materials offer consistency in size and density and may be more affordable than solid wood options, making them suitable for various woodworking applications, including shelving, paneling, and cabinetry.
Preparing the Workpiece
Marking the Location of the Notch:
Begin by carefully examining the workpiece to determine the notch’s location. Ensure that the placement aligns with the project’s overall design and functional requirements.
Use a carpenter’s pencil or marking knife to mark the notch’s boundaries on the wood’s surface accurately. Ensure the lines are visible and extend across the entire width or length of the notch area.
Measuring and Marking the Depth and Width of the Notch:
With the location of the notch marked, use a combination square or ruler to measure the desired depth measure of the notch on the side of the wood. Ensure that the depth measurement is consistent and corresponds to the intended functionality of the notch.
Similarly, measure and mark the width of the notch, ensuring that it accommodates the dimensions of the joining pieces or the intended purpose of the notch. Make sure to double-check the measurements to ensure accuracy before proceeding with cutting.
Using Templates or Guides for Accuracy:
Consider creating templates or guides for complex or repetitive notch designs to ensure consistency and accuracy across multiple workpieces.
Templates can be made from sturdy materials such as plywood or acrylic and cut to the exact shape and dimensions of the desired notch. Secure the template firmly on the workpiece using clamps or double-sided tape.
When using a template, trace around its edges with a pencil or marking knife to transfer the notch outline onto the workpiece. This method ensures precise shape and size replication on each piece.
Alternatively, router templates or jigs can guide power tools such as routers or trimmers for cutting notches with high precision and efficiency.
Regardless of the method chosen, always verify the markings’ alignment and accuracy before cutting to avoid errors that could compromise the Fit and functionality of the finished piece.
Cutting Notches
Overview of Different Cutting Methods:
Notches can be cut using various methods depending on available tools and the desired outcome. Standard cutting methods include:
Sawing: Utilizing backsaws, coping saws, or Japanese pull saws to make straight or curved cuts through the wood.
Chiseling: Employing chisels to remove wood incrementally and shape the notch to the desired dimensions.
Routing: Using a router with appropriate bits and guides to create precise and uniform notches, particularly in bulk or repetitive tasks.
Drilling and Sawing: Combining drilling to remove bulk material and sawing to refine the notch, suitable for larger notches or rough shaping.
Step-by-Step Instructions for Cutting Notches with Various Tools:
Using a Saw:
Secure the workpiece firmly using clamps or a vice to prevent movement during cutting.
Using a carpenter’s square or straightedge, align the saw blade with the marked lines delineating the notch’s boundaries.
With steady, controlled strokes, carefully saw along the marked lines, ensuring the cuts remain straight and accurate.
Switch to a coping saw or a jigsaw for curved notches, following the marked lines with smooth, continuous movements until the desired shape is achieved.
Using Chisels:
Start by outlining the notch with a sharp utility knife or marking knife to create a clear boundary for the chisel.
Using a mallet and chisel, carefully score along the marked lines to establish the depth of the notch.
Gradually remove wood from the notch area with successive mallet strikes, working from the edges towards the center.
Test-fit the joining pieces periodically to ensure that the notch is shaped to the correct dimensions, making adjustments as necessary.
Using a Router:
Secure the workpiece and set up the router with the appropriate bit and depth adjustment according to the notch dimensions.
Position the router guide or template firmly against the workpiece to ensure accurate routing along the marked lines.
Run the router along the template or guide, applying gentle pressure to gradually remove the material and form the notch.
Maintain steady control over the router to achieve clean and precise cuts, adjusting the depth and direction as needed.
Combining Drilling and Sawing:
Begin by drilling a series of closely spaced holes along the length or width of the notch area to remove bulk material.
Use a saw (such as a handsaw or jigsaw) to connect the drilled holes and refine the notch’s shape and dimensions.
Work carefully and methodically, ensuring the cuts remain within the marked lines and the notch meets the desired specifications.
Tips for Achieving Clean and Precise Cuts:
Maintain Sharp Tools: Ensure that saw blades, chisels, and router bits are sharp and properly maintained to achieve clean cuts with minimal effort.
Work Incrementally: Take your time and make gradual cuts, especially when using chisels, to avoid removing too much material at once and risking errors.
Test Fit Frequently: Periodically check the Fit of the joining pieces within the notch to ensure that it aligns correctly and meets the desired dimensions.
Use Guides or Templates: Utilize guides, templates, or straightedges to guide your cutting tools and maintain accuracy throughout the process.
Secure Workpiece: Always secure the workpiece firmly in place to prevent movement or slippage during cutting, which could lead to inaccurate cuts or injury.
Practice Proper Technique: Whether sawing, chiseling, or routing, practice proper technique and maintain control over the tool to achieve clean, precise, and consistent results.
Safety Considerations
Woodworking can be rewarding and fulfilling, but it comes with inherent risks. Proper safety precautions are paramount to prevent accidents and injuries. Here’s why safety is crucial, along with tips for safe handling of tools and potential hazards to watch out for during the cutting process:
Importance of Proper Safety Precautions:
Protecting Yourself: Woodworking involves the use of extremely sharp tools and machinery that can cause severe injuries if misused. Adhering to safety precautions ensures your physical well-being while working.
Preventing Accidents: Accidents in the workshop can lead to cuts, bruises, and even more severe injuries. Following safety protocols and guidelines reduces the risk of unsafe accidents and creates a safer work environment.
Maintaining Concentration: When focused on safety, you’re less likely to be distracted, allowing you to concentrate fully on your woodworking tasks and produce higher-quality results.
Tips for Safe Handling of Tools:
Wear Personal Protective Equipment (PPE): Always wear appropriate PPE, including safety glasses or goggles to protect your eyes from flying debris, hearing protection to safeguard against loud noises, and a dust mask or respirator to prevent inhalation of wood dust.
Keep Work Area Clean and Organized: A clutter-free workspace reduces the risk of tripping hazards and ensures that tools and materials are readily accessible when needed.
Use Tools as Intended: Each woodworking tool is designed for specific tasks. Use tools according to their intended purpose and follow manufacturer guidelines for safe operation.
Maintain Tools Properly: Keep your tools well-maintained, ensuring that blades are sharp, cords are intact, and moving parts are lubricated. Faulty equipment can lead to accidents.
Use Tools with Both Hands: When operating power tools or handling heavy objects, use both hands to maintain control and stability.
Avoid Distractions: Focus solely on the task while operating tools or machinery. Avoid distractions such as ringing phone calls or conversations that can compromise safety.
Educate Yourself: Familiarize yourself with woodworking techniques and safety practices through books, videos, or classes. Continuous learning improves your skills and awareness of potential hazards.
Potential Hazards to Watch Out for During the Cutting Process:
Kickback: When using power tools such as table saws or routers, kickback can occur if the material binds or catches on the blade or bit. Always use push sticks or feather boards to maintain control and prevent kickbacks.
Flying Debris: Cutting wood generates flying debris, which can cause eye injuries if not adequately protected. Make sure to wear safety goggles to protect your eyes from debris.
Accidental Startups: Ensure power tools are switched off and unplugged when not used. Accidental startups can occur if tools are left powered on, or cords are left in a position that can be accidentally activated.
Wood Dust: Wood dust generated during cutting can pose respiratory hazards if inhaled. Use a respirator or dust mask to protect yourself from dust exposure.
Slippery Surfaces: Sawdust and wood shavings can create slippery surfaces in the workshop. Keep floors dry and clean to prevent dangerous slips and falls.
Conclusion
Getting good at cutting notches in wood is like learning the ABCs of woodworking. It helps builders make joints that are not only strong but look nice. We have discussed notches, different ways to cut them, and how to do it safely. Adding finishing touches, like smoothing rough edges and adding color, makes projects even better.
Following steps like marking where to cut, cutting, making adjustments when needed, and finishing up helps ensure everything turns out just right. And remember, practicing and trying new things is critical to getting better and having fun.
So, whether you’re building furniture, making houses, or simply being creative with other wood projects, learning how to cut notches opens up a world of possibilities. Remember, every project is a chance to learn and grow. So, keep at it, stay safe, and enjoy the woodworking journey.
How to Hollow Out Wood With A Router
Hollowing out a log means scooping out the inside to make a space. People often do this in woodworking and crafting to change solid logs into functional or pretty things. Hollowed-out logs are super handy for lots of stuff.
You can use them as natural containers for plants or tools. They also make great bases for furniture, like tables or seats. Some folks even use them in building houses or for making rustic decorations.
One cool thing about hollowing out logs is that you can make each one special. You can customize and change them to fit exactly what you need or how you want them to look.
But it’s about more than just being helpful. Hollowed-out logs have a unique charm. They bring a cozy, natural feeling to indoor and outdoor spaces. Their rough, natural look adds a bit of nature to your home, making it warm and welcoming.
Overall, hollowed-out logs are excellent for woodworking and decorating. They’re practical and pretty, adding a natural touch to any place.
Preparation and Safety Measures
Selecting a Suitable Log:
Before diving into hollowing out a log, take your time to choose the perfect one for your project. Look for a strong and solid log without any cracks or rot. It’s also essential to consider the size and shape of the log.
Ensure it’s big enough and has the correct dimensions to fit your desired hollowed-out space. You want to avoid ending up with a log that is too small or the wrong shape for what you have in mind.
Preparing the Workspace:
Getting your workspace ready is critical to a successful hollowing process. Start by clearing out any clutter or obstacles that might get in your way. You’ll need enough space to move around the log comfortably and work safely.
If you’re working indoors, laying down some protective coverings to catch sawdust or debris is a good idea. This will help keep your workspace clean and make cleanup easier later on. Taking the time to set up your workspace correctly will make the hollowing process smoother and more efficient.
Safety Equipment and Precautions:
Safety should always be a top priority when working with woodworking tools. Wear appropriate personal protective equipment, including safety glasses and goggles to protect your eyes from flying materials like debris and harm, and ear protection if using loud power tools.
Wear your gloves to protect your hands from splinters and cuts. When using power tools such as drills or routers, follow the manufacturer’s safety guidelines and ensure tools are correctly maintained and in good working condition. Keep your hands and fingers away from moving parts, and be mindful of potential hazards such as sharp edges or protrusions on the log.
Tools and Materials Needed
Essential Tools for Hollowing Out a Log:
- Chainsaw or Handsaw: For initial cutting and shaping of the log.
- Drill with Forstner or Spade Bits: For removing bulk material and creating starter holes.
- Chisels and Mallet: For refining the interior shape and removing material.
- Gouges or Hollowing Tools: For carving out the hollow cavity with precision.
- Sandpaper or Sanding Tools: For smoothing rough surfaces and achieving a polished finish.
- Measuring Tape and Marking Tools: For marking dimensions and guiding the hollowing process.
Optional Tools for Specialized Tasks:
- Router with Specialty Bits: For creating intricate designs or patterns within the hollowed-out space.
- Power Carving Tools: These are rotary or carving machines for more efficient removal of material.
- Wood Burning Tool: Adding decorative accents or detailing to the interior surfaces.
- Lathe: For turning the log and hollowing out cylindrical shapes with precision.
- Drawknife or Spokeshave: For shaping and smoothing surfaces with curved or irregular contours.
Materials for Finishing and Sealing the Hollowed-Out Log:
- Wood Finish or Sealant: Protect interior surfaces from moisture and damage.
- Wood Filler: For filling any cracks or imperfections in the log.
- Paint or Stain: For adding color or enhancing the natural beauty of the wood.
- Varnish or Polyurethane: For providing a durable and glossy finish.
- Protective Gear: Use gloves and masks for safety when applying finishes and sealants.
Hollowing Out Process
Marking the Desired Shape and Dimensions:
Start by marking the shape and dimensions of the hollowed-out area on the log’s surface. Use a measuring tape and drawing tools to outline the desired size and shape of the cavity. Take into account any specific design or functional requirements for your project.
Initial Removal of Material:
Begin the hollowing process by removing bulk material from the marked area. Use a chainsaw or handsaw to make initial cuts along the outline of the cavity. Then, use a drill with forstner or spade bits to create starter holes within the marked area, facilitating easier material removal.
Refining the Interior Shape and Surface:
Once the bulk material is removed, refine the interior shape and surface of the hollowed-out area. Use chisels, gouges, or hollowing tools to carve the cavity precisely, following the marked outline. Work slowly and methodically, removing material in layers to achieve the desired depth and shape.
Checking for Uniform Thickness and Smoothness:
After hollowing out the log, carefully inspect the interior surfaces for uniform thickness and smoothness. Use sandpaper or sanding tools to smooth rough areas and achieve a consistent surface texture. Check for any uneven spots or irregularities and make necessary adjustments to ensure uniform thickness and smoothness throughout the hollowed-out area.
Finishing Touches
Sanding and Smoothing the Interior Surfaces:
After hollowing out the log, sanding and smoothing the interior surfaces is essential to achieve a polished finish. Use sandpaper or sanding tools to remove rough spots or unevenness, paying attention to corners and edges. Work gradually, starting with coarse-grit sandpaper and progressing to finer grits for a smooth and even surface.
Applying Finishes or Sealants for Protection:
To protect the interior surfaces of the hollowed-out log from moisture, damage, and wear, apply finishes or sealants. Choose a suitable wood finish or sealant tak,e note, and follow the manufacturer’s instructions for application and process. Apply the finish evenly and balance with a brush or cloth, ensuring complete coverage of the interior surfaces. Allow the finish to dry thoroughly before proceeding to the next step.
Optional Decorative Enhancements:
Consider incorporating optional decorative enhancements to the hollowed-out log for added aesthetic appeal. This could include wood-burning designs, carving intricate patterns, or adding inlays or accents. Use specialized tools and techniques to create unique and personalized decorative elements that complement the project’s overall design.
Tips and Techniques for Success
Maintaining Control and Stability while Hollowing:
To ensure precise and controlled hollowing, maintain a firm grip on your tools and the log throughout the process. Use steady and controlled movements to remove material, avoiding sudden or jerky motions that could result in mistakes or accidents.
Consider securing the log using clamps or other stabilizing methods to prevent it from shifting or rolling during hollowing.
Preventing Cracks and Splits in the Log:
To prevent cracks and splits from forming in the log during hollowing, pay attention to the direction of the wood grain and work with it whenever possible.
Avoid cutting across the grain, as this can weaken the wood and increase the risk of cracking. Work slowly and gradually, removing material in small increments to minimize stress on the wood fibers. Stop immediately and reassess your approach before continuing if you notice any signs of cracking or splitting.
Achieving Desired Thickness and Shape:
Work methodically and consistently throughout the hollowing process to achieve the desired thickness and shape of the hollowed-out area.
Use measuring tools to periodically check the depth and dimensions of the cavity, ensuring it meets your specifications.
Take your time to refine the shape and surface of the cavity, removing material gradually until you reach the desired thickness and shape. Make adjustments as needed to maintain uniformity and symmetry in the final product.
Troubleshooting Common Issues
Dealing with Knots or Irregularities in the Log:
When encountering knots or irregularities in the log while hollowing, exercise caution and adjust your approach accordingly. Workaround knots by adjusting the shape or location of the hollowed-out area.
Use specialized tools such as gouges or chisels to carefully remove material around knots, taking care not to damage the surrounding wood. Alternatively, consider incorporating knots or irregularities as unique features or decorative accents.
Repairing Cracks or Imperfections:
If cracks or imperfections occur during the hollowing process, take note and address them promptly to prevent further damage and maintain structural integrity.
Use wood filler or epoxy resin to fill cracks and imperfections, following the manufacturer’s instructions for application and drying times.
Once filled and dried, sand the repaired areas smoothly to blend seamlessly with the surrounding wood. Consider reinforcing the affected regions with additional support or reinforcement for larger cracks or structural issues.
Adjusting for Unexpected Changes in the Log’s Characteristics:
Sometimes, unexpected changes in the log’s characteristics, such as grain direction or density changes, may occur during the hollowing process.
Stay flexible and adaptable for your approach as needed to accommodate these changes. Use lighter pressure and slower movements when encountering denser wood areas, and adjust your tools and techniques accordingly to maintain control and precision.
If necessary, make minor modifications to your design or dimensions to account for any deviations from the original plan.
Application and Use of Hollowed-Out Logs
Creative Uses in Woodworking and DIY Projects:
Hollowed-out logs offer endless possibilities for creativity in woodworking and do-it-yourself (DIY) projects.
They can be transformed into unique art pieces, such as sculptures or centerpieces, by carving intricate designs or patterns into the interior surfaces. Hollowed-out logs can serve as bases or containers for creative installations, such as indoor or outdoor plant displays, fairy gardens, or natural water features.
Functional Applications in Furniture, Decor, and Outdoor Structures:
Hollowed-out logs are highly versatile and can be incorporated into various functional applications in furniture, decor, and outdoor structures.
They make excellent bases for furniture pieces, such as coffee tables, stools, or benches, adding a rustic and natural touch to interior spaces. In outdoor settings, hollowed-out logs can be used as planters, birdhouses, or outdoor seating, blending seamlessly with natural surroundings and enhancing the aesthetic appeal of gardens or landscapes.
Additionally, hollowed-out logs can be utilized in architectural designs, such as log cabins or shelters, providing structural support and visual interest.
Environmental Considerations and Sustainability:
From an environmental perspective, hollowed-out logs offer sustainable solutions by repurposing natural materials and minimizing waste.
Using salvaged or reclaimed logs, woodworkers can reduce the demand for new timber and promote sustainable forestry practices.
Hollowed-out logs can serve as habitat for wildlife, providing shelter and nesting sites for birds, insects, and small mammals. When selecting logs for hollowing, consider sourcing materials from responsibly managed forests or reclaimed sources to minimize environmental impact and support conservation efforts.
Conclusion
Hollowing out a log involves some main steps. First, you must pick the correct log and prepare your workspace. Then, you use the proper tools to carve out the inside of the log. It’s crucial to be safe, stay steady, and fix any problems like knots or cracks that pop up.
Woodworking is all about being creative and trying new things. Woodworkers are encouraged to explore their imagination and experiment with different ideas when working with hollowed-out logs. Trying new stuff can lead to making excellent and unique pieces that show off your style and skill.
Hollowed-out logs are super helpful and look great, too. They can be used for many things, like furniture or art pieces. They have a natural, cozy vibe that adds charm to any space, whether inside or outside. Using hollowed-out logs lets you be creative and make things that bring nature’s beauty into your home.
Whether indoors or outdoors, hollowed-out logs add warmth, character, and a touch of nature to any space, enriching the environment and enhancing the overall aesthetic.
Best Wood Routers Under $100
Finding a good quality wood router under $100 can be extremely difficult these days. While there are several available if you look hard enough, they may not always be the best option for heavy-duty use or professional applications. Remember, you get what you pay for, so a router for less than $100 is generally going to be for smaller jobs and DIY projects.
Don’t get me wrong, these routers can certainly do the job and serve you well, I’m just saying it’s tough to find a wood router in that price range…
Here are some options to keep in mind, their specifications, along with some pros and cons:
Makita RT0701C 1-1/4 HP Compact Router:
Features:
- Variable speed control dial (10,000 to 30,000 RPM) for precise adjustments.
- Smooth rack and pinion fine depth adjustment system.
- Slim and ergonomically designed body for comfort and control.
- This router provides 6.5 amps of power and generates a maximum of 1.25 HP. It’s suitable for various profile cuts and guided work of shallow and medium depths.
Pros:
- Variable speed dial for versatility.
- Additional base options available (plunge base and tilt-base).
- Quick-release cam lock for depth adjustments.
Cons:
- The straight guide won’t connect to all available bases (e.g., plunge base).
- Some bits may become loose during work.
Bosch PR20EVS Colt 1-Horsepower 5.6 Amp Electronic Variable-Speed Palm Router:
Features:
- 1.0 Horsepower motor with speeds from 16,000 to 35,000 RPM.
- Straight edge guide for precise routing.
- Angled cord exit to keep the cord out of the way.
- Ideal for signs and detailed work.
- Soft Start: Provides a smooth and controlled start, reducing torque during startup.
- Depth Adjustment System: Allows both macro and micro adjustments for precise routing depths. Quick and tool-less adjustments for convenience.
- Neoprene-Sheathed Power Cord: The 10-foot long SJ-type cord is tough, pliable, and resistant to cold conditions. Angled reinforcement boot keeps the cord out of the way during routing.
- Versatility: Ideal for tasks like flush-trim routing, roundovers, chamfering, and profiling edges.
- Compatible with various accessories
Pros:
Variable Speed Motor:
- The variable speed feature is handy for different woodworking applications.
- Allows customization based on the task at hand.
Lightweight and Well-Balanced:
- The Colt is comfortable to use, even during extended periods.
- Its balance ensures better control and precision.
Accessories Available:
- Numerous useful accessories are compatible with the Colt.
- Enhances its versatility and functionality.
Cons:
Shaft Lock Button Challenges:
- Some users find the spindle lock button difficult to operate.
- May require extra effort to lock the spindle.
Non-Transparent Aluminum Base:
- The base is not see-through, which can affect visibility during routing.
- Users need to rely on external guides or markings.
Depth Adjustments Can Be Tricky:
- Fine and coarse depth adjustments may be confusing for some users.
- Requires careful attention to achieve the desired routing depth.
PORTER-CABLE Router, 4.5-Amp, Single Speed 31,000 RPM (PCE6430):
Features:
- 4.5-amp motor with a single speed of 31,000 RPM.
- Lightweight and compact design.
- Ideal for basic routing tasks.
Pros:
- Compact and lightweight: This router is easy to handle and maneuver, making it suitable for detailed work and tight spaces.
- Powerful motor: The 4.5 amp motor provides enough power for laminate trimming, small edge forming, and hinge routing applications.
- Easy to use: With a single speed and a simple design, this router is ideal for beginners or those who need a straightforward tool for occasional use.
- Affordable: This router is priced under $100, making it a budget-friendly option.
Cons:
- Limited speed control: The single-speed design restricts its versatility for working with different materials.
- Limited depth adjustment: The plastic depth adjustment mechanism may not be as precise or durable as higher-end models.
- No LED light: Low visibility can be an issue, especially when working in dimly lit areas.
- Not ideal for heavy-duty tasks: Due to its lower power and limited adjustability, this router may not be suitable for larger projects or hard materials.
Ryobi P601 One+ 18V Lithium Ion Cordless Fixed Base Trim Router:
Features:
- Cordless design (requires Ryobi One+ battery, sold separately).
- Fixed base for stability.
- LED lighting for improved visibility.
- Great for small projects and trimming.
Pros:
- Cordless convenience: Eliminates the hassle of dealing with cords, offering greater portability and maneuverability around your workspace.
- Affordable: Priced under $100 for the bare tool (battery and charger sold separately), making it a budget-friendly option for basic routing needs.
- Compact and lightweight: Easy to handle and use, especially for smaller projects and tight spaces.
- Ryobi One+ battery compatibility: Works with Ryobi’s 18V One+ battery system, which can be used with other Ryobi One+ tools if you already own them.
- Tool-free depth adjustment: Allows for quick and easy adjustments during operation.
- LED work light: Illuminates the work surface for better visibility.
Cons:
- Limited power: While sufficient for soft to medium woods, it might struggle with harder materials or deeper cuts.
- Not ideal for heavy-duty projects: This router may not be powerful enough for demanding tasks that require extended use or precise control.
- Single speed: Lacks the versatility of variable speed control, which can be crucial for working with different materials.
- No dust port: Requires a separate dust collection system to manage sawdust, which can be a nuisance.
- Limited base compatibility: The unique bolt pattern on the base might not be compatible with some router plates.
- Battery and charger not included: Needs to be purchased separately, adding to the overall cost.
Ryobi 8.5 Amp 1-1/2 HP Fixed Base Router (Green):
Features:
- 8.5-amp motor with 1-1/2 HP.
- Fixed base design.
- Suitable for various woodworking tasks.
Pros:
- Affordable: Compared to professional routers, this Ryobi model offers a decent power rating at a considerably lower price point.
- Powerful motor: The 8.5 amp motor delivers enough power for various routing tasks, including laminate trimming, edge forming, and even light plunging applications.
- Durable construction: The die-cast aluminum base provides stability and accuracy during operation.
- Easy to use: Features like micro-adjustments for depth and a comfortable grip make it user-friendly, especially for DIYers and hobbyists.
- Comes with basic accessories: Often includes a carrying case and starter router bits in the kit, eliminating the need for immediate additional purchases.
Cons:
- Limited to fixed base: This model cannot be plunged into the material, restricting its use to straight cutting applications.
- Lacks variable speed: Only one speed setting might limit its versatility for working with various materials and achieving optimal results.
- Corded design: While powerful, the corded nature restricts mobility and requires access to an outlet.
- Bulkier and heavier: Compared to smaller trim routers, it might be less suitable for intricate work or tight spaces.
- Limited dust collection: Doesn’t have a dust port for direct connection to a vacuum, requiring separate dust management solutions.
Conclusions:
The routers mentioned above are great options for someone on a tighter budget, as well as for:
- DIY enthusiasts and hobbyists: Looking for a powerful and affordable router for various routing tasks around the house or workshop.
- Straight cutting applications: Well-suited for projects requiring precise straight cuts, edge forming, or light decorative routing.
However, it might not be ideal for:
- Professional use: May lack the precision, versatility, and dust collection capabilities needed for continuous heavy-duty applications.
- Intricate work: The bulkier size and fixed base design might make it less suitable for delicate projects or tight spaces.
- Advanced routing techniques: The single speed setting limits fine-tuning cuts for different materials.
If you’re a DIYer or hobbyist tackling projects that require a step up from a basic trim router, any of the models offer a balance of power, affordability, and user-friendliness. However, for professional applications or tasks demanding more control and dust management, consider investing in a router with variable speed, plunge functionality, and dust collection capabilities.
- What are the Best DeWALT Routers? – Here are the Details
- How to Use a Palm Router
- How to Plane Wood With A Router
- How to Make a Router Sled
- Types of Brad Nail Guns
- How to Oil a Brad Nailer
- How to Install (or Insert) a Router Bit
- How to Chamfer Wood With a Router
- Finding the Perfect Table Saw – Five Brands Reviewed and Explained
- Carving the Future: A Review of the Best CNC Routers
- Nailing It: The Best Brad Nailers for Your Woodworking Projects
- What are the Best 3HP Routers?
- How to Make a DIY Router Sled
- Nail Gun Basics: How to Load a Brad Nailer
- How to Load a Staple Gun
- Mastering the Craft: How to Build a DIY Router Table Fence
- How to Cut a Square Hole With a Router
- Notching Techniques: How to Cut Perfect Notches in Wood
- How to Hollow Out Wood With A Router
- Best Wood Routers Under $100
- How to Make a Wooden Sign with a Router
- How to Use a Router Straight Edge Guide
- The Best Plunge Routers: A Review and Comparison Guide
- Router Circle Cutting Jigs
- Maximizing Efficiency with the Dewalt Router Table