Uncategorized
What are the Best DeWALT Routers? – Here are the Details
Looking for a new router? These are the top-rated DeWALT routers available today.
If you are in the market for a new router, there are several important factors to consider. Before we get to the reviews, let’s explore some of the details.
Motor Power: The motor is the heart of a router. Look for a motor size that suits your needs. Routers typically range from 1/2 to 3 horsepower (hp) or more. For delicate work, consider a smaller motor. Larger motors can be unwieldy and challenging for intricate tasks.
Base Type: Routers come in different base types:
Fixed Base: Ideal for edge profiling and shaping.
Plunge Base: Great for joinery (dadoes, rabbets, mortise-and-tenons).
Trim Router: Compact and suitable for flush trimming and hinge mortising.
Variable Speed Control: Having a router with adjustable speed settings allows better control and adaptability. Different woodworking tasks require varying speeds, so choose a router with this feature.
Applications: Consider the projects you’ll be working on:
Edge Profiling or Shaping: Achieved with appropriate router bits (roundovers, chamfers).
Joinery: Routers excel at cutting joints (dadoes, rabbets, mortise-and-tenons).
Flush Trimming: Used to make one piece flush with another.
Hinge Mortising: Speeds up hinge installation.
Inlays: Create impressive decorative features.
Accessories:
Fence Guide: Allows parallel routing along an edge for rabbets or dadoes.
Templates or Jigs: Unleash the router’s versatility (letter carving, angled joinery).
Space and Comfort: Consider the available space in your workshop. Some routers are more compact than others. Choose a router that feels comfortable to handle during extended use.
DEWALT 20V Max XR Cordless Router (DCW600B):

This cordless router features a brushless motor and dual LED lights to illuminate your work surface.
It has a depth adjustment ring for easy height adjustments and a variable speed dial.
The soft start motor maintains speed during cuts, and it’s compatible with 20V Max XR batteries1.
The DEWALT 20V Max XR Cordless Router (DCW600B) is a versatile tool that combines the power of a corded compact router with the convenience of cordless operation. Here are some key features and details about this router:
Powerful Performance: The DCW600B provides power similar to a corded compact router, making it suitable for various woodworking tasks. It’s equipped with a brushless motor for efficient performance.
Dual LED Lights: The router features dual LED lights that illuminate your work surface. This ensures better visibility, especially when working in dimly lit areas.
Variable-Speed Dial: The variable-speed dial allows you to adjust the router’s speed according to the specific application. Whether you need precise control for delicate cuts or faster speeds for larger tasks, this feature ensures flexibility.
Depth Adjustment Ring: The depth adjustment ring enables fast and easy height adjustments. You can set the desired depth quickly, allowing for efficient routing.
Fixed Base Design: The plastic fixed base provides stability during operation. It’s lightweight and easy to handle, making it suitable for both beginners and experienced woodworkers.
Battery Compatibility: The DCW600B is part of the DEWALT 20V Max XR system, which means it’s compatible with other 20V Max XR batteries and chargers.
Bit Visibility: The dual LEDs not only illuminate the work surface but also enhance bit visibility. You’ll have a clear view of the router bit and the area you’re working on.
Overall, the DEWALT 20V Max XR Cordless Router (DCW600B) is a reliable choice for woodworking projects, whether you’re a professional or a DIY enthusiast. Keep in mind that it’s a tool-only option, so you’ll need to have compatible batteries and chargers from the DEWALT 20V Max XR system
DEWALT Fixed Base Router (DW618B3):
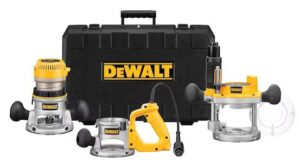
The DW618B3 is a powerful fixed base router with a 2-1/4 HP motor.
It offers precise depth adjustments and comes with three different bases for versatility2.
The DEWALT DW618B3 is a powerful router kit that offers versatility and precision. Here are the key features of this three-base router kit:
Motor Power: The DW618B3 features a 12.0 Amp electronic variable speed motor with a maximum motor HP of 2-1/4 HP. This robust motor allows you to route smoothly through even the toughest hardwoods.
Three Bases: The kit includes three bases: Fixed Base: Ideal for stable and precise routing.
Plunge Base: Allows controlled plunge cuts and depth adjustments.
D-handle Base: Provides comfortable handling and control during operation.
Variable Speed Control: The electronic variable speed motor offers a range from 8,000 to 24,000 rpm. You can adjust the speed based on your specific routing needs.
Soft Start: The soft start feature reduces start-up torque, enhancing overall control. It ensures a smooth and controlled start, especially when working with delicate materials.
Depth Adjustments: The DW618B3 allows for precise depth adjustments. Achieve accurate routing depths for various tasks.
Easy Motor Pack Removal: Changing router bits or bases is hassle-free with the fast and easy motor pack removal design.
Dust Control Integration: Keep your workspace cleaner with efficient dust control features.
Whether you’re a professional woodworker or a DIY enthusiast, the DEWALT DW618B3 Three Base Router Kit provides the flexibility and power needed for a wide range of woodworking projects. Its durable construction and thoughtful design make it a reliable choice for both beginners and experienced usersThe DEWALT DW618B3 is a powerful router kit that offers versatility and precision. Here are the key features of this three-base router kit:
DEWALT 1-1/4-HP Trim Router (DWP611):


This compact trim router is perfect for smaller tasks.
It features variable speed control and a soft start motor for smooth operation2.
The DEWALT DWP611 is a compact router designed for precision and versatility. Here are some key details about this router:
Powerful Motor: The DWP611 features a 1-1/4 HP motor that delivers ample power for various woodworking applications. Whether you’re working on trim, edging, or intricate designs, this router can handle it.
Variable Speed Control: The router offers variable speed control, allowing you to optimize the bit speed for different tasks. Adjust the speed based on the material you’re routing and the type of bit you’re using.
LED Lights: Dual LED lights illuminate the work area, providing maximum visibility. You’ll have a clear view of your workpiece and the router bit, even in dimly lit spaces.
Soft-Starting Motor: The soft-starting motor ensures a smooth and controlled start. It maintains consistent speed throughout the cut, enhancing precision.
Electronic Feedback: The router features full-time electronic feedback that monitors and maintains motor speed. This feedback system ensures stability during operation.
Bit Compatibility: The extended, 8-slot, 1/4-inch collet maximizes surface contact with the router bit shank for a secure grip. You can easily swap out bits using the multiple shaft-lock detents.
Durable Construction: The DWP611 has an aluminum motor housing and base, providing long-term durability. It’s built to withstand rigorous use in the workshop.
In summary, the DEWALT DWP611 is a reliable and user-friendly compact router, making it a favorite among woodworkers for its performance and ease of control
DEWALT DW618PKB Fixed Base/Plunge Router Kit:

This kit includes both fixed base and plunge base routers.
It’s a versatile option for various woodworking projects2.
The DEWALT DW618PKB Fixed Base/Plunge Router Kit is a versatile and powerful tool designed for woodworking enthusiasts and professionals. Let’s dive into the details:
Motor Power: The DW618PKB features a 12.0 Amp electronic variable speed motor with a maximum motor HP of 2-1/4 HP. This robust motor allows you to route smoothly through even the toughest hardwoods.
Two Bases in One Kit: This kit includes both a fixed base and a plunge base, giving you the flexibility to tackle a wide range of applications. The fixed base provides stability for precise routing, while the plunge base allows controlled plunge cuts and depth adjustments.
Precise Depth Adjustments: The micro-fine depth adjustment ring enables precise depth changes in increments as small as 1/64 inch. Achieve accurate routing depths for various tasks, whether you’re working on edges, grooves, or intricate designs.
Fast and Easy Motor Pack Removal: Changing router bits or bases is hassle-free with the quick-release motor latches. Swap out bits or bases without any fuss.
Integral Dust Collection: The plunge base features an integral dust collection system that collects up to 95% of dust. This not only keeps your workspace cleaner but also provides superior bit visibility.
Electronic Variable Speed Control: Adjust the router’s speed from 8,000 to 24,000 RPM using the electronic variable speed control. The soft start feature reduces start-up torque for enhanced control.
Additional Accessories:
The DW618PKB Wood Router Combo Kit includes:
DW618M motor pack
DW6184 fixed base
DW6182 plunge base
1/4-inch and 1/2-inch collets
Wrench
Large hole sub-base
Vacuum adapter
Soft carry bag
In summary, the DEWALT DW618PKB Fixed Base/Plunge Router Kit provides power, precision, and versatility for your woodworking projects. Whether you’re a seasoned woodworker or just starting out, this kit has you covered
DEWALT 3-HP Variable Speed Router:

With a powerful 3-HP motor, this router can handle heavy-duty tasks.
It offers variable speed control and precise depth adjustments2.
The DEWALT 3-HP Variable Speed Router is a powerful tool designed for woodworking professionals and enthusiasts. Let’s explore its features:
Professional-Grade Motor: The DWE625 boasts a 3 peak HP electronic variable speed motor that delivers smooth and reliable performance. With a powerful 15 Amp motor, it can handle tough routing applications.
Precise Depth Adjustments: Achieve accurate results with the micro-fine depth stop adjuster. The 3-stage adjustable turret and micro-fine height adjustment allow quick and precise setup.
Variable Speed Control: Match the router’s speed to your specific application with a range of 9,000 to 22,000 no-load RPM. The variable speed dial ensures flexibility during different routing tasks.
Magnified Scale: The magnified scale enhances visibility and helps you make precise adjustments.
Bit Compatibility: The DWE625 can safely accommodate bits as small as 1 inch and as large as 3.5 inches. Its full-wave electronic variable speed range ensures optimal performance.
Phosphorus Bronze Bushings: These bushings contribute to the router’s durability and smooth operation.
Fine Bit Depth Adjuster: Fine-tune your routing depth with ease using the bit depth adjuster.
In summary, the DEWALT 3-HP Variable Speed Router (DWE625) is a workhorse that combines power, precision, and ease of use. Whether you’re shaping edges, creating grooves, or executing intricate designs, this router has you covered
DEWALT Plunge Base Variable Speed Router:

The plunge base design allows for controlled and precise routing.
It’s suitable for both beginners and experienced woodworkers2.
The DEWALT Plunge Base Variable Speed Router is a versatile tool designed for precision routing. Let’s explore its features:
Motor Power: The plunge router features a 1.25 HP motor that delivers ample power for various woodworking tasks. Whether you’re creating intricate designs, making plunge cuts, or shaping edges, this router can handle it.
Variable Speed Control: The variable speed feature allows you to optimize the bit speed for different applications. Adjust the speed based on the material you’re routing and the type of bit you’re using.
Soft-Starting Motor: The soft-starting motor ensures a smooth and controlled start. It maintains consistent speed through the cut, enhancing precision.
Dual LED Lights and Clear Sub-Base: The router is equipped with dual LED lights for maximum visibility during operation. The clear sub-base further enhances visibility, allowing you to see your workpiece and the router bit clearly.
Adjustment Ring for Controlled Bit Depth: The plunge base incorporates an adjustment ring that enables precise bit depth changes. Achieve accurate routing depths within 1/64 inch (fixed base only).
Fine-Tune Adjustment Rod: The plunge base includes a fine-tune adjustment rod for precise depth settings. Whether you’re working on inlays or mortises, this feature ensures accuracy.
Large, Low-Pressure Spindle Lock Button: Changing router bits is comfortable and convenient with the large spindle lock button. You can perform single-wrench bit changes effortlessly.
In summary, the DEWALT Plunge Base Variable Speed Router is a reliable choice for both beginners and experienced woodworkers. Its combination of power, precision, and ease of use makes it a valuable addition to any workshop!
DEWALT 1-3/4-HP Fixed Base Router:


This router provides consistent performance and ease of use.
It’s a reliable choice for various woodworking applications2.
The DEWALT 1-3/4-HP Fixed Base Router (DW616) is a reliable tool for woodworking tasks. Here are the key features of this router:
Motor Power: The DW616 is equipped with an 11.0 amp motor, providing the power needed to rout smoothly through even the toughest hardwoods. With a maximum motor HP of 1-3/4 HP, it’s suitable for various applications.
Micro-Fine Depth Adjustment: The micro-fine depth adjustment ring allows precise depth changes in increments as small as 1/64 inch. You can achieve accurate routing depths for different tasks.
Vertical Adjustment: The depth adjustment ring also adjusts vertically, ensuring a consistent switch/cordset location. This feature enhances convenience during operation.
Tool-Free Steel Motor Cam Lock: Changing the depth or base is quick and solid-locking thanks to the adjustable, tool-free steel motor cam lock. You can make adjustments efficiently without the need for additional tools.
Fast Motor Pack Removal: The DW616 facilitates fast and easy motor pack removal for bit and base changes. Swap out bits or bases with minimal effort.
Durable Construction: Built with durability in mind, the DW616 is designed to withstand rigorous use in the workshop.
Whether you’re a professional woodworker or a DIY enthusiast, the DEWALT DW616 1-3/4-HP Fixed Base Router provides the performance and precision you need for your woodworking projects.
How to Use a Palm Router
Introduction to Palm Routers
There has always been a debate about whether or not you need a full-size router versus the smaller trim router or palm router. While the full-size router is definitely the more powerful and versatile tool, the trim router can definitely be an essential addition to any workshop or DIYer’s toolkit.
The trim router, despite being smaller and more compact that a full sized router, packs a surprising punch. This tool has become a favorite among casual DIYers, hobbyists, and even professional carpenters for its ease of use, precision, and ability to tackle a wide range of tasks with ease. From flush trimming and freehand sign making to adding decorative edges, the trim router is a true jack-of-all-trades in the woodworking world.
While full-size routers excel at heavy-duty tasks and large-scale projects, the trim router does quite well in its portability and maneuverability. It is an great choice for intricate work, tight spaces, and projects that need a more delicate touch. With its lightweight and ergonomic design, the trim router offers a level of control and comfort that can be particularly appealing to beginners or those with limited strength or dexterity.
Key Features and Benefits
Portability and Ease of Use: One of the biggest advantages of trim routers is their remarkable portability and ease of use. Weighing in at only a few pounds, these compact tools are incredibly lightweight and ergonomically designed, making them comfortable to operate for extended periods. Their small size and sleek profiles allow for easy maneuverability, enabling users to access tight spaces and work on intricate details with precision. Whether you’re a seasoned professional or a DIY enthusiast, the trim router’s user-friendly nature makes it an excellent choice for those seeking a tool that minimizes fatigue and maximizes control.
Versatility in Applications: Despite their compact size, trim routers boast an impressive versatility that belies their modest stature. These multi-talented tools can tackle a wide array of tasks, from flush trimming and edge forming to freehand sign making and even small-scale joinery work. With the ability to accept a variety of specialized bits, trim routers can be adapted to suit virtually any woodworking project, making them an indispensable addition to any well-equipped workshop or DIY arsenal.
Precision and Adjustability: Precision and control are paramount in woodworking, and trim routers excel in delivering both. These tools often feature adjustable speed settings, allowing users to fine-tune the router’s performance to match the specific demands of the material and the task at hand. Furthermore, the compact size and lightweight design of trim routers allow precise handling, enabling users to execute intricate cuts and patterns with remarkable accuracy. Many models also offer micro-adjustment capabilities, giving you the ability to make minute tweaks for truly flawless results.
Practical Applications
Flush Trimming: One of the trim router’s best uses is flush trimming. This involves trimming the edge of one material so that it is perfectly flush with another. An example of this would be when working on a laminated countertop or veneered piece, the trim router, equipped with a flush-trim bit, can easily remove excess material, leaving behind a smooth, even surface. This application not only exemplifies the router’s precision but also its ability to handle detailed work with ease, making it a great tool for finishing touches.
Freehand Sign Making: For those with an artistic side, trim routers open up a world of possibilities in freehand sign making and creative woodworking projects. By using specialty lettering bits and following freehand templates or stencils, crafters can effortlessly carve beautiful signs, plaques, and decorative pieces from wood. The trim router’s lightweight design provides the maneuverability needed for these intricate carving tasks.
Decorative Edges: Trim routers are great at adding decorative flair to otherwise ordinary woodworking projects. By swapping in specialized edge beading or molding bits, users can quickly and easily dress up plain edges with beautiful profiles and accents. From simple roundovers to elaborate cove cuts, these versatile tools allow DIYers to incorporate decorative touches that take their projects to the next level.
Beyond these popular uses, trim routers also excel at smaller-scale tasks like hinge mortising, creating custom moldings and edge treatments, and even basic joinery work like cutting rabbets or dadoes on smaller workpieces. Their portability and precision make them perfectly suited for a wide range of intricate routing applications.
Here is a great video from Woodworkers Guild of America
Buying Guide and Usage Tips
With so many trim router models on the market, it can be challenging to determine which one best meets your needs. Choosing the right trim router can make all the difference in your woodworking and DIY projects.
Power and Speed
The motor’s power, usually measured in amps, is a critical factor to consider. Most trim routers range from 5 to 9 amps. While a higher amp rating generally means more power for cutting through tougher materials, it’s also essential to look for a router with variable speed control. This feature allows you to adjust the speed based on the bit size and material, enhancing the tool’s versatility and the quality of the finish. Speeds typically range from 10,000 to 30,000 RPM, with variable speed routers offering the flexibility to tackle a wide range of tasks.
Ergonomics and Design
The physical design of the trim router greatly affects its usability. Look for models with ergonomic grips and a lightweight design to reduce fatigue during extended use. The tool should fit comfortably in your hand, providing control and stability as you work. Additionally, consider models with a clear base or LED lighting, as these features greatly improve visibility, ensuring precision in your cuts.
Depth Adjustment
Precision depth adjustment is another crucial feature, allowing for accurate control over the bit’s penetration into the material. Look for a trim router with an easy-to-use depth adjustment system that offers both macro and micro adjustments. This feature is particularly important for tasks requiring high precision, such as creating intricate inlays or detailed edge profiles.
Dust Collection
Woodworking can generate a significant amount of dust, which not only creates a mess but can also be hazardous to your health. A trim router with an effective dust collection system can help keep your workspace clean and reduce airborne particles. While not all models come with built-in dust collection, those that do—or at least offer an attachment option—can be a good choice for both cleanliness and health reasons.
Accessories and Compatibility
Consider what comes with the trim router and what additional accessories are available. A model that includes a variety of bases, such as a plunge base or tilt base, offers greater versatility. Additionally, check the compatibility with different bits and whether the router accepts standard sizes, particularly if you already own bits you’d like to use. Some routers are designed exclusively for ¼-inch shank bits, while others may accommodate both ¼-inch and ½-inch sizes.
Price and Brand
Trim routers are available across a wide price range, from budget-friendly models to high-end professional units. Determine your budget beforehand, but also consider the tool’s durability and the reputation of its manufacturer. Investing a bit more in a reputable brand can lead to better performance, longer tool life, and access to customer support and spare parts.
Selecting the right trim router involves balancing power and precision with comfort and versatility. By considering these key factors, you can choose a tool that not only meets your current needs but also grows with you as your skills and projects evolve. In the next section, we’ll share some tips on using your trim router safely and effectively to achieve the best results in your woodworking endeavors.
Overcoming Limitations
While trim routers offer an impressive array of capabilities, they do have some inherent limitations that users should be aware of. One of the primary constraints is the restriction to 1/4-inch shank router bits. This smaller bit size, while contributing to the router’s compact design and ease of use, also limits the scope of projects and materials that can be effectively worked.
Larger 1/2-inch shank bits, commonly used in full-size routers, have greater mass and cutting surface area, making them better suited for hogging out large amounts of material or tackling heavy-duty tasks like mortising or cutting deep grooves. The 1/4-inch bits used in trim routers simply lack the heft and cutting area for such demanding applications.
However, this limitation can often be mitigated by taking a multi-pass approach or roughing out the bulk of material removal with another tool before using the trim router for final shaping and detailing. Additionally, some manufacturers offer base plate accessories that increase the trim router’s stability and control, allowing for safer use of larger diameter bits when needed.
Another potential drawback is the relatively low maximum cutting depth of trim routers compared to full-size models. Most are limited to a 1-inch maximum cut depth, restricting larger-scale plunge routing operations. For projects requiring deeper plunge cuts, a full-size router may be a more appropriate choice.
Despite these constraints, trim routers remain incredibly versatile tools that can handle the vast majority of routing tasks encountered in hobby woodworking, cabinetry, and general DIY projects. By understanding their capabilities and working within their limitations, users can maximize their effectiveness while avoiding excessive strain that could risk bit breakage or loss of control.
Conclusion
The world of woodworking and DIY is constantly evolving, with new tools and techniques emerging to meet the needs of hobbyists and professionals alike. In this landscape, the trim router stands out as a remarkably versatile and indispensable addition to any well-rounded toolkit.
Despite its compact size, the trim router packs a powerful punch, offering a unique combination of precision, maneuverability, and ease of use that is unmatched by its full-size counterparts. From flush trimming and edge profiling to freehand sign making and decorative touches, these mighty little tools have proven their mettle time and time again.
For casual DIYers and hobbyists, the trim router represents an affordable and user-friendly entry point into the world of routing. Its lightweight design and ergonomic features make it approachable for beginners, while still delivering the precision and control required for more advanced projects.
Even seasoned professionals have come to appreciate the trim router’s ability to tackle intricate tasks and access tight spaces that would be challenging or impossible with larger routers. Its versatility allows it to serve as a valuable secondary tool, complementing the capabilities of a full-size router.
When it comes to choosing between a trim router and a full-size model, the decision often comes down to the scope and scale of your projects. For most casual DIY and light carpentry tasks, the trim router’s combination of power, precision, and portability make it an excellent choice that can handle the majority of routing needs with finesse.
So, whether you’re a seasoned woodworker or a budding DIY enthusiast, the case for investing in a trim router is a compelling one. With its ability to elevate the quality and sophistication of your projects while offering unmatched convenience and ease of use, this mighty little tool is sure to become an indispensable ally in your workshop adventures.
How to Plane Wood With A Router
Planing wood is an essential task in many woodworking projects, helping to create smooth, flat surfaces. Traditionally, this process was done with hand planes, which can be tedious and physically demanding. You can also use an electric planer, but if your workpiece is too wide for a planer, there is another option. These days, using a router for planing has become a popular and efficient alternative.
Routers are versatile tools that you can use for many woodworking tasks, including planing, cutting grooves & dadoes, along with shaping edges. With the right bit, a router can quickly and accurately remove material from a wood surface, creating a level, uniform thickness.
In this article, we will discuss how to use a router to plane wood, covering everything from the necessary tools and materials to safety considerations, step-by-step instructions, and troubleshooting tips. Whether you’re a seasoned woodworker or a beginner looking to expand your skills, planing with a router can be a valuable technique to add to your repertoire.
Here is a helpful YouTube video that you might enjoy.
What You Need
Tools and Materials
- Router – You’ll need a router that is powerful enough to handle the job. For planing, a router with at least 1.5 to 2 horsepower is recommended, as it will have enough power to remove material efficiently.
- Router Bit – The type of router bit you will need depends on the desired final surface and the amount of material you need to remove. For general planing tasks, a straight or spiral bit works well. These bits have straight cutting edges that create a smooth, flat surface. Look for bits with a large diameter (1 to 2 inches) for maximum material removal.
- Straight bits are more affordable and readily available but can cause chip-out on the surface.
- Spiral upcut bits are more expensive but provide a cleaner cut and reduce tear-out.
- Read more about router bits here
- Router Jig or Sled: A jig or sled is essential for stabilizing the router over the workpiece. You can build your own or purchase one. It should be capable of spanning the width of the piece to be planed and provide a flat, stable surface for the router. See our article on how to make your own router sled here.
- Clamps – You’ll need several clamps to secure the workpiece to the workbench and to attach any necessary guides or fences.
- Safety Equipment – Proper safety gear is a must when working with power tools. You’ll need safety glasses or goggles, a dust mask (or respirator for prolonged use), and snug-fitting gloves to protect your hands from the spinning bit.
Preparation Materials
- Wood to be Planed – The type and condition of the wood will determine your approach. Straight, clean boards will be easier to plane than cupped, twisted, or damaged pieces.
- Marking Tools – A pencil, marking knife, or marking gauge will be useful to mark your workpiece and your desired planing depth.
Setting Up Your Workspace
- Workspace Safety: Clear the area of any unnecessary items or debris. Ensure your work surface is stable and at a comfortable working height.
- Tool Inspection: Check your router and bits for any signs of wear or damage. Ensure the bit is securely fastened in the router’s collet.
- Prepare the Wood: If your wood piece has any loose knots or is particularly rough, consider a light pass with a hand plane or sandpaper to knock down any high spots. This can help prevent the router bit from catching and ensure a smoother planing process.
- Plan Your Passes: Determine the depth of each pass. It’s generally best to make multiple light passes rather than trying to remove too much material at once. This approach reduces the risk of tear-out and ensures a more uniform surface.
- Dust Management: Planing can generate a lot of dust and chips, especially with larger pieces. If possible, set up dust collection or have a shop vac handy to keep the area clean and reduce airborne particles.
With the right preparation, tools, and materials, you’re ready to begin the planing process with your router. This careful setup not only ensures safety and efficiency but also contributes to achieving the best possible results on your woodworking project.
Setting Up for Planing
Proper setup is essential for achieving a successful and safe planing operation with your router. Here are the key steps to follow:
Choosing the Right Router and Bit: As mentioned earlier, select a router with sufficient power (1.5 to 2 HP) to handle the task of planing wood efficiently. For the router bit, a straight or spiral bit with a large diameter (1 to 2 inches) is ideal for planing tasks.
Setting Up the Wood Piece: Secure the wood piece to a sturdy workbench or surface using clamps. Ensure that the piece is stable and won’t move during the planing process. If working with a long or large piece, consider clamping additional supports or adjustable sawhorses to prevent sagging or movement.
Configuring the Router for Depth of Cut: Adjust the router’s depth of cut to the desired thickness you want to remove from the wood surface. For planing, it’s generally recommended to take shallow passes (1/8 inch or less) to prevent excessive strain on the router and minimize the risk of tear-out or chipping.
To set the depth, first lower the router bit until it barely touches the wood surface. Then, use the depth adjustment mechanism on the router to raise or lower the bit to the desired cutting depth. Double-check your measurements and make any necessary adjustments.
Using a Straight Edge or Router Jig
To ensure a straight, consistent plane, you’ll need to run the router along a flat guide. You can use a router slide jig or edge guide that attaches to the router base. Click here to read our article about how to make your own router sled.
With the proper setup in place, you’ll be ready to move on to the actual planing process. Take your time during this stage, as a well-prepared setup will ensure better results and safer operation.
Planing Process with a Router Sled Jig
Using a router sled jig is an excellent way to plane wood surfaces while maintaining precision and control. The sled jig supports the router and glides along a straight, flat surface, ensuring consistent results.
Step-by-Step Guide
- Marking the Wood for Planing
- Use a pencil or marking gauge to clearly mark the areas on the wood that need planing.
- Indicate the desired final thickness you want to achieve after planing.
- Setting Up the Router Sled Jig
- Assemble the router sled jig according to the manufacturer’s instructions.
- Adjust the sled’s fence to the desired cutting depth, typically taking shallow passes of 1/8″ or less.
- Securely mount the router to the sled’s base plate.
- Making the First Pass
- With the wood piece clamped in place, position the sled jig at one end.
- Turn on the router and make the first pass, pushing the sled smoothly along the length of the board.
- Keep the sled’s fence flush against the workpiece to maintain a straight cut.
- Checking for Flatness and Making Adjustments
- After the first pass, check the surface for flatness using a straight edge.
- Make any necessary adjustments to the cutting depth or fence alignment.
- Completing Multiple Passes
- For deeper planing, make additional passes, adjusting the cutting depth as needed.
- Always move the sled in the opposite direction from the previous pass to avoid tear-out.
Tips for Effective Planing with a Router Sled
- Keep the sled moving at a steady, consistent pace to avoid burn marks or uneven surfaces.
- Ensure the router bit is rotating in the correct direction for the sled’s motion (check the manufacturer’s guidelines).
- Use featherboards or hold-downs to prevent workpiece movement during planing.
- For wide boards, you may need to adjust the fence or make overlapping passes.
- Consider using a scoring cut first to minimize tear-out on the end grain.
By following these steps and tips, you’ll be able to effectively plane wood surfaces using a router sled jig, achieving precise and consistent results with minimal tear-out or chipping.
Another video you might find helpful…
Finishing Touches
After successfully planing your wood surface with the router, there are a few additional steps you can take to achieve a truly smooth and polished finish.
Sanding After Planing
Even with the sharpest router bit, there may still be minor scratches or imperfections left behind on the planed surface. To achieve a silky-smooth finish, follow up with sanding.
Start with a coarser grit sandpaper (80-100 grit) to remove any remaining plane marks or ridges. Then, progressively work your way up to finer grits (120, 150, 180, etc.) until you’ve achieved the desired level of smoothness.
Sanding not only refines the surface but also helps to slightly round over any sharp edges left by the planing process, resulting in a more comfortable and visually appealing finish.
Optional Surface Treatments
Depending on the intended use of the planed wood, you may want to consider applying additional surface treatments after sanding. Here are a few options:
- Sealing: Apply a clear wood sealer or Danish oil for moisture protection while enhancing the natural grain pattern.
- Staining: If you prefer a colored finish, use a wood stain before sealing to achieve your desired shade.
- Finishing: For a durable and aesthetically pleasing finish, apply a topcoat such as polyurethane, lacquer, or varnish after sealing or staining.
Remember to follow the manufacturer’s instructions for proper application and drying times when using any of these surface treatments.
By taking the time to sand and potentially apply additional finishes, you’ll turn your freshly planed wood surface into a beautiful and long-lasting piece, ready for your next woodworking project.
Troubleshooting Common Issues
Even with careful setup and technique, you may still encounter some issues when planing wood with a router. Here are some common problems and their solutions:
Uneven Planing
- Cause: Inconsistent router bit depth, wavering sled/router movement, or a warped/twisted workpiece.
- Solution: Double-check the depth setting, use a straight edge guide, and consider flattening/jointing the workpiece first before planing.
Router Slipping/Losing Traction
- Cause: Insufficient clamping, worn router base pads, or a slippery workpiece surface.
- Solution: Use more clamps to secure the workpiece, replace worn base pads, or apply friction tape to the router base and workpiece.
Tear-out/Chipping
- Cause: Cutting against the wood grain, dull router bit, or excessive cutting depth.
- Solution: Cut with the grain direction when possible, use a sharp spiral upcut bit, take shallower passes, and consider scoring cuts on cross-grain edges.
Burn Marks on Wood
- Cause: Feeding too slowly, dull bit, or improper bit selection for the wood type.
- Solution: Maintain a steady feed rate, use a sharp bit designed for the wood species, and take lighter passes.
Router Vibration/Wandering
- Cause: Loose router bit, excessive cutting depth, or inappropriate bit selection.
- Solution: Ensure the bit is securely tightened, reduce the cutting depth, and use the correct bit type for the task.
Wood Chipping/Splintering
- Cause: Planing against the grain direction, excessive cutting depth, or dull bit.
- Solution: Adjust the grain direction, reduce the cutting depth, and use a sharp bit designed for planing.
If you encounter any other issues, consult the router and bit manufacturer’s guidelines, or seek advice from experienced woodworkers or online forums. Proper troubleshooting can help you overcome challenges and achieve the desired planing results.
Advanced Techniques
Once you’ve mastered the basics of planing wood with a router, you may want to explore more advanced techniques to expand your capabilities and achieve even greater precision and efficiency.
Using Templates for Precision Planing
For projects that require complex shapes or patterns, you can create custom templates to guide the router during the planing process. Templates can be made from materials like hardboard, plastic, or thin plywood and are designed to follow the desired contour or shape.
To use a template, secure it to the workpiece and then run the router’s bearing-guided flush trim bit along the template’s edges. This technique allows you to plane intricate shapes with exceptional accuracy and repeatability.
Planing End Grain
Planing end grain can be particularly challenging due to the wood’s tendency to tear out or splinter. When working with end grain, consider using a specialized end grain planing bit, which features a curved or spiral cutting edge designed to shear the wood fibers cleanly.
You may also want to employ techniques like scoring cuts or applying thinned wood glue to the end grain before planing to help minimize tear-out.
Planing Figured or Highly Figured Wood
Woods with intricate grain patterns, such as burls, figured maple, or highly figured woods, can be problematic to plane due to their irregular grain direction. When planing these types of wood, consider using a spiral upcut bit with a high number of cutting edges, as this will help reduce tear-out.
Additionally, take lighter passes and adjust the feed direction based on the grain orientation to minimize chipping or splintering.
As you gain experience with planing wood using a router, don’t be afraid to explore these advanced techniques. They can open up new possibilities for your woodworking projects and help you achieve even more impressive results.
Maintenance and Care for Your Router
A well-maintained router is essential for achieving consistent, high-quality results when planing wood. Proper care and maintenance will not only extend the life of your router but also ensure safe and efficient operation. Here are some tips for keeping your router in top condition:
Cleaning
- After each use, thoroughly clean the router to remove any sawdust or debris build-up. Use a brush or compressed air to clear out the vents and motor housing.
- Regularly clean the base plate and other moving parts to prevent sticking or binding.
Lubrication
- Consult your router’s manual for specific lubrication instructions.
- Generally, you’ll want to apply a few drops of lightweight machine oil to any moving parts or adjustment mechanisms periodically.
Bit Maintenance
- Keep router bits sharp and in good condition. Dull or damaged bits can lead to poor cutting performance, tear-out, and increased risk of kickback.
- Regularly inspect bits for any signs of chipping, burning, or excessive wear, and replace them as needed.
- Store bits properly to prevent damage, and keep them clean and free of pitch buildup.
Power Cord Care
- Inspect the power cord regularly for any cuts, fraying, or damage.
- Avoid running over the cord with the router or other tools, as this can lead to internal wire damage.
- If the cord becomes damaged, replace it immediately to prevent electrical hazards.
Motor Brushes
- Most routers have replaceable motor brushes that wear down over time.
- Consult your manual for instructions on checking and replacing the brushes when necessary.
Storage
- Store your router in a dry, dust-free environment when not in use.
- Consider storing it in a protective case or covering it to prevent accidental damage.
By following these maintenance guidelines and treating your router with care, you can ensure that it remains a reliable and high-performing tool for all your future woodworking projects, including planing tasks.
Conclusion
Planing wood with a router is a versatile and efficient technique that can greatly enhance your woodworking projects. By following the steps outlined in this article, you’ll be able to achieve smooth, flat surfaces with precision and consistency.
Using a router for planing offers several advantages over traditional hand planing methods. It requires less physical effort, allows for faster material removal, and provides greater accuracy and control. With the right set of tools and materials, along with proper safety precautions, you can effectively plane wood pieces of various sizes and types.
Throughout the planing process, remember to take your time during the setup phase, ensuring that the workpiece is securely clamped and that the router is properly configured for the desired depth of cut. Whether you’re using a handheld router with a straightedge guide or a specialized router sled jig, maintaining a steady and consistent feed rate is crucial for achieving optimal results.
While planing with a router may seem daunting at first, with practice and attention to detail, you’ll soon develop the skills and confidence to tackle even the most challenging woodworking projects. The ability to create perfectly flat and smooth surfaces will open up a world of possibilities, from furniture making to cabinetry, and everything in between.
So, don’t be afraid to give planing with a router a try. Embrace the satisfaction of transforming rough, uneven wood into beautifully planed surfaces, ready for the next step in your woodworking journey. With patience, precision, and a commitment to safety, you’ll be creating stunning pieces that showcase your skills and craftsmanship.
Additional Resources
While this article has covered the essential aspects of planing wood with a router, there are numerous additional resources available for those seeking further guidance, inspiration, or advanced techniques. Here are some recommended books, websites, and videos to explore:
Books
- “The Complete Guide to Router Use” by Pat Warner – A comprehensive guide to routers, including detailed sections on planing and other woodworking tasks.
- “Taunton’s Complete Illustrated Guide to Routers” by Lonnie Bird – A well-illustrated and easy-to-follow resource for mastering router techniques.
- “The Router Book: A Complete Guide to the Router and its Accessories” by Patrick Spielman – An in-depth exploration of routers, with chapters dedicated to planing and specialty jigs.
Websites
- Wood Magazine (www.woodmagazine.com) – A wealth of articles, tips, and techniques related to woodworking, including router use and planing.
- Fine Woodworking (www.finewoodworking.com) – High-quality content from expert woodworkers, covering various aspects of the craft, including router techniques.
- Router Forums (www.routerforums.com) – An active online community where woodworkers can ask questions, share tips, and discuss router-related topics.
Videos
- “Router Planing Techniques” by Steve Ramsey (YouTube) – A comprehensive video tutorial on planing with a router, covering setup, technique, and troubleshooting.
- “How to Plane Wood with a Router” by Wood Workers Guild of America (YouTube) – A step-by-step guide to planing wood using a router and sled jig.
- “Router Planing Basics” by Popular Woodworking Magazine (YouTube) – A straightforward introduction to planing with a router, including essential tips and techniques.
Online Courses:
Websites like Udemy and Craftsy offer affordable courses that range from introductory woodworking to advanced techniques, including extensive lessons on router use.
These resources can provide additional insights, expert advice, and alternative perspectives on planing wood with a router. Whether you prefer books, online articles, or video tutorials, there is a wealth of information available to help you further hone your skills and expand your woodworking knowledge.
How to Make a Router Sled
What is a Router Sled?
A router sled is an amazingly simple yet effective jig that helps woodworkers make clean, straight cuts with total control. Essentially, it’s a rigid plastic, metal, or track that your router securely mounts into. The base then glides smoothly along the workpiece, allowing you to make cuts by pushing the sled rather than wrestling the router itself.
The sled’s flat, straight edges act as built-in guides, ensuring your cuts are perfectly straight and your bit’s depth is consistent from start to finish. Whether you need dadoes, rabbets, or just to straighten up the edge of a board, a router sled gives you way more accuracy and ease of use.
Plus, that stable, secure sled base helps protect your hands and workpiece by preventing kick-back, chips, and catches that can happen with freehand routing. Think of it as putting a “safe, steady harness” around your router!
While you can buy pre-made sleds, any competent DIYer can construct a basic one for their specific router model and needs using just some hardwood, plastic sheeting, and a few supplies. Best of all – these customized sleds are a total game-changer for elevating your routing skills and capabilities.
Why Would Someone Want a Router Sled?
1. Flattening Large Slabs
One of the biggest reasons to use a router sled is for flattening large slabs of wood. When you have a beautiful piece of wood that’s just too big for a standard planer, or if you don’t have a planer at all, the router sled can be an amazing tool. It allows you to achieve a level surface across the entire slab, which is essential for tabletops, countertops, and other large projects. If you have never seen a router sled before, picture a slab of wood on your workbench, and a router running on a sliding track above the slab. It cuts into the wood from above to make the top perfectly flat. I will include some videos below to show you how they work, but the router sled is an ingenious idea. One of the things I love most about woodworking is the ingenuity of people coming up with solutions in creative ways.
2. Precision and Control
A router sled gives you unmatched control over the depth and uniformity of your cuts. This means you can gradually remove material, checking your progress as you go, to ensure you don’t take off too much material at. It’s like having a fine-tuning dial for your woodworking projects, allowing for meticulous adjustments. A router sled basically gives you much more control turning your hand-held power tool into a guided machine. Here are some of the key ways a router sled provides better control:
- Stable, Flat Base: The flat, rigid base of the sled rides smoothly along the workpiece, preventing any rocking, wobbling, or tipping that can happen when holding a router freehand. This makes it easier to keep the cut straight and the bit at a consistent depth.
- Long Guide Edges: The long straight edges extending from the sled’s base act as built-in fence guides. Running these edges along the workpiece keeps the router sled (and bit) cutting in a perfectly straight line, minimizing any veering off-track.
- Two-Handed Control: With the router mounted securely in the sled, both of your hands are free to grip and apply controlled forward pressure, rather than having one hand entirely devoted to just hanging onto the router itself.
- No Reacting to Torque: When routing freehand, you have to actively counter and control the inward-twisting torque of the spinning bit. The sled’s mass and stable guidance eliminates having to fight against this reactive torque.
- Edge Protection: The sled’s edges extend beyond the bit’s cutting area, allowing you to smoothly route all the way to the edge of a workpiece without danger of hitting the base against the surface below.
So, the sled transforms a handheld router into a sort of mini router table – completely removing the instability, vibration and torquing forces that make freehand routing so difficult to control precisely. The sled lets you focus entirely on making smooth, controlled forward passes.
3. Versatility
Beyond flattening, a router sled is an incredibly versatile jig that can be used for a wide variety of woodworking tasks and projects, like creating dadoes, grooves, and inlays. Its simple design and ability to guide the router bit along any straight or curved path makes it useful for much more than just trimming edges. It’s like a Swiss Army knife for woodworkers.
Here are some examples of the router sled’s versatility:
A router sled is an incredibly versatile jig that can be used for a wide variety of woodworking tasks and projects. Its simple design and ability to guide the router bit along any straight or curved path makes it useful for much more than just trimming edges. Here are some examples of the router sled’s versatility:
- Straight Edge Profiles: Of course, one of the most common uses is running the sled’s straight edge along a board to trim it perfectly square or create an edge profile/dado. But you can also use the sled for narrow straight grooving on a tabletop or case.
- Curved Cutting: By carefully guiding the sled freehand, you can cut gentle inside or outside curves – great for arched shelves, circles, circular patterns and more.
- Long Edge Joining: Secure two boards edge-to-edge and the sled lets you neatly trim down both edges at once to prepare for a perfectly joined seam.
- Joinery and Recesses: Use the sled to cleanly cut mortises, grooves and recesses for joinery like tenons or hardware inlays.
- Pattern Routing: Trace the sled along a pattern or template to cut that shape into the workpiece below – a method for replicating signs, carvings, etc.
- Flush Trimming: Run the sled’s bit against another surface like a template or bench to cleanly trim and flatten protruding sections of the workpiece flush.
The possibilities are really endless. Anything requiring a clean, controlled straight or curved cut – from keyholes to lettering – can likely be done efficiently with a simple router sled jig. Its versatility lets you use guided routing for all kinds of woodworking projects.
4. Cost-Effective
For those who are just starting out or who enjoy DIY projects, building a router table sled is a cost-effective way to add functionality to your workshop. Instead of investing in a high-end planer or a larger router table, you can create a custom sled that meets your specific needs.
The whole point of a router sled is to maximize the functionality of the router you already have. Rather than purchasing expensive tools like a jointer or dedicated pattern cutting machine, a sled lets you do many of those tasks with the single router in your existing tool set. Granted, you need a pretty hefty router that is up to the task, but the sled is often a simple design that is inexpensive to build…. To build a basic router sled, you just need a flat base (melamine, plastic laminate, etc.), some straight edging like 1×3 boards, and basic hardware like screws or clamps. Most can be constructed with scraps you may already have on hand.
By expanding what you can do with your router, a sled allows tackling tasks that may have otherwise required hiring a pro or buying even more tools. So, it opens up potential for more DIY project savings.
Long-Lasting Usability Router sleds are also very simple and durable. If built properly out of sturdy materials, they can provide years, even decades of utility from just a small initial investment.
5. Space Saving
In workshops where space is at a premium, a router sled is a smart solution. It can be stored away easily when not in use, unlike larger, more permanent equipment. This makes it perfect for hobbyists who need to maximize their workspace. In addition, the overhanging edges of a well-designed sled provide extended outfeed support when routing longer workpieces, eliminating the need for additional costly extensions.
6. Learning and Experimentation
Building and using a router table sled offers a fantastic learning experience. It encourages experimentation and helps develop a deeper understanding of wood behavior, tool adjustment, and precision craftsmanship. Each project becomes an opportunity to refine your skills.
Conclusion
Whether you’re dealing with oversized lumber, aiming for unparalleled precision, or simply looking for a versatile and cost-effective tool, a router sled is a brilliant addition to your woodworking arsenal. It opens up new possibilities for creativity and craftsmanship, allowing you to tackle projects that were once out of reach. Plus, the satisfaction of flattening a large wood slab to perfect smoothness with a tool you’ve customized yourself? That’s the kind of joy only woodworking can bring.
Below are a couple of great examples of how to make a router sled out of inexpensive materials.
This is not my YouTube channel, but a channel you might enjoy.
Types of Brad Nail Guns
Whether you’re piecing together a delicate woodworking project or assembling sturdy furniture, the right tools can make all the difference. Among the essentials for any professional woodworker or DIY enthusiast is the brad nailer—a versatile tool that drives thin, nearly invisible nails into your work without splitting even the most delicate of woods. But did you know that not all brad nailers are created equal? From the robust power of pneumatic models to the cordless convenience of electric versions, understanding the different types of brad nailers can empower you to choose the perfect one for your projects. Join us as we explore these variations, helping you nail down (pun intended!) the best choice for bringing your creations to life.
Before we get started, here is a quick layout of what we will discuss:
| Feature | Pneumatic | Electric | Gas-powered |
| Power Source | Compressed Air | Electricity (Corded or Battery) | Gas Cartridge + Battery |
| Portability | Requires Air Compressor | Highly Portable (especially battery models) | Highly Portable |
| Best Use Cases | Heavy-duty Projects | Light to Medium Projects | Remote or High-mobility Projects |
| Maintenance Level | Moderate (due to air compressor) | Low | High (due to gas cartridges and engine) |
Pneumatic Brad Nailers
At the heart of many woodworking shops is the pneumatic brad nailer. This type uses compressed air to launch brad nails into wood with precision and strength. Here is why it’s been a long time favorite in shops for decades:
- Power and Performance: Pneumatic brad nailers are renowned for their high performance. They can drive nails through the toughest materials with ease, making them ideal for projects that demand high durability.
- Consistency: Thanks to the steady supply of compressed air, these nailers offer consistent driving power. This ensures that each nail is seated perfectly, providing a clean, professional finish to your work.
- The Need for Compressed Air: The primary requirement for a pneumatic brad nailer is an air compressor. While this means an additional piece of equipment and the need to manage air hoses, the trade-off in power and efficiency is often worth it for those tackling more demanding projects.
Despite their numerous advantages, it’s important to weigh the need for a compressor and the management of air hoses against your project needs and workspace constraints. For those with access to a compressor and tackling projects that require the utmost in nail-driving power, a pneumatic brad nailer is an unmatched tool in your arsenal. For anyone on a jobsite, however, you already know that air hoses can be difficult to work with and the extra equipment can make things difficult. It all depends on your specific needs.
Electric Brad Nailers
For woodworkers and DIY enthusiasts who prioritize convenience and mobility, electric brad nailers can present an appealing alternative. These come in two main varieties: corded and battery-powered, each with its own set of advantages.
- Corded Electric Brad Nailers: These models offer continuous operation without worrying about running out of power, as long as you are near an electrical outlet. They’re perfect for longer projects where stopping to recharge can be a hindrance.
- Battery-Powered Brad Nailers: The true champions of portability, these nailers allow you to work freely without being tethered to an outlet or dragging an air hose around. They are ideal for projects in hard-to-reach areas or where mobility is key. The latest models boast impressive battery life and power, making them increasingly popular among professionals as well as hobbyists.
Key Benefits:
- Portability: Electric brad nailers, especially battery-powered models, give you the freedom to work anywhere. This is a game-changer for projects that aren’t close to power sources or air compressor setups.
- Ease of Use: With no air compressor to set up or maintain, electric brad nailers are generally easier to get started with. They’re a plug-and-play solution for those who want to focus on their work, not on tool prep.
- Versatility: Suitable for a wide range of projects, electric models can handle everything from light trim work to more demanding tasks, depending on the nailer’s power and the battery’s endurance.
While electric brad nailers offer unmatched convenience, it’s important to consider the type of projects you undertake. Corded models offer uninterrupted power for extensive projects, while battery-powered nailers provide total mobility for quick tasks and spot work. Whichever you choose, an electric brad nailer can be a valuable addition to your tool collection, simplifying your woodworking projects with a press of a trigger.
Gas-powered Brad Nailers
While pneumatic and electric brad nailers dominate most of the market, there’s a third player worth mentioning for its unique blend of power and portability: the gas-powered brad nailer. These tools use a small, internal combustion engine powered by a gas fuel cell, combined with a battery to ignite the fuel and drive nails with impressive force.
Unique Selling Points:
- Ultimate Portability: Gas-powered brad nailers shine in scenarios where electricity and compressed air are out of reach. Without the need for cords or hoses, they offer unparalleled freedom, allowing you to take your work virtually anywhere.
- Consistent Power: Much like their pneumatic counterparts, gas-powered nailers deliver consistent, powerful shots. This makes them suitable for heavy-duty tasks where portable power is a must.
However, these advantages come with considerations. The fuel cells need regular replacement, and the initial cost can be higher than other types. Additionally, they require more maintenance than electric nailers, making them a choice for those who value portability and power over convenience.
Despite these considerations, for professionals working on remote sites or those who prioritize mobility and power without the constraints of cords and hoses, gas-powered brad nailers offer a compelling solution. They bridge the gap between the raw power of pneumatic models and the cordless convenience of electric nailers, providing an excellent tool for specific, demanding applications.
Features to Consider When Choosing a Brad Nailer
Selecting the right brad nailer goes beyond just choosing a power source. Here are some crucial features to keep in mind that can greatly influence your work and satisfaction with the tool:
- Nail Size and Length Compatibility: Different projects require different nail sizes. Ensure the brad nailer you choose can accommodate the range of nail lengths and diameters you plan to use. This flexibility allows for a wide array of applications, from delicate trim work to more robust framing tasks.
- Weight and Ergonomics: A comfortable tool is a used tool. Look for a brad nailer that feels good in your hand, with a balanced weight distribution that won’t cause fatigue over long periods. The overall design should enable precise control and easy maneuverability.
- Battery Life (for Cordless Models): If you’re leaning towards a battery-powered model, consider the battery life and charge time. Longer battery life means more work done on a single charge, and quick charge times ensure minimal downtime.
- Cost and Availability of Accessories: Finally, consider the ongoing cost of nails, fuel cells (for gas-powered models), and potential replacement batteries. Also, assess the availability of these accessories to ensure they’re readily obtainable when needed.
Choosing a brad nailer with these features in mind ensures you’ll have a tool that not only meets your current needs but also serves you well into the future. Whether you’re a professional contractor or a weekend warrior, the right brad nailer can make your work more efficient, enjoyable, and high-quality.
Conclusion
In the world of woodworking and crafting tools, the brad nailer stands out as a must-have for its precision, versatility, and efficiency. Whether you’re a seasoned professional or a passionate hobbyist, the right brad nailer can help your projects go from good to exceptional. As we have seen, the choice between pneumatic, electric, and gas-powered models boils down to understanding your specific project needs, workspace limitations, and personal preferences.
Pneumatic brad nailers offer unmatched power for those who don’t mind tethering themselves to an air compressor. Electric models, both corded and battery-powered, provide convenience and portability for a wide range of applications. Meanwhile, gas-powered nailers serve those in need of cordless operation without sacrificing performance. Beyond the power source, considerations like nail compatibility, ergonomics, battery life, and cost of ownership play crucial roles in finding the perfect tool for your workbench.
Choosing the right brad nailer is a decision that should not be rushed. Reflect on the projects you undertake most frequently, the environments you work in, and what you value most in a tool. By aligning these factors with the features and benefits of each type of brad nailer, you’re well on your way to unlocking smoother workflows, impeccable finishes, and the sheer joy of bringing your wooden creations to life. Remember, the best brad nailer is the one that meets your needs today and grows with you as your skills and projects evolve.
Related Articles:
What are the Best Brad Nailers
How to Oil a Brad Nailer
Oiling your brad nailer is crucial for its upkeep, but using the correct type of oil and applying it properly is just as important. The right oil ensures smooth operation and prevents damage to the tool, while the wrong kind can cause issues, including degraded performance or even irreversible harm. In this article, we will cover how to select the appropriate oil for your brad nailer and the steps to properly apply it.
Types of Oil Suitable for Brad Nailers
When selecting oil for your brad nailer, it’s vital to choose a type that’s compatible with pneumatic tools. Here are the most common options:
- Pneumatic Tool Oil: Specifically designed for air-powered tools, pneumatic tool oil is the safest choice for your brad nailer. It’s formulated to lubricate effectively without damaging rubber or plastic parts within the tool.
- Mineral Oil: A lightweight mineral oil can also be a good option if pneumatic tool oil is not available. Ensure it’s free from additives that can harm the tool’s internal components.
- Avoid Using: Heavy oils, WD-40, or automotive oils are not suitable for brad nailers. These can attract dust and debris or even degrade the rubber seals and o-rings, leading to leaks and decreased performance.
Steps to Oil Your Brad Nailer
- Safety First: Always start by ensuring your brad nailer is disconnected from the air supply to prevent accidental discharge.
- Access the Air Inlet: Locate the air inlet, where you connect the air hose. This is typically at the bottom of the handle on most brad nailers.
- Apply Oil: Place a few drops (usually 2-3) of the appropriate oil into the air inlet. Avoid over-oiling, as this can attract dust and debris, leading to clogs.
- Reconnect and Test: After oiling, reconnect your brad nailer to the air supply and fire several nails into scrap wood. This process helps distribute the oil throughout the internal components.
- Wipe Excess: Finally, wipe away any excess oil from the tool with a clean, dry cloth. This prevents oil from dripping onto your workpiece during use.
Frequency of Oiling
- Regular Use: If you use your brad nailer frequently, oiling it at the beginning of each day of use is good practice.
- Intermittent Use: For those who use their brad nailer less frequently, oiling it before each use will help maintain smooth operation.
- After Prolonged Storage: Always oil your brad nailer after it has been stored for an extended period before putting it back to use.
Common Mistakes to Avoid When Oiling Your Brad Nailer
Proper maintenance of your brad nailer, including regular oiling, is essential for its performance and longevity. However, even with the best intentions, it’s easy to fall into common pitfalls that can lead to less-than-ideal outcomes or even damage your tool. Here, we’ll explore some of the frequent mistakes made during the oiling process and how to avoid them, ensuring your brad nailer remains in top condition.
Over-Oiling
One of the most common mistakes is applying too much oil. While it might seem like more oil would better lubricate the tool, excess oil can actually attract dust and debris, leading to clogs and gumming up the internal mechanisms. This can degrade the performance of your brad nailer and necessitate a thorough cleaning to resolve.
- Solution: Stick to a few drops of oil (usually 2-3) each time you lubricate the tool. This amount is sufficient to keep the moving parts lubricated without attracting unnecessary dirt.
Using the Wrong Type of Oil
Not all oils are created equal, especially when it comes to pneumatic tools like brad nailers. Using the wrong type of oil can damage the o-rings and seals, leading to air leaks and reduced efficiency.
- Solution: Always use pneumatic tool oil or a suitable lightweight mineral oil. Avoid automotive oils, WD-40, and heavy oils, as these can contain additives harmful to your nailer’s internal components.
Neglecting Regular Maintenance
Another mistake is not oiling the brad nailer regularly. This can lead to the tool’s parts becoming dry and worn, which increases friction and accelerates wear and tear.
- Solution: Develop a maintenance routine based on how frequently you use the nailer. Oiling before each use or at the start of each day if you use it frequently ensures that your tool stays in good working order.
Not Cleaning Before Oiling
Oiling a dirty brad nailer can trap dirt and debris inside the tool, which can erode internal components and affect performance.
- Solution: Always give your brad nailer a quick clean before oiling, especially around the air inlet and the head where dust and debris tend to accumulate. A clean tool ensures that the oil can properly lubricate the internal parts without mixing with grime.
Forgetting to Test After Oiling
Skipping the step of testing your brad nailer after oiling can mean missing the opportunity to ensure it’s working smoothly and that the oil has been properly distributed.
- Solution: After oiling, reconnect your tool to the air supply and fire several nails into scrap wood. This helps spread the oil evenly and allows you to check that the nailer is operating correctly.
Troubleshooting Common Issues After Oiling Your Brad Nailer
After diligently oiling your brad nailer, you might expect it to operate smoothly without any issues. However, even with proper maintenance, some problems can arise. Recognizing and knowing how to troubleshoot these issues can save you time and ensure your projects aren’t delayed. Below, we address common problems that may occur after oiling your brad nailer and offer practical solutions.
Excessive Oil Leaks
If you notice oil dripping excessively from the nailer after oiling, it could be a sign of over-oiling or a problem with the seals.
- Solution: First, ensure you’re not over-oiling the tool; a few drops before use should suffice. If the problem persists, inspect the seals and o-rings for damage. Replacing damaged seals can often resolve the issue.
Decreased Performance or Misfires
Sometimes, even after oiling, your brad nailer might not perform as expected, showing signs like decreased power or frequent misfires.
- Solution: Check if there’s an air leak, which can significantly reduce power. Listen for hissing sounds and feel for air escaping from connections or seals. Tightening connections and replacing worn seals can often fix leaks. Also, ensure the air compressor is set to the correct pressure for your nailer.
Jamming
A nailer that jams frequently after oiling might be experiencing issues unrelated to the lubrication process, such as using the wrong size of brads or internal debris.
- Solution: First, confirm you’re using the correct size and type of nails for your brad nailer. Next, perform a thorough cleaning to remove any debris or buildup inside the nail chamber and along the feed mechanism.
Oil Contaminating Work Surface
If you find oil marks on your work surface or material after oiling the nailer, it might be due to excessive oil being blown out during use.
- Solution: Reduce the amount of oil you use during maintenance to prevent excess oil from being expelled onto your workpiece. Also, firing a few nails into scrap material after oiling but before starting your project can help clear out any excess oil.
Persistent Squeaking or Grinding Noises
If squeaking or grinding noises continue even after oiling, it may indicate deeper mechanical issues or that certain parts are not receiving lubrication.
- Solution: Inspect the nailer for any visible signs of wear or damage to internal components. It may be necessary to disassemble the tool for a deeper cleaning and lubrication or to replace worn parts. If you’re not comfortable doing this yourself, consider taking the tool to a professional for servicing.
Conclusion
Selecting the right oil and applying it correctly is essential for maintaining the efficiency and longevity of your brad nailer. By following the guidelines outlined above, you can ensure your tool remains in peak condition, ready for whatever project comes next. Regular maintenance, including proper oiling, not only protects your investment but also guarantees the best performance and results in your woodworking endeavors. In the next section, we’ll explore common mistakes to avoid when oiling your brad nailer, ensuring your maintenance routine is as effective as possible.
How to Install (or Insert) a Router Bit
Inserting or installing a router bit into a router is a fundamental skill that woodworkers and DIY enthusiasts should master to ensure precision in their projects and safety during the process. Below is a straightforward guide to the basic steps involved in inserting a router bit into a router:
- Safety First: Always start by ensuring your router is unplugged or disconnected from any power source. This precaution prevents accidental startup, which could lead to injury.
- Access the Collet: Remove the base of the router if necessary to access the collet. The collet is a cylindrical sleeve that holds the router bit in place. Some routers may have a fixed base that doesn’t need to be removed.
- Loosen the Collet: Use the wrench(es) provided with your router to loosen the collet. Most routers come with a spindle lock button to hold the shaft in place while you turn the collet nut with the wrench. If your router requires two wrenches, one will hold the shaft, and the other will turn the nut.
- Insert the Router Bit: Carefully insert the shank (the smooth part) of the router bit into the collet. It’s important not to insert the bit all the way in. Leave about 1/8 inch (or approximately 3mm) of the shank exposed. This ensures that the bit is held securely and allows for thermal expansion during use.
- Tighten the Collet: Once the bit is in place, hand-tighten the collet to make sure the bit is snug. Then, use the wrench(es) to fully tighten the collet. Avoid overtightening, as this can damage the collet or the bit. Just ensure it’s tight enough that the bit will not move during operation.
- Adjust the Bit Height: Depending on your project, adjust the height of the bit. This might mean adjusting the router’s depth setting so that the bit protrudes from the base at the desired height.
- Reattach the Base (if removed): If you had to remove the base to access the collet, reattach it securely.
- Double-check Everything: Before plugging the router back in, double-check that the bit is securely installed and that the height is set correctly for your project.
- Test Run: After everything is set up and before you start on your actual project, it’s a good idea to do a test run on a scrap piece of wood. This allows you to ensure the bit is correctly installed and to adjust if necessary.
Following these steps will help ensure that your router bit is installed correctly, providing a safe and efficient way to achieve precise cuts for your projects. Please check out this video below for more details about the importance of properly inserting the bit. (video courtesty of Fine Woodworking)
How to Chamfer Wood With a Router
How to Chamfer Wood with a Router: A Step-by-Step Guide
Chamfering wood with a router is a skill that can significantly enhance the look of your woodworking projects. This guide is designed to give you the knowledge and techniques to achieve precise and clean chamfered edges, suitable for both professional woodworkers and dedicated hobbyists.
Essential Tools and Materials
- Router: A key tool for creating precise chamfers.
- Chamfer Router Bit: Select according to the desired chamfer angle and size.
- Clamps: For securely fastening the wood piece during the routing process.
- Safety Gear: Safety goggles, dust mask, and hearing protection are essential.
Step-by-Step Chamfering Process
Step 1: Selecting the Right Chamfer Router Bit
Choosing the correct chamfer router bit is crucial for achieving the desired finish on your woodworking project. Chamfer bits are designed to create a beveled edge at a specific angle, and selecting the right one depends on the design requirements and the type of material you are working with. Here are some common types of chamfer router bits and their applications:
- Standard Chamfer Bits: These are the most commonly used chamfer bits and typically have an angle of 45 degrees. They are versatile and suitable for a wide range of projects, from softwoods to hardwoods. Standard chamfer bits are ideal for creating a classic beveled edge that reduces sharpness and adds a decorative touch.
- Adjustable Chamfer Bits: These bits offer flexibility as they can be adjusted to cut different angles, typically ranging from 15 to 45 degrees. Adjustable chamfer bits are perfect for woodworkers who require versatility in their projects or for those looking to experiment with different edge profiles without investing in multiple bits.
- Large Chamfer Bits: Designed for creating significant beveled edges, large chamfer bits can cut angles typically larger than 45 degrees. These bits are suitable for projects that require a bold, pronounced chamfer, such as tabletops, counters, or architectural features.
- Small Chamfer Bits: These bits are used for delicate work where a subtle bevel is desired. They are excellent for adding fine details to smaller projects, like picture frames, jewelry boxes, or trim work. Small chamfer bits often have angles less than 45 degrees, offering a gentle slope that softens the edge of the material.
- Specialty Chamfer Bits: Some chamfer bits come with unique features designed for specific applications, such as creating chamfers with a decorative edge or combining a chamfer cut with a profile cut in one pass. These bits are ideal for adding custom decorative finishes to your projects.
When selecting a chamfer bit, consider the material you will be working with, the desired angle and size of the chamfer, and the type of finish you aim to achieve. Additionally, the quality of the bit is paramount; opting for high-quality, carbide-tipped bits can enhance the precision of your cuts and the longevity of your tool.
By understanding the types of chamfer bits available and their specific uses, you can make informed decisions that enhance the quality and aesthetic appeal of your woodworking projects.
Step 2: Router Setup
Proper router setup is essential for successful chamfering. First and most importantly, ensure your router is unplugged before installing the chamfer bit to prevent any accidental starts. Insert the bit into the collet until it’s seated deeply but not bottomed out, then tighten the collet nut securely. For optimal control and precision, adjust the router’s depth setting so the bit protrudes slightly less than the desired depth of the chamfer. This setup ensures you’re ready for a test cut on scrap material to fine-tune the depth before moving on to your project piece.
Step 3: Securing the Wood Piece
A stable workpiece is critical for safety and accuracy. Use clamps to secure the wood to your workbench or a stable surface, ensuring it won’t move during routing. Position the clamps strategically so they don’t interfere with the router’s path. If working with smaller pieces, consider using a router table or a larger backing board clamped together with your workpiece to provide additional stability and control.
Step 4: Emphasizing Safety
Safety in woodworking cannot be overstated. Before powering on your router, ensure you’re wearing safety goggles to protect your eyes from debris, a dust mask or respirator to prevent inhalation of sawdust, and hearing protection to guard against prolonged exposure to noise. Additionally, familiarize yourself with the router’s operation and safety features. A clear understanding of your tool’s capabilities and limitations not only enhances safety but also improves the quality of your work.
Step 5: Executing the Chamfer Cut
With the router at full speed, approach the wood’s edge gently and start moving the tool steadily along the workpiece. Maintain a firm grip and control over the router, applying consistent forward pressure but allowing the tool to do the work. The key is to move at a pace that cuts efficiently without burning the wood or causing the bit to chatter. A single, smooth pass is often sufficient, but don’t hesitate to make multiple lighter passes for deeper or wider chamfers.
Step 6: Evaluating and Adjusting
After your initial pass, turn off the router and inspect the chamfer. Look for uniformity in the cut and any areas that may require additional passes. If the chamfer isn’t as pronounced as you’d like or if there are minor imperfections, adjust the router’s depth setting slightly for a deeper cut, and reroute the edge. This more gradual process allows for precise control over the final appearance of your chamfer.
Step 7: Finishing Touches
A well-executed chamfer often requires minimal sanding. Using fine-grit sandpaper, lightly sand the chamfered edge to remove any rough spots or router marks, moving in the direction of the grain to avoid scratches. This step also softens the edge for a professional, touchable finish. For a decorative touch, consider adding a stain or finish that complements the wood’s natural beauty and protects the surface.
Pro Tips for Success
- Practice Makes Perfect: Experimenting with various speeds, depths, and feed rates on scrap wood can build confidence and precision.
- Bit Maintenance: Keeping your chamfer bits sharp and clean extends their life and ensures clean, crisp chamfers on your projects.
- Creative Chamfering: Beyond basic beveled edges, explore different chamfer bit profiles for decorative edges, adding unique character to your workpieces.
Conclusion
Mastering the art of chamfering with a router enriches your woodworking projects, adding both aesthetic appeal and functional benefits. Through careful preparation, precise execution, and thoughtful finishing, you can achieve professional-quality results that showcase your craftsmanship.
This expanded guide aims to provide the detail and guidance needed to enhance your chamfering technique, whether you’re a seasoned professional or an enthusiastic hobbyist.
Finding the Perfect Table Saw – Five Brands Reviewed and Explained
Selecting the right table saw is a big decision for any woodworker. By considering your project needs, space, safety preferences, and budget, you can choose a table saw that not only meets but exceeds your expectations, elevating your woodworking to new heights. Whether you’re making delicate jewelry boxes or furnishing a home, the right table saw becomes your trusted partner for years to come.
Focusing on shop table saws that take a permanent spot in your workshop is a great way to delve into tools designed for precision, power, and long-term durability. These saws are the heart of a woodworking shop, capable of handling everything from ripping sheets of plywood to making intricate cuts with unwavering accuracy. Let’s explore some standout models from renowned manufacturers that specialize in stationary table saws for the dedicated craftsman’s space.
Powermatic PM2000B
The Powermatic PM2000B stands as a testament to engineering excellence, offering robust construction and top-tier performance. Renowned for its attention to detail, this saw boasts a massive cast iron base for stability, a finely tuned trunnion mechanism for silky smooth blade adjustments, and a poly-V belt that reduces vibration to ensure precise cuts every time. It’s a favorite among professionals for its reliability and ease of use.
- Horsepower (HP): 3 HP or 5 HP
- Electrical Requirements: 230V (3 HP model); 230V or 460V (5 HP model)
- Estimated Pricing: Between $3,000 and $4,500
SawStop PCS31230-TGP252 Professional Cabinet Saw
SawStop’s reputation for safety is unmatched, and the PCS31230-TGP252 is no exception, featuring the brand’s signature flesh-sensing technology that will stop the blade within milliseconds of contact. Beyond its revolutionary safety feature, this saw offers a powerful 3 HP motor and a 52-inch T-Glide fence system for expansive work capacity and refined precision. It’s the choice for those who refuse to compromise on safety or performance.
- Horsepower (HP): 3 HP
- Electrical Requirements: 230V, requiring a 20-amp circuit
- Estimated Pricing: Around $3,000 to $3,500
Delta 36-L552 Unisaw
The Delta 36-L552 Unisaw brings together power, precision, and durability. With a 5 HP motor that cuts through hardwoods with ease, a large cast iron table for ample work support, and a Biesemeyer fence system for accurate cuts, this saw is built for the professional woodworker who demands the best in class. Delta’s commitment to quality shines through in every component, making it a reliable cornerstone for any serious workshop.
- Horsepower (HP): 5 HP
- Electrical Requirements: 230V, single phase
- Estimated Pricing: $3,200 – $3,700
Grizzly Industrial G0690
Grizzly Industrial’s G0690 is a workhorse designed for heavy-duty use, featuring a triple belt drive, 3 HP motor, and a heavy cast iron table and wings. With meticulous attention to quality and detail, it includes a camlock T-fence, riving knife, and magnetic switch with thermal overload protection. This saw is celebrated for its durability and ability to tackle rigorous tasks day in and day out.
- Horsepower (HP): 3 HP
- Electrical Requirements: 220V, single phase
- Estimated Pricing: $1,500 – $2,000
Jet XACTASAW Deluxe
The Jet XACTASAW Deluxe combines power, precision, and innovative features in a user-friendly design. With a 3 HP motor and a poly-V belt drive system, it delivers smooth, quiet operation and the ability to make precise cuts without hesitation. The saw’s exclusive 50-inch commercial XACTA Fence II offers unmatched accuracy, making it a top choice for woodworkers who prioritize both quality and innovation.
- Horsepower (HP): 3 HP
- Electrical Requirements: 230V, single phase
- Estimated Pricing: $2,000 – $2,500
Please note that these prices are estimates and subject to change. They are intended to provide a ballpark figure to help with budgeting and comparisons. For the most accurate and up-to-date pricing, directly consult the manufacturers’ websites, authorized dealers, or reputable hardware stores.
What to Look for in a Table Saw…
When selecting a shop table saw, consider the long-term value it brings to your projects. These saws are investments in your craftsmanship, enabling you to expand your capabilities and execute your vision with precision and confidence. Whether you’re a seasoned professional or an ambitious hobbyist, equipping your workshop with a reliable, stationary table saw is a step toward mastering your craft and bringing your woodworking projects to life with unmatched quality and precision.
When considering a shop table saw, especially one that will hold a permanent spot in your workshop, several key features stand out as essential for ensuring the saw meets the diverse needs of woodworking projects. Here’s what to look for:
- Power and Motor Performance: A powerful motor ensures the saw can handle dense materials and prolonged use without bogging down. Look for horsepower (HP) that matches your most demanding projects—professional setups often feature motors with 3 HP or more.
- Fence System Accuracy and Ease of Adjustment: A high-quality fence system is crucial for making precise cuts. It should be easy to adjust, lock securely in place, and maintain parallel alignment with the blade.
- Table Size and Extension Capability: A spacious, flat cast iron table provides a stable and durable surface for cutting large pieces of wood. Extension wings or tables allow for increased workspace and support for larger projects.
- Dust Collection Efficiency: Good dust collection keeps your workspace clean and air quality safe, capturing sawdust at the source. Look for saws with effective dust ports that can connect to a shop vacuum or dust collection system.
- Safety Features: Look for modern safety features like riving knives, which prevent kickback, and blade guards. Some saws, like those from SawStop, offer technology that stops the blade instantly upon contact with skin.
- Tilt and Bevel Capabilities: The ability to tilt the blade for bevel cuts adds versatility. A saw that allows for easy adjustments to the blade angle ensures precision in a variety of cuts.
- Miter Gauge Quality: For making crosscuts or angled cuts, a reliable miter gauge is indispensable. It should fit snugly in the table’s miter slots without any play and offer easy adjustability for accurate cuts.
- Sturdy Construction and Vibration Dampening: Solid construction, often featuring a cast iron base, reduces vibration for smoother operation and more accurate cuts. Stability is key to safe and precise woodworking.
- Ease of Use and Maintenance: Accessibility for changing blades, adjusting alignments, and performing routine maintenance keeps the saw in top condition and makes woodworking more enjoyable and less of a chore.
- Extension and Accessory Compatibility: The ability to add accessories like dado blade sets, crosscut sleds, or specialized fences can significantly expand the range of projects you can tackle.
- Mobility Options: Although primarily stationary, some shop saws come with built-in mobile bases or are compatible with aftermarket ones. This feature is invaluable for small shops where space optimization is crucial.
Choosing a table saw with these features ensures that you have a versatile, powerful, and safe tool at the heart of your workshop, capable of executing a wide range of woodworking projects with precision and ease.
Each Saw in Detail…
Powermatic PM2000B
The Powermatic PM2000B table saw is a stellar example of a stationary saw that embodies many of the essential features sought after by both professional woodworkers and serious hobbyists. Let’s see how it stacks up against the key features desirable in a shop table saw:
Power and Motor Performance: The PM2000B is equipped with a robust 3 to 5 HP motor (depending on the model), providing ample power to slice through hardwoods and maintain performance during extended work sessions. This level of horsepower ensures the saw can tackle the most demanding projects without strain.
Fence System Accuracy and Ease of Adjustment: It features the Accu-Fence system, renowned for its precision and ease of adjustment. The fence glides smoothly and locks securely, offering support and accuracy for cuts of any length.
Table Size and Extension Capability: The saw boasts a large cast iron table, providing a stable and flat work surface essential for accurate cuts. Additionally, it offers extension options that significantly increase the work area, accommodating larger pieces of wood.
Dust Collection Efficiency: With a built-in 4-inch dust port, the PM2000B effectively captures sawdust, directing it away from the blade and work area. This feature is crucial for maintaining a clean shop and protecting the user’s health.
Safety Features: The PM2000B includes a riving knife to prevent kickback, a blade guard, and a magnetic switch with overload protection. While it doesn’t feature the flesh-sensing technology found in some other brands, its safety features are comprehensive and designed to protect the user during operation.
Tilt and Bevel Capabilities: The saw allows for easy blade adjustments, offering tilt capabilities for precise bevel cuts. This flexibility is essential for a wide range of projects, from cabinetry to custom furniture making.
Miter Gauge Quality: The included miter gauge is robust and accurate, fitting snugly in the table’s miter slots. It allows for precise adjustments, ensuring accurate crosscuts and angled cuts.
Sturdy Construction and Vibration Dampening: Featuring a heavy-duty cast iron base, the PM2000B is designed to minimize vibration, which enhances both the quality of the cuts and the user’s comfort during operation.
Ease of Use and Maintenance: Accessibility for routine maintenance tasks, such as blade changes and adjustments, is straightforward, thanks to the saw’s thoughtful design. This ease of use extends the life of the saw and makes it a joy to operate.
Extension and Accessory Compatibility: The PM2000B supports a wide range of accessories, from dado sets to crosscut sleds, making it a highly versatile tool that can adapt to various woodworking tasks.
Mobility Options: While primarily a stationary saw, the PM2000B can be equipped with a mobile base (sold separately), offering flexibility for workshops where space is at a premium.
In summary, the Powermatic PM2000B is a high-caliber table saw that meets and exceeds the needs of serious woodworkers looking for a durable, reliable, and precise tool for their shop. Its blend of power, precision, and thoughtful features make it a worthy centerpiece of any woodworking shop.
SawStop PCS31230-TGP252
The SawStop PCS31230-TGP252 Professional Cabinet Saw is a remarkable piece of engineering that stands out not only for its unparalleled safety features but also for its comprehensive suite of high-performance characteristics tailored to meet the demands of professional woodworkers and hobbyists alike. Here’s how the SawStop PCS31230-TGP252 aligns with the sought-after features in a shop table saw:
Power and Motor Performance: Equipped with a powerful 3 HP motor, the SawStop Professional Cabinet Saw offers robust power capable of handling the toughest woods and most demanding projects with ease. Its motor is designed for continuous heavy-duty use, ensuring smooth and consistent performance.
Fence System Accuracy and Ease of Adjustment: The saw comes with the T-Glide Fence System, providing an expansive 52-inch rip capacity. The T-Glide Fence is known for its precision, smooth operation, and firm locking, ensuring accurate cuts and stability for materials of all sizes.
Table Size and Extension Capability: A large cast iron table gives users a durable, flat, and spacious work area. The professional model includes extension wings that further extend the table’s width, accommodating larger projects and providing ample support for wide or long pieces of wood.
Dust Collection Efficiency: SawStop’s attention to cleanliness and air quality is evident in its superior dust collection system. The saw features a fully enclosed cabinet base with a 4-inch dust port, effectively capturing dust below the table and enhancing the overall shop environment.
Safety Features: The hallmark of SawStop saws is their patented safety system that stops the blade within milliseconds of skin contact, significantly reducing the risk of serious injury. This revolutionary technology, coupled with a robust blade guard and riving knife system, makes the SawStop Professional Cabinet Saw one of the safest on the market.
Tilt and Bevel Capabilities: The saw allows for precise blade tilt adjustments for bevel cuts, offering angles ranging from -1 to 46 degrees with easy-to-read measurements. This range provides versatility for a variety of bevel cuts and joinery options.
Miter Gauge Quality: Included with the saw is a high-quality miter gauge that ensures accurate crosscuts and angled cuts. It slides smoothly in the table’s miter slots, allowing for precise adjustments and reliable results.
Sturdy Construction and Vibration Dampening: Built with heavy-duty construction, including a cast iron table and wings, the saw is designed to reduce vibration, providing a stable base for precision cuts and a comfortable user experience.
Ease of Use and Maintenance: The PCS31230-TGP252 is designed with user convenience in mind, featuring accessible controls for blade height and tilt adjustments, tool-free riving knife and guard changes, and easy-to-perform maintenance procedures.
Extension and Accessory Compatibility: SawStop offers a range of accessories and extension options for the Professional Cabinet Saw, including mobile bases, overarm dust collection, and various inserts and fences, making it a highly adaptable tool for any woodworking task.
Mobility Options: For workshops where space optimization is crucial, SawStop provides an optional industrial mobile base designed specifically for the Professional Cabinet Saw, allowing for easy movement and storage within the shop.
Summary: In essence, the SawStop PCS31230-TGP252 Professional Cabinet Saw combines advanced safety technology with superior performance and durability, making it an exceptional choice for woodworkers who prioritize both craftsmanship and safety in their work environment.
Delta 36-L552 Unisaw
The Delta 36-L552 Unisaw is a venerable powerhouse in the world of woodworking, embodying a legacy of precision engineering and rugged durability. Designed for professional woodworkers and serious enthusiasts who demand excellence in their craft, this table saw is built to deliver on several fronts, aligning well with the essential features of a top-tier saw.
Power and Motor Performance: Powered by a robust 5 HP motor, the Delta 36-L552 Unisaw cuts through the toughest woods with remarkable ease and efficiency. This high horsepower rating ensures that the saw can manage continuous, heavy-duty operations without faltering, making it an ideal choice for demanding workshop environments.
Fence System Accuracy and Ease of Adjustment: Delta’s Biesemeyer fence system is renowned for its accuracy, stability, and reliability. The fence offers a large rip capacity and glides smoothly along the rail, locking securely into place for precise cuts. Its design minimizes deflection, providing consistent accuracy for every cut.
Table Size and Extension Capability: The Unisaw features a large cast iron table that provides a stable and flat surface for accurate cutting. It includes extension wings that can be adjusted or added to increase the workspace, accommodating larger projects with ease, and ensuring support for wide or long pieces of lumber.
Dust Collection Efficiency: The 36-L552 is designed with an effective dust collection system, featuring a built-in 4-inch port that connects to external dust collectors. This system helps maintain a cleaner work environment by efficiently capturing dust at its source, directly below the blade.
Safety Features: Delta has equipped the Unisaw with several safety features, including a riving knife that follows the blade’s movement for kickback prevention, a blade guard for added protection, and a large, easily accessible stop button. These features are designed to enhance the safety of the user without compromising the saw’s performance.
Tilt and Bevel Capabilities: The saw allows for precise blade adjustments, offering tilt capabilities to the left for bevel cuts. This flexibility is essential for achieving accurate bevels and compound cuts, broadening the range of projects that can be tackled with this saw.
Miter Gauge Quality: The Delta Unisaw comes with a miter gauge that provides accurate crosscuts and angled cuts. It fits snugly into the table’s miter slots, reducing play and ensuring the accuracy of each cut.
Sturdy Construction and Vibration Dampening: Constructed with a heavy-duty cast iron base and table, the Unisaw is built to last and designed to minimize vibration. This solid foundation not only enhances the precision of cuts but also contributes to the saw’s overall durability and longevity.
Ease of Use and Maintenance: The Unisaw’s design focuses on user convenience, featuring tool-free access for quick and easy blade changes and adjustments. Maintenance tasks are straightforward, ensuring the saw remains in top condition with minimal downtime.
Extension and Accessory Compatibility: Delta offers a range of accessories for the Unisaw, including dado inserts, zero-clearance throat plates, and various jigs, enhancing the saw’s versatility and capability to handle specialized tasks.
Mobility Options: While primarily designed as a stationary saw for permanent workshop installation, optional mobile bases are available for the Unisaw. These bases allow for easier movement within the shop, catering to workshops where space flexibility is essential.
Summary: The Delta 36-L552 Unisaw is a testament to Delta’s commitment to quality, performance, and reliability. It stands as a favorite among professionals and serious woodworkers for its powerful motor, precision, and built-to-last construction, making it a worthy investment for those looking to elevate their woodworking projects.
Jet XACTASAW Deluxe
The Jet XACTASAW Deluxe is a prominent figure in the woodworking community, offering a blend of innovative features, precision, and reliability. Designed for both professional woodworkers and serious hobbyists, this table saw aims to enhance the efficiency and quality of your projects, making it a valuable addition to any workshop. Let’s break down how the Jet XACTASAW Deluxe aligns with the critical features sought in a high-quality shop table saw.
Power and Motor Performance: Equipped with a 3 HP motor, the Jet XACTASAW Deluxe provides ample power to effortlessly cut through various wood types, from soft pine to hard maple. This power ensures smooth operation for everyday cutting tasks as well as more demanding projects, maintaining performance without bogging down.
Fence System Accuracy and Ease of Adjustment: The saw features the exclusive 50-inch commercial XACTA Fence II, a high-precision fence system that offers a large rip capacity. This fence glides smoothly across the table and locks securely, providing accurate cuts and stable support for your workpiece, enhancing the precision of every project.
Table Size and Extension Capability: A spacious, cast iron table serves as the foundation for your work, offering durability and a flat, stable surface for precise cutting. The XACTASAW Deluxe also includes extension wings, allowing woodworkers to expand their workspace to accommodate larger projects, providing ample support for wide or long pieces of lumber.
Dust Collection Efficiency: Jet understands the importance of maintaining a clean work environment, equipping the XACTASAW Deluxe with a built-in 4-inch dust collection port. This system efficiently captures dust at the source, keeping your workspace cleaner and ensuring better air quality in your shop.
Safety Features: The XACTASAW Deluxe incorporates several safety features designed to protect the user, including a transparent blade guard for visibility, a riving knife to prevent kickback, and anti-kickback pawls. These features collectively ensure safer operation without compromising the saw’s cutting performance.
Tilt and Bevel Capabilities: The saw offers easy blade tilt adjustments for precise bevel cuts, allowing for angles up to 45 degrees. This flexibility is crucial for executing accurate bevels and compound cuts, expanding the creative possibilities of your projects.
Miter Gauge Quality: Included with the saw is a high-quality miter gauge that ensures accurate crosscuts and angled cuts. It fits tightly in the table’s miter slots, eliminating play and ensuring the accuracy and repeatability of each cut.
Sturdy Construction and Vibration Dampening: Featuring a heavy-duty cast iron base and table, the XACTASAW Deluxe is built to reduce vibration, enhancing both the quality of cuts and the comfort of the user during operation. This stability is key to achieving precision in detailed work.
Ease of Use and Maintenance: Jet designed the XACTASAW Deluxe with the user in mind, featuring accessible controls and tool-free adjustments for ease of use. Maintenance is straightforward, ensuring the saw remains in optimal condition with minimal effort.
Extension and Accessory Compatibility
The saw supports a wide range of accessories, including dado sets, zero-clearance inserts, and various jigs, making it a highly versatile tool capable of handling a wide array of woodworking tasks.
Mobility Options: While the XACTASAW Deluxe is primarily designed as a stationary fixture in a workshop, optional mobile bases are available. These bases allow for easier repositioning within the shop, accommodating changes in workflow or shop layout.
Summary: The Jet XACTASAW Deluxe stands as a testament to Jet’s commitment to quality, offering woodworkers a table saw that combines power, precision, and versatility. Its comprehensive features and reliable performance make it a wise investment for anyone serious about elevating their woodworking projects.
Grizzly Industrial G0690
The Grizzly Industrial G0690 is a standout model within the Grizzly brand, a name synonymous with robust construction, precision, and reliability in the woodworking tools sector. Aimed at professional woodworkers and advanced hobbyists who demand high performance and durability, the G0690 is a feature-rich cabinet table saw that excels in various workshop settings. Let’s explore how it measures up to the crucial features desired in a shop table saw.
Power and Motor Performance: Equipped with a potent 3 HP motor, the Grizzly G0690 effortlessly powers through dense materials, ensuring smooth cuts without hesitation. This level of horsepower is ideal for tackling a wide range of projects, from delicate joinery to cutting thick hardwoods, maintaining consistent performance under heavy use.
Fence System Accuracy and Ease of Adjustment: The saw features the acclaimed T-square type fence system, known for its accuracy and reliability. The fence glides smoothly along the rail, locking securely for precise cuts. Its design ensures stability and accuracy, making it a trusted ally for achieving straight, accurate cuts on every project.
Table Size and Extension Capability: A large, precision-ground cast iron table provides a solid, flat surface for accurate cutting. The G0690 includes cast iron extension wings, expanding the workspace to accommodate larger pieces and providing ample support for a variety of projects, enhancing the saw’s versatility.
Dust Collection Efficiency: Understanding the importance of a clean work environment, Grizzly has outfitted the G0690 with a superior dust collection system. Featuring a 4-inch dust port, the saw efficiently captures sawdust, helping to keep your workshop clean and air quality safe.
Safety Features: The G0690 is equipped with essential safety features, including a riving knife that prevents kickback, a blade guard to protect hands, and anti-kickback pawls. These features are designed to enhance operational safety without compromising the saw’s performance.
Tilt and Bevel Capabilities: Offering easy adjustments for blade tilt, the G0690 allows for accurate bevel cuts, providing versatility for a range of cutting tasks. The saw’s ability to make precise bevel adjustments enhances its capability to execute complex projects with precision.
Miter Gauge Quality: The included miter gauge is sturdy and accurate, fitting snugly into the table’s miter slots. This ensures reliable crosscuts and angled cuts, adding to the saw’s versatility and precision in various woodworking tasks.
Sturdy Construction and Vibration Dampening: Featuring a heavy-duty trunnion and a cast iron table and base, the G0690 is built to reduce vibration, ensuring stable, precise cuts. The robust construction not only enhances accuracy but also contributes to the saw’s longevity and durability.
Ease of Use and Maintenance: Grizzly has designed the G0690 with user convenience in mind, incorporating accessible controls and easy-to-make adjustments. Routine maintenance is straightforward, ensuring the saw remains in excellent condition, ready for any project.
Extension and Accessory Compatibility: The G0690 supports a wide range of accessories, making it a highly versatile tool capable of accommodating various cutting tasks. From dado inserts to custom jigs, the saw can be tailored to meet the specific needs of your projects.
Mobility Options: While primarily designed as a stationery saw for a permanent workshop setup, the G0690 can be mounted on a mobile base (sold separately), offering flexibility in workshop arrangement and optimizing space when needed.
Summary: The Grizzly Industrial G0690 cabinet table saw is a testament to Grizzly’s commitment to quality and performance. It stands as an excellent choice for woodworkers who prioritize power, precision, and durability in their cutting tools, making it a worthy centerpiece in any workshop dedicated to the art of woodworking.
Carving the Future: A Review of the Best CNC Routers
Introduction to CNC Routing
CNC (Computer Numerical Control) routers were an incredible advancement in manufacturing and design, offering unparalleled precision in cutting and shaping various materials, including wood, plastics, and metals. These sophisticated tools are controlled by computer programming, enabling the execution of intricate designs that would be challenging, if not impossible, to achieve manually.
How CNC Routers Operate
A CNC router begins with a digital design, typically crafted in a CAD (Computer-Aided Design) program. This design is then converted into a set of machine-readable instructions, guiding the router to cut and mill materials with remarkable accuracy and efficiency. The ability of CNC routers to replicate designs with exact precision makes them indispensable in industries ranging from furniture production to automotive manufacturing, significantly enhancing productivity and quality.
In short, CNC routers have become the superheroes of manufacturing. They are precise and efficient and have become indispensable in manufacturing today.
Today’s Top CNC Router Manufacturers
When it comes to recommending brands for CNC routers, it is important to consider a few key factors such as the machines’ reliability, precision, versatility, and the support offered by the manufacturer. Here are some well-regarded brands in the industry known for their quality and innovation:
- Axiom Precision – Offers a range of CNC routers that are well-suited for both hobbyists and professionals. Their machines are known for precision and ease of use, with robust support and community resources.
- Biesse – An Italian manufacturer known for its high-quality industrial CNC machines. Biesse routers are designed for high performance and durability, catering to large-scale production needs.
- Carbide 3D – Popular among hobbyists and small businesses, Carbide 3D’s CNC routers are compact, affordable, and user-friendly, making them a great choice for beginners and those with limited space.
- Haas Automation – A leading name in CNC machining, Haas offers routers and milling machines that are widely used in industrial settings. Known for their durability and precision, Haas machines are a staple in many manufacturing environments.
- Laguna Tools – Provides a wide range of CNC routers that are popular among woodworkers and small businesses. Laguna routers are praised for their build quality, cutting precision, and excellent customer service.
- ShopBot Tools – ShopBot offers versatile CNC routers that cater to various sizes and budget ranges, from small desktop models to full-sized industrial machines. They are known for their robust construction and reliability.
- Techno CNC Systems – Techno CNC routers are aimed at providing high-quality, cost-effective solutions for both education sectors and businesses. They offer a wide range of sizes and configurations to suit different needs.
- Vectric – While Vectric is primarily known for their CNC software, which is widely used and recommended for use with various CNC routers for designing and programming.
It’s important to research and compare the specific models and features that each brand offers to find the best fit for your needs and budget. Additionally, checking user reviews, warranty options, and post-sales support can provide further insights into which brand and model will be the best CNC router for your projects.
Key Features of the Best CNC Routers
- Precision and accuracy: The best CNC routers are known for their ability to cut with pinpoint accuracy, ensuring that each piece is made precisely as designed. Precision is crucial for creating intricate details and maintaining consistency across multiple pieces.
- Speed and efficiency: High-speed operation and efficient cutting capabilities are essential features of top-notch CNC routers. These machines can complete projects quickly without sacrificing quality, allowing businesses to meet tight deadlines and maximize productivity.
- Durability and reliability: A top-quality CNC router is built to last, with sturdy construction and reliable components that can withstand heavy use over time. Durability ensures consistent performance and minimizes downtime due to maintenance or repairs.
- Compatibility with different materials: The best CNC routers are versatile machines that cut various materials, including wood, plastic, metal, and composites. They offer compatibility with various cutting tools and configurations to accommodate different material types and thicknesses.
- Ease of use and versatility: User-friendly interfaces and intuitive controls make operating the best CNC routers a breeze, even for beginners. These machines offer versatility in customization options, allowing users to adjust settings for different projects and applications quickly.
Types of CNC Routers
Desktop CNC routers:
Desktop CNC routers are compact machines designed for smaller workshops or home-based settings. They are usually lightweight and portable, making them easy to move and set up on a desktop or workbench.
Despite their smaller Size, desktop CNC routers offer impressive capabilities for hobbyists, small businesses, and educational purposes. They are ideal for creating prototypes, engraving, and cutting small-scale projects with precision and accuracy.
Benchtop CNC routers:
Benchtop CNC routers are slightly larger than desktop models and are designed to be placed on a workbench or tabletop. They offer more stability and rigidity than desktop routers, making them suitable for more demanding applications.
Hobbyists, small businesses, and professionals in woodworking, signage, and prototyping commonly use benchtop routers.
They provide versatility and performance in a compact and affordable package, making them a popular choice for those with limited space or budget constraints.
Industrial CNC routers:
Industrial CNC routers are large-scale machines designed for heavy-duty manufacturing operations. They are built with robust construction and high-performance components to withstand continuous production demands in industrial settings.
Industrial routers offer advanced features such as high-speed cutting, multi-axis capabilities, and automatic tool changers, enabling them to handle complex projects precisely and efficiently.
These routers are commonly used in aerospace, automotive, furniture manufacturing, and metal fabrication industries, where Speed, accuracy, and reliability are essential.
While industrial CNC routers require a more significant investment upfront, they offer unparalleled performance and capabilities for businesses looking to maximize their production processes and maximize output.
Factors to Consider When Choosing a CNC Router
- Budget considerations: When selecting a CNC router, aligning your choice with your budgetary constraints is vital. CNC routers vary significantly in price, from affordable entry-level models to high-end industrial machines.
Before purchasing, carefully evaluate your financial resources and determine how much you can afford and spend to invest upfront.
However, it is essential to consider the initial cost and the long-term expenses associated with maintenance, repairs, and potential upgrades.
While opting for a cheaper CNC router may seem appealing initially, weighing the costs against factors such as reliability, performance, and lifespan is crucial. Investing in a higher-quality machine upfront leads to greater efficiency, productivity, and cost savings in the long run.
- Size and workspace requirements: The physical Size of the CNC router and its compatibility with your workspace are critical factors to consider.
Measure your available workspace to ensure the CNC router fits comfortably without obstructing other equipment or workflows.
Additionally, consider the Size of the materials you’ll be working with and whether the router’s bed size can accommodate them adequately.
Choosing a CNC router with a larger bed size may offer greater flexibility and allow for larger projects. Still, balancing this with your available space and budget constraints is essential.
- Spindle power and Speed: The spindle of a CNC router plays a crucial role in determining its cutting capabilities. Spindle power refers to the motor’s ability to drive the cutting tool through the material, while spindle speed refers to how quickly the spindle functions and rotates.
Higher spindle power and Speed generally result in faster cutting speeds and increased versatility, allowing you to work with a broader range of materials and achieve more precise cuts.
However, it is essential to consider whether the additional cost of a higher-powered spindle is justified based on your specific needs and intended applications.
- Controller system: The controller system is the software interface that allows you to input your design files and control the operation of the CNC router.
Different controller systems offer varying levels of functionality, ease of use, and compatibility with design software. Some standard controller systems include Mach3, GRBL, and proprietary software provided by CNC router manufacturers.
When choosing a CNC router, consider your familiarity with different controller systems and select one that aligns with your skill level and workflow preferences. Additionally, ensure that the controller system can handle the complexity of your design files and offers the features you need for your projects.
- Compatibility with design software: Ensure that the CNC router you choose is compatible and suitable with the design software you plan to use. Most CNC routers support standard file formats such as DXF, DWG, and G-code, allowing seamless integration with popular design programs like AutoCAD, SolidWorks, and Adobe Illustrator.
Verifying compatibility with your specific design software is important to ensure that you can quickly transfer your designs to the CNC router without compatibility issues or file conversion errors.
Choosing a CNC router with robust compatibility with your design software can streamline your workflow, minimize errors, and maximize productivity.
- Support and maintenance services: When investing in a CNC router, consider the availability of support and maintenance services from the manufacturer or dealer.
A reliable support network can be invaluable in ensuring that your CNC router operates smoothly and efficiently, minimizing downtime and maximizing productivity.
Look for manufacturers or dealers that offer comprehensive support packages, including technical assistance, troubleshooting guidance, and access to spare parts or upgrades.
Inquire about warranty coverage and post-purchase support options to ensure peace of mind and minimize the risk of unexpected expenses. By choosing a CNC router with reliable support and maintenance services, you can be confident that your investment will continue to add and deliver value over the long term.
Case Studies and Success Stories
Examples of Businesses or Individuals Using CNC Routers Effectively:
Furniture Maker: A furniture maker uses CNC routers to create custom furniture pieces with precision and Speed. By using CNC technology, they streamline their process, reduce waste, and maintain high quality, meeting market demands.
Signage Company: A signage company employs CNC routers to craft detailed signs and displays for various clients. Their investment in CNC technology enables them to offer innovative designs, shorten production times, and create eye-catching visuals.
Product Design Studio: A product design studio relies on CNC routers to produce prototypes and parts quickly. With CNC technology, they iterate designs rapidly, test concepts, and refine products based on feedback, speeding up their development cycle.
Showcase of Projects Made Using CNC Routers:
Detailed Woodwork: CNC routers create intricate woodwork like furniture, cabinetry, and moldings. Their precision allows artisans to quickly achieve complex designs, resulting in stunning pieces that showcase craftsmanship.
Precise Metalwork: CNC routers shape metal components accurately for various applications. From architectural elements to industrial parts, they deliver high-quality metalwork with smooth finishes, meeting industry standards.
Custom Signage: CNC routers produce custom signage and branding materials for businesses and events. Whether cutting letters, logos, or dimensional signs, CNC technology ensures precise replication across materials, enhancing brand visibility.
Tips for Optimizing Performance and Maintenance
Proper Setup and Calibration:
- Ensure the CNC router is installed on a solid, stable, and level surface to prevent vibrations and inaccuracies during operation.
- Calibrate the machine regularly to maintain accuracy and consistency in cutting. This includes checking and adjusting the axis alignments, tool offsets, and spindle concentricity.
- Follow the manufacturer’s guidelines for initial setup and calibration procedures to ensure optimal performance from the start.
Routine Maintenance Tasks:
- Clean the CNC router regularly to remove dust, debris, and accumulated residue from cutting operations. Use compressed air or a vacuum to clean the machine thoroughly, including the cutting area, spindle, and cooling system.
- Lubricate moving parts, such as bearings, ball screws, and guide rails, according to the manufacturer’s recommendations to prevent wear and ensure smooth operation.
- Check and replace worn or damaged parts, like belts, pulleys, and cutting tools, to maintain performance and avoid unexpected breakdowns.
Troubleshooting Common Issues:
- Familiarize yourself with common issues during CNC router operation, such as tool chatter, material burning, or irregular cutting.
- Record any recurring problems or abnormalities during operation, including error messages, unusual sounds, or unexpected movements.
- Refer to the CNC router’s manual or online resources for troubleshooting guides and solutions to address common issues promptly and effectively.
Upgrades and Modifications for Enhanced Functionality:
- Stay informed about available upgrades and modifications that can enhance and help the performance and capabilities of your CNC router.
- Consider upgrading components such as the spindle, control system, or cutting tools to improve cutting Speed, accuracy, and versatility.
- Explore aftermarket accessories or add-ons, such as dust collection systems, automatic tool changers, or rotary axes, to expand and maximize the capabilities of your CNC router and accommodate a broader range of applications.
Future Trends in CNC Router Technology
Advancements in Automation and Robotics:
Increased integration of automation features, such as robotic loading and unloading systems, to streamline production processes and reduce manual labor.
Developing collaborative robotic systems that work alongside human operators enhances safety and efficiency in CNC router operations.
Implementation of advanced sensing and feedback mechanisms to enable real-time monitoring and adjustment of the cutting process for optimal performance.
Integration with AI and Machine Learning:
Artificial intelligence (AI) algorithms are utilized to optimize toolpath generation, minimize material waste, and improve cutting efficiency.
Integration of machine learning capabilities to analyze historical data and predict tool wear, maintenance requirements, and potential issues before they occur.
Adoption of AI-driven adaptive control systems that automatically adjust cutting parameters based on material properties, tool conditions, and environmental factors.
Industry-Specific Developments and Innovations:
Customization of CNC router technology to meet the specific needs, specifications, and requirements of different industries, like aerospace, automotive, healthcare, and construction.
Development of specialized cutting tools and accessories tailored to specific materials and applications, including advanced coatings and geometries for improved performance.
Integration of additive manufacturing capabilities, such as 3D printing, with CNC routing systems to enable hybrid manufacturing processes and create complex, multi-material components.
Conclusion
CNC routers are transformative tools in the manufacturing landscape, offering precision, efficiency, and versatility across a wide range of applications. When selecting a CNC router, it’s essential to consider its performance, capabilities, and compatibility with your projects and workspace. By staying informed about technological advancements, manufacturers can leverage CNC routers to not only meet but exceed production goals and quality standards.
- What are the Best DeWALT Routers? – Here are the Details
- How to Use a Palm Router
- How to Plane Wood With A Router
- How to Make a Router Sled
- Types of Brad Nail Guns
- How to Oil a Brad Nailer
- How to Install (or Insert) a Router Bit
- How to Chamfer Wood With a Router
- Finding the Perfect Table Saw – Five Brands Reviewed and Explained
- Carving the Future: A Review of the Best CNC Routers
- Nailing It: The Best Brad Nailers for Your Woodworking Projects
- What are the Best 3HP Routers?
- How to Make a DIY Router Sled
- Nail Gun Basics: How to Load a Brad Nailer
- How to Load a Staple Gun
- Mastering the Craft: How to Build a DIY Router Table Fence
- How to Cut a Square Hole With a Router
- Notching Techniques: How to Cut Perfect Notches in Wood
- How to Hollow Out Wood With A Router
- Best Wood Routers Under $100
- How to Make a Wooden Sign with a Router
- How to Use a Router Straight Edge Guide
- The Best Plunge Routers: A Review and Comparison Guide
- Router Circle Cutting Jigs
- Maximizing Efficiency with the Dewalt Router Table